Rotoscoping uses the real movements of actors and turns them into fun and creative animation that feels both real and magical. This technique allows authors to create utterly realistic fantasy worlds by bridging the gap between imagination and reality. And many studios offering animation services include rotoscoping as a key option in their VFX and film work.
Once you finish this guide, you’ll know how this method works, why it’s still popular, and how to start making your own rotoscoped animation.
What Is Rotoscope Animation?
Has the music video for “Take On Me” by A-ha ever caught your eye? We mean the one where real people transform into funny moving sketches? That sounds so intriguing! That beautiful technique is actually known as rotoscope animation!

Rotoscope animation is all about tracing over real video footage, and you do it one frame at a time, which helps create those fun cartoon-like sequences. Artists observe real people as they move, and then they draw over them. This creates animations with a really natural movement that feels real to us.
The concept is straightforward:
- Film real actors performing actions
- Import the footage into animation software
- Trace over each frame with digital tools
- Add artistic touches, colors, and effects
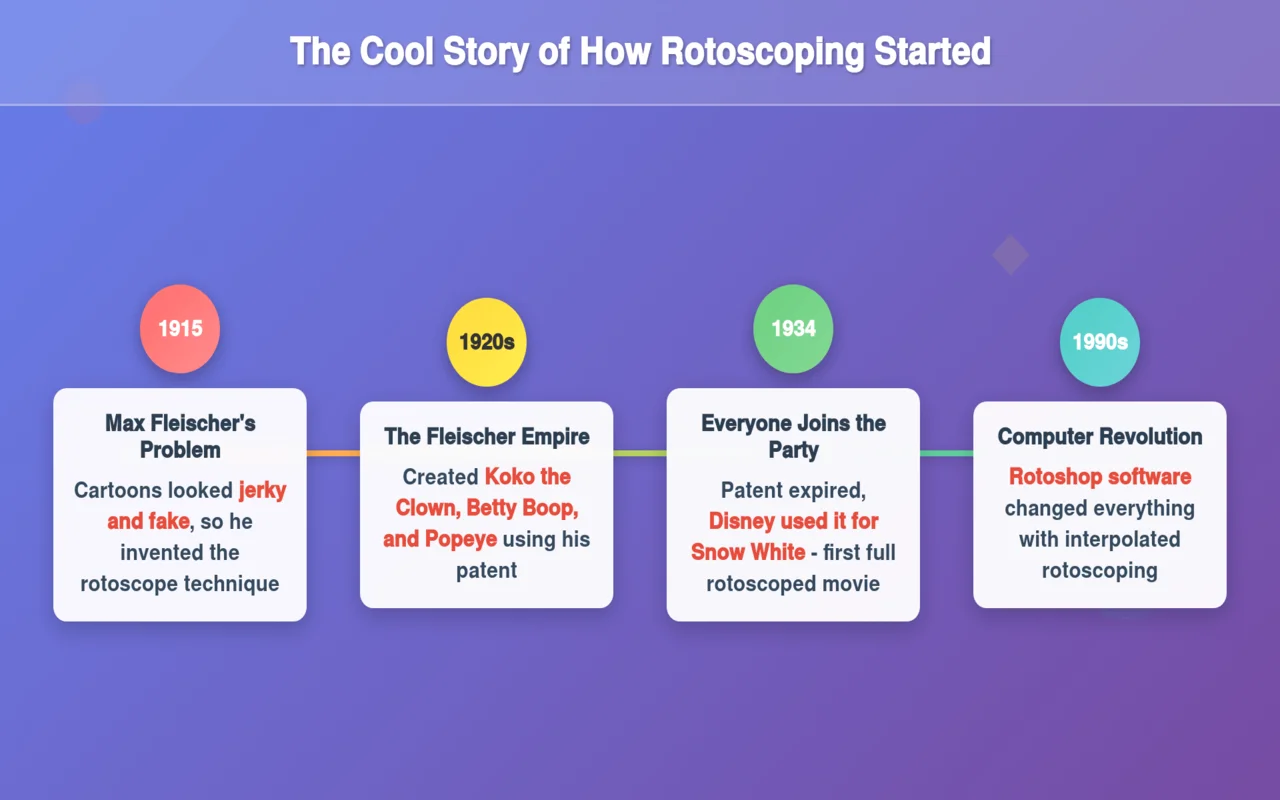
The Cool Story of How Rotoscoping Started
Back in 1915, Max Fleischer ran into a problem. This artist, who is Polish-American, thought that cartoons looked jerky and fake, so he made the rotoscope.
He had a really smart setup going on: a movie projector, a glass surface, and some frame controls. In the meantime, his brother Dave put on a clown outfit and entertained in front of the camera.
Max used this footage to bring Koko the Clown to life in his “Out of the Inkwell” series. People were totally blown away when they saw Koko moving just like a real person.
1920s and 1930s: The Fleischer Empire
Max had the patent during this time, and his company was the only one that could use this method. Because of this, he was able to create the greatest stars in animation.
| Character | Show | Special Feature |
| Koko the Clown | Out of the Inkwell | First rotoscoped character |
| Betty Boop | Betty Boop Series | Real dancer movements |
| Popeye | Popeye Cartoons | Authentic sailor moves |
| Superman | Superman Series | Realistic flying scenes |
One of the coolest examples is the 1932 classic Minnie the Moocher, where Fleischer rotoscoped jazz legend Cab Calloway’s dance moves onto a ghostly walrus. Calloway himself was stunned when he saw the animated performance.
1934: Everyone Joins the Party
Once Fleischer’s patent ran out, other studios wasted no time getting involved. Walt Disney was the first to use the technique for Snow White back in 1937, which makes it the first full-length rotoscoped movie.
Later on, Disney incorporated it into Cinderella’s ballroom scenes and Alice’s movements in Wonderland.
1960s-1980s: Movies Get the Magic
Rotoscoping left the world of cartoons and entered the world of live-action movie effects around this time. Did you know that Alfred Hitchcock’s team took three months to rotoscope 500 frames for “The Birds” back in 1963? They really went all out to create those chilling bird attack scenes!
Then everything changed with Star Wars. Between 1977 and 1983, they used rotoscoping to create those iconic lightsaber effects in the original trilogy.
In fact, there were actors battling it out with these white sticks, and then the artists came in and added these amazing glowing effects to every single frame. It took weeks of rotoscoping work for each lightsaber duel.
1990s: The Rise of Computers
Rotoshop software, developed by MIT’s Bob Sabiston in 1997, completely changed the game. His “interpolated rotoscoping” really shifted the game since artists just had to draw the keyframes, and the computers took care of the rest.
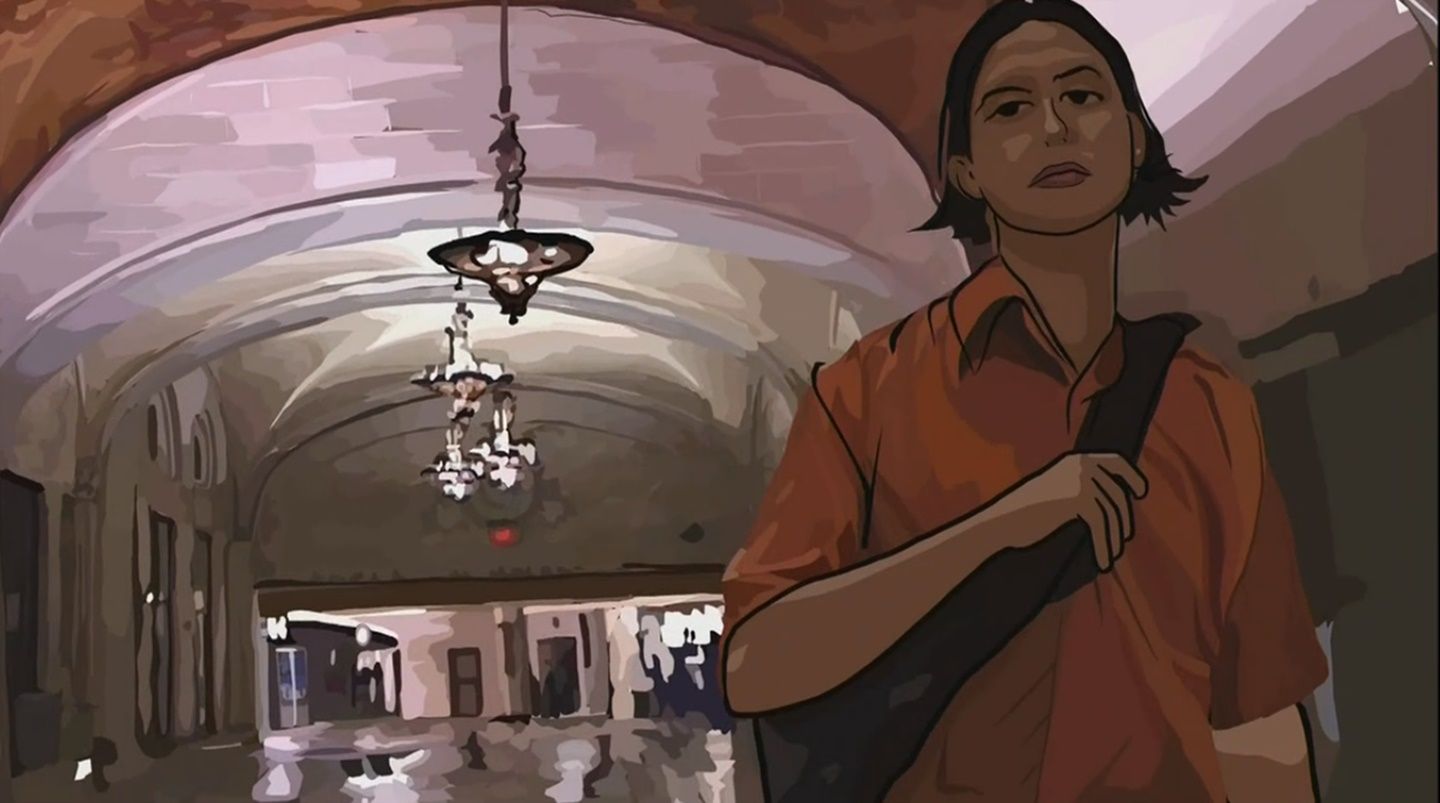
Director Richard Linklater used this new technology in “Waking Life” (2001) and “A Scanner Darkly” (2006). Both movies offered some really unique visuals that totally fit their wild storylines.
2000s-Today: Now it’s all around us
There is rotoscoping everywhere these days. Netflix’s “Undone” really goes into some mind-bending time travel stories. A-ha’s “Take On Me” is still the most well-known example that received over 1.3 billion views, and Kanye West introduced it to hip-hop with “Heartless.”
The ads themselves got clever. For example, Charles Schwab’s “Talk to Chuck” campaign had real customers telling their stories through rotoscopes.
The Rotoscoping Process Step-by-Step
Rotoscoping is actually pretty simple and follows a common pattern that a lot of studios stick to.
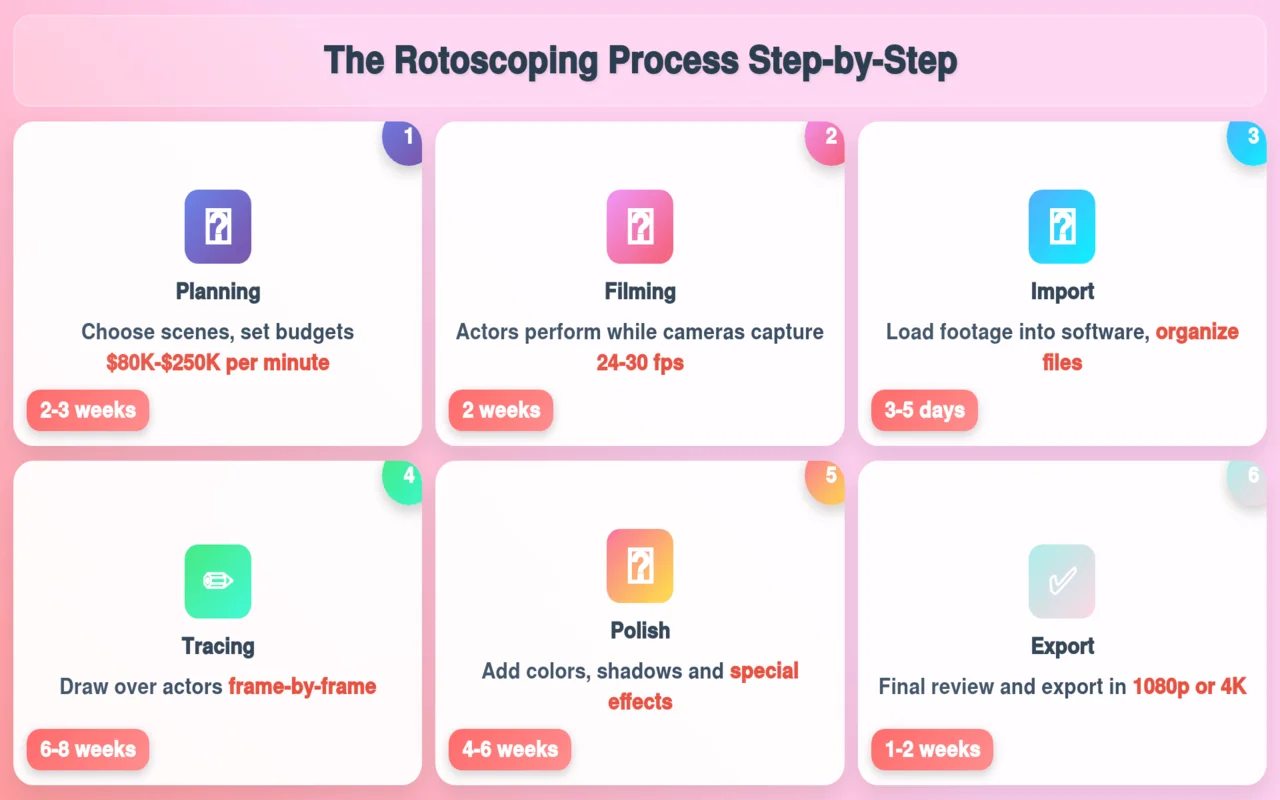
Step 1: Planning and Preparation
Studios start off by deciding what they really want to bring to life through animation. Artists go through scripts and whip up some rough sketches of the important scenes. At the same time, directors choose the best camera settings and lights for drawing later.
So, what goes down during planning?
- Teams figure out which scenes need rotoscoping, typically around 10 to 15 scenes for each project.
- Artists guess how many frames there are (usually about 720 for each 30-second sequence)
- Studios set costs of $80,000 to $250,000 per minute of finished animation.
- Directors typically set up about 3 to 5 different camera angles for every scene.
Usually, planning and getting ready for this job takes 2 to 3 weeks. Also, getting this done early saves you from big problems down the road.
Step 2: Filming Reference Footage
Now we’re getting into the actual filming part. Actors move around while the cameras capture everything from the angles we set up beforehand. Also, lighting techs ensure that everything is lit evenly to avoid any harsh shadows that might interfere with the tracing process.
Here are the filming requirements:
- Cameras typically capture at 24 to 30 frames per second to create that nice, smooth motion.
- Studios normally film 3 to 5 takes of every action sequence.
- Lighting arrangement makes use of 3-point lighting with a color temperature of 5600K.
- Teams need 2 to 3 hours of footage for every minute of the finished animation.
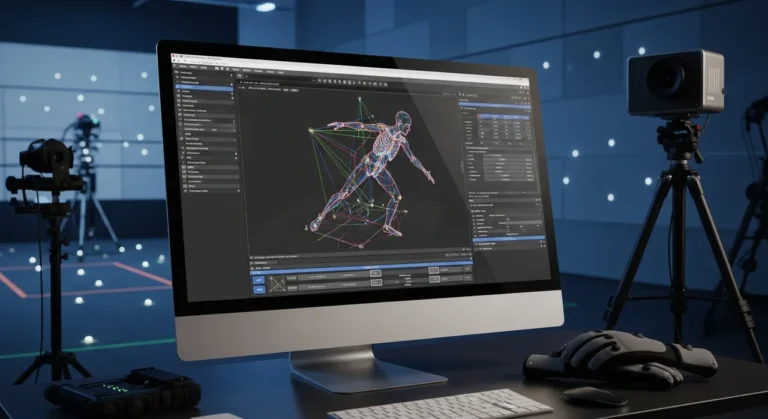
Step 3: Digital Import and Setup
Once filming is done, the technical teams gather all the footage and load it into the animation software. They sort everything into nicely labeled folders and create project files with the correct frame rates. Artists often make separate layers for the different parts of each character.
Here are the details for the technical setup:
- They organize the files into about 4 to 6 main folders based on the type of scene.
- Projects work at matching frame rates, either 24fps or 30fps.
- Artists give each figure 5 to 8 different levels.
- Teams generally set aside 16 to 32GB of RAM to keep things running smoothly.
- The setup phase usually takes about 3 to 5 days for a complete project.
Step 4: Frame-by-Frame Tracing
This is the place where all the real magic goes down. Artists take their time with the footage and go through it one frame at a time to carefully trace over the actors.
First, they show the most important poses. Then, they go for all the shots in between those important ones.
Here’s how the tracing workflow goes:
- Artists pick out 8 to 12 keyframes for every second of footage.
- Teams outline the main characters in about 2 to 3 hours for each keyframe.
- They separate layers and use them to create details like clothes and hair.
- Quality control people look over work every 10 to 20 frames.
Step 5: Adding Style and Polish
After the basic tracing is finished, artists go ahead and add colors, shadows, and some cool special effects. This step takes those raw, traced lines and turns them into the final artistic style.
Further, teams use the same color schemes and lighting throughout all the frames to keep everything looking nice and unified.
Let’s talk about style and polish work now:
- Applying the base color usually takes about 1 to 2 hours for every second of animation.
- Shadow work needs an extra 30 to 60 minutes each second.
- Each special effect takes 45 to 90 minutes.
Did you know that artists put in about 40 to 50 hours just to perfect each minute of traced animation? That’s a lot of dedication!
Step 6: Final Review and Export
So, here’s where the studios take a good look at the finished animation to catch any inconsistencies or errors. Then, technical teams export everything in the types that are needed for different purposes, like for TV, movies, or the web.
Here are the final delivery steps:
- Teams watch the video three times at different speeds.
- Export options include 1080p for streaming and 4K for cinemas.
- File sizes can vary between 500MB and 2GB for each minute.
- Studios usually make 2-3 backup copies and store them in different places.
It usually takes about 2 to 4 months to create just one minute of the final animation. On the flip side, if you have a bigger team running day and night, you can get those rush projects done in just 6-8 weeks.
How Does Rotoscoping Compare to Other Animation Techniques?
| Animation Method | Production Time | Budget Range | Best Use Cases | Learning Difficulty |
| Traditional Hand-Drawn | 8-12 months per minute | $300K-$800 per minute | Unique artistic styles, cartoons | Very High |
| Rotoscope Animation | 2-4 months per minute | $80K-$250 per minute | Realistic movement with style | Medium |
| Motion Capture | 1-2 months per minute | $150K-$400 per minute | Ultra-realistic action scenes | Medium-High |
| CGI Animation | 4-8 months per minute | $500K-$1.5 per minute | Fantasy worlds, complex VFX | Very High |
Creating traditional hand-drawn animation really takes a lot of time—like 8 to 12 months for just one minute! And it can set you back around $800,000.
In contrast, motion capture is very quick and it takes just one to two months, but it offers you no creative control over the finished product. Also, CGI animation can take anywhere from 4 to 8 months and can cost more than $1 million for just a minute of footage, which is pretty wild for most projects.
So, rotoscoping really hits that sweet spot, taking about 2-4 months to produce and costing somewhere between $80,000 and $250,000 per minute.
Technical Side of Rotoscoping Animation
Rotoscope animation comes with a few technical rules that can feel a bit tricky at the beginning. Honestly, once you get the hang of these basics, everything else just becomes a lot easier to manage.
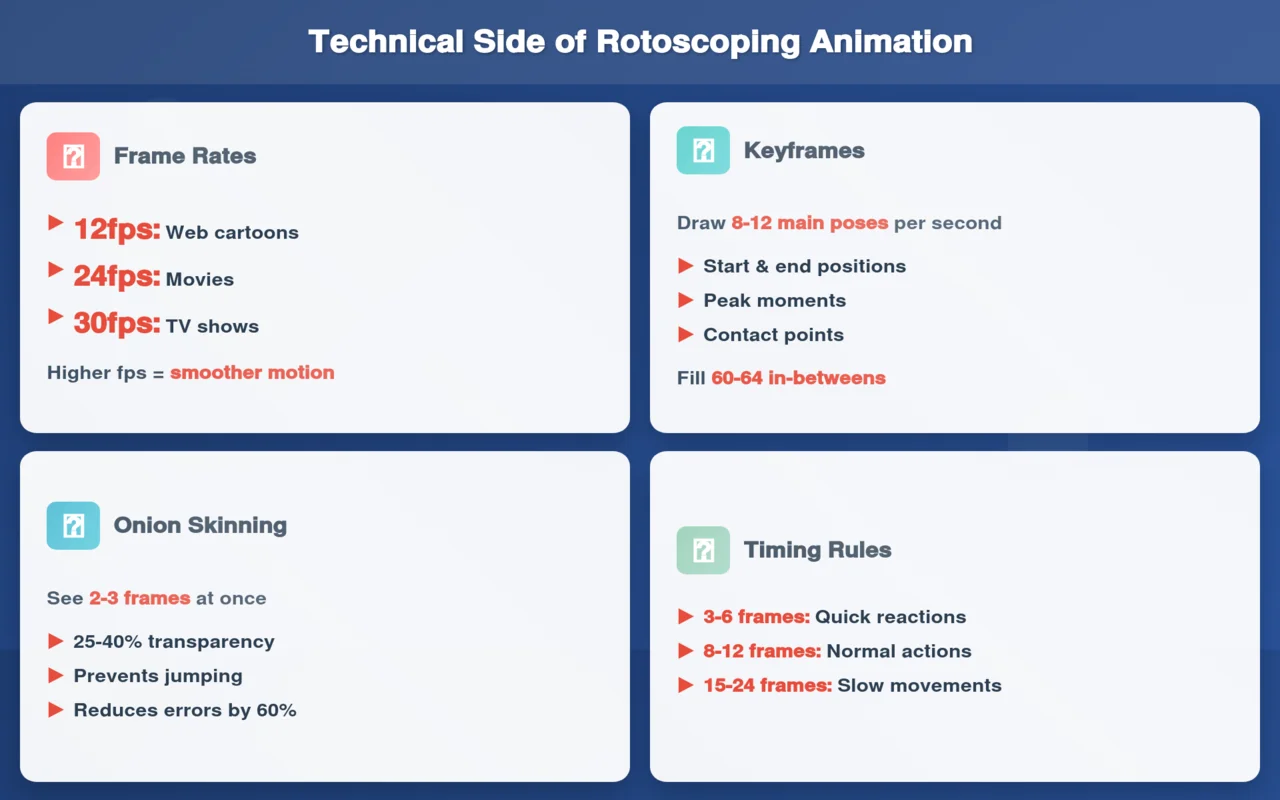
Frame Rates: Rotoscope Animation Movement
The frame rate really calls the shots for your whole rotoscope animation project. This number shows you how many separate images appear in just one second of video.
| Frame Rate | Best For | Drawings Needed | Budget Range | Visual Feel |
| 12fps | Web cartoons, simple projects | 720 per minute | $20K-$40K | Choppy but stylized |
| 24fps | Movies, professional work | 1,440 per minute | $60K-$120K | Smooth and natural |
| 30fps | TV shows, premium content | 1,800 per minute | $80K-$150K | Ultra-smooth motion |
12 frames per second is what most web rotoscope cartoons use because it’s the fastest to make.
On the other hand, movies always use 24fps because it gives your eyes the smooth, natural movement they’re used to. But TV shows usually stick to 30fps to achieve that smooth look we all enjoy.
Frame-by-Frame
Really, every frame matters in rotoscope animation. If you skip even a single frame or make it look off, people are going to notice right away.
What’s the biggest challenge when it comes to rotoscoping? Keeping everything consistent across all those frames is key.
We need to keep the line thickness the same, make sure the character proportions don’t change unexpectedly, and guarantee the colors match perfectly across the frames. Even the smallest mistakes really stand out when you watch the rotoscope animation play out.
Effective quality control for rotoscope projects includes:
- Check every 10th frame while you’re working
- Take a close look at how you move between those key poses.
- Check out the playback at regular speed every hour.
- Instantly fix problems before moving on.
- Keep professional rotoscope errors at 1%.
Keyframes and In-Betweens
Professional rotoscope animators don’t just draw frames on their own. They’ve got this smart system that really saves a lot of time and leads to better results.
The first step is to find the keyframes, which are the most important movements in your film. Then, you just go ahead and fill in all the frames that connect those key moments.
Where can you find keyframes in rotoscope animation?
- Start and end of each movement
- Really intense poses (like the highest jump or the most stretched position)
- Moments when your feet hit the ground or your hands grab something.
- Frequent emotional high points (surprised looks, intense body language)
This is how the math works out. A 3-second rotoscope scene at 24 frames per second means you’ll need a total of 72 frames. Typically, most scenes have around 8 to 12 keyframes, which means there are about 60 to 64 frames in between to fill things out. That’s about one keyframe for every six to eight frames in between.
Onion Skinning
This feature lets you see multiple frames at the same time, almost like peering through the layers of a see-through onion. Your current frame looks clear, but the frames before and after it seem to be just faint ghost images.
Here’s why it really boosts rotoscope animation:
- Prevents characters from jumping awkwardly between frames
- Clearly shows movement paths and maintains consistent spacing throughout the sequences.
- It cuts down on mistakes by about 60 to 70 percent.
Typically, professional rotoscope artists show about 2-3 frames with a transparency level of 25-40%. Plus, you can change what you’re working on to change how faint those ghosts look.
Motion Blur
When things move quickly, real cameras tend to create a blur, so it’s important for your rotoscope animation to capture that natural effect too.
How to know when to blur in rotoscoping:
- Slow actions (walking): No blur needed
- Medium speed (running): Light blur on arms and legs
- Fast actions (fighting): Heavy blur on moving parts
- Very fast actions (falling): Streak effects across the screen
Measurements for blur that are great for rotoscope projects are:
- Just 1-2 pixels for those little adjustments.
- 3 to 5 pixels for middle moves (10 to 25 percent of the screen area)
- 6 pixels or more for big moves (more than 25% of the screen area)
Some rotoscope animation styles fully avoid blur, giving them a nice, clean, graphic vibe. Your decision really depends on what you want to achieve artistically.
Timing and Spacing
The way these two concepts work really shapes the emotional vibe of your rotoscope animation for the audience.
Rules for timing that work for rotoscoping:
- Quick reactions: 3-6 frames (surprise, shock, sudden movements)
- Normal actions: 8-12 frames (walking, talking, casual gestures)
- Slow actions: 15-24 frames (dramatic pauses, careful movements)
Different spacing patterns create various vibes:
- Even spacing makes action automatic and robot-like.
- Slow start makes acceleration feel natural (this is how most human movements work)
- Slow finish makes braking feel natural (this is good for stops and hits).
- A slow start and finish really bring out the most natural human movement.
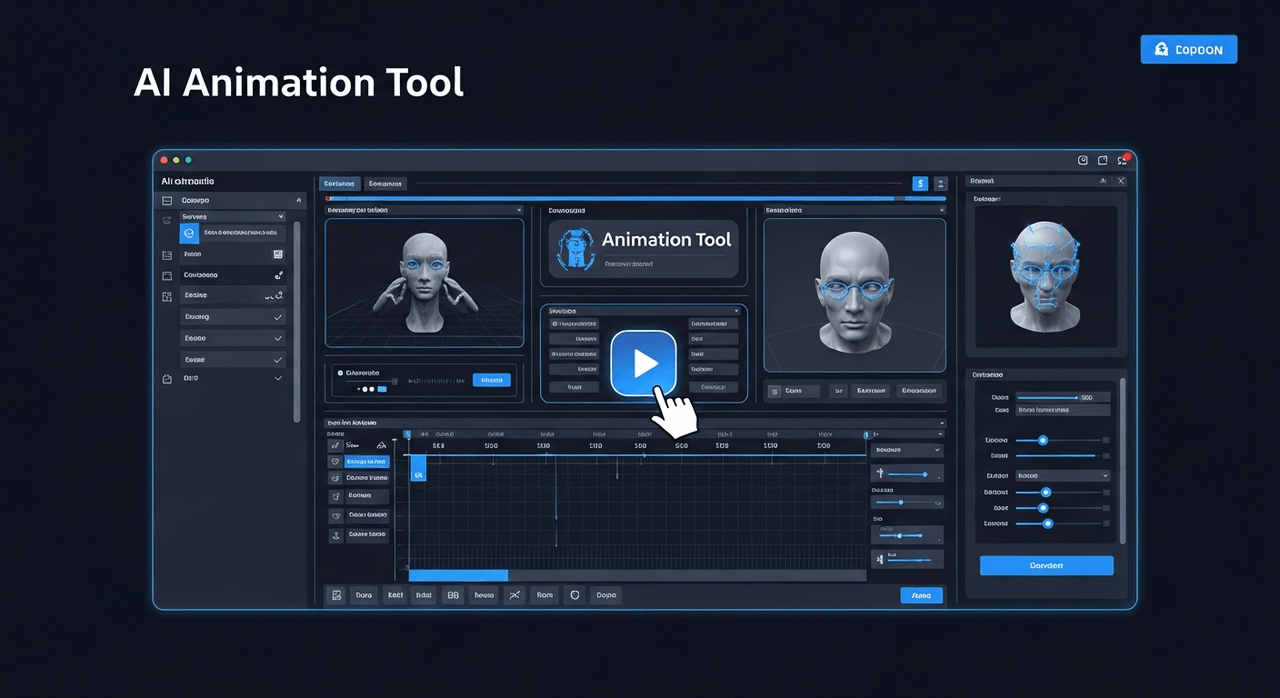
Tools to Get Started With Rotoscope Animation?
You don’t need expensive equipment to start rotoscoping. Many professional-quality tools are available for free, and even basic hardware can produce great results.
Rotoscope Animation Free Tools
| Software | Download Size | Learning Time | Best For | Special Features |
| Blender | 200MB | 2-3 weeks | Complete beginners | Used by major studios, massive online tutorials |
| OpenToonz | 150MB | 3-4 weeks | Traditional animation | Originally cost $10,000+, Studio Ghibli uses it |
| Krita | 120MB | 1-2 weeks | Artists & painters | Artist-friendly interface, great community support |
Start with Krita if you’re completely new because it’s the easiest to learn and perfect for getting your feet wet.
Also, choose Blender if you want something powerful that can grow with your skills. Plus, there are tons of free tutorials online.
And in the end, pick OpenToonz if you want the same tools that Studio Ghibli uses for their amazing movies.
Rotoscope Animation Professional Tools
| Software | Cost | Learning Time | Best For | Cool Features |
| After Effects | $20/month | 2-4 weeks | Most people | AI Rotobrush, tons of plugins, everyone uses it |
| Silhouette | $995 one-time | 4-6 weeks | Hollywood pros | Made just for rotoscoping, works on Marvel movies |
| Mocha Pro | $695/year | 4-6 weeks | Complex VFX | Amazing object tracking, works with other software |
| Nuke | $4,975/year | 6+ months | Big studios only | Super powerful but crazy expensive |
| DaVinci Resolve | Free/Paid | 3-5 weeks | All-in-one users | Does everything – editing, color, rotoscoping |
First choice? After Effects works for most people. Plus, tons of tutorials are available online, so you won’t get stuck.
Getting serious? Then Silhouette is your friend. Meanwhile, it’s the same tool Marvel uses for superhero movies.
Dealing with tricky shots? Mocha Pro handles moving cameras like a champ. Also, it plays nicely with other software.
Working at a big studio? Only then should you consider Nuke. Otherwise, skip it. It is way too expensive and complicated for normal projects.
What Hardware Do You Need For Rotoscope Animation?
Your computer has to be up to the task for all that frame-by-frame work. Rotoscoping can be quite a challenge, especially when you’re dealing with high-quality footage.
Must-have computer hardware:
- Processor: Intel i5 or AMD Ryzen 5 minimum (faster is always better)
- Memory: 16GB RAM works fine, but 32GB makes everything smoother for 4K projects
- Graphics: Any decent graphics card helps speed things up
- Storage: SSD drive for your project files (trust me, regular hard drives are painfully slow)
Rotoscope Animation You Already Know and Love
You’ve probably seen rotoscope animation tons of times without even realizing it. Let me show you some of the most famous examples that changed everything.
| Project | Year | Budget | Animation Time | Views/Sales |
| Take On Me | 1985 | $230K | 16 weeks | 1.3B views |
| Heartless | 2008 | $1.2M | 8 weeks | 400M views |
| A Scanner Darkly | 2006 | $8.7M | 18 months | $7.3M box office |
| Undone S1 | 2019 | $2.5M | 26 months | 89% critic rating |
Rotoscope Animation in Music Videos
1- A-ha “Take On Me” (1985): This is hands down the most famous rotoscoped video ever made. The whole thing mixed real people with pencil-sketch animation in a way that nobody had seen before.
| Detail | Numbers |
| Production time | 16 weeks with 3,000 hand-drawn frames |
| Animation team | 6 artists working full-time |
| Budget | $230,000 (expensive for 1985) |
| Filming duration | 2 weeks of live-action footage |
| Rotoscoping ratio | 30-second final animation from 3 minutes of footage |
| Results | 1.3 billion YouTube views, 6 MTV Video Music Awards |
| Comic book transition | 800 individual drawings, 4 weeks to complete |
2- Kanye West “Heartless” (2008): West took rotoscoping and brought it straight into hip-hop culture with this emotional breakup track. Meanwhile, the minimalist style perfectly matched the song’s raw feelings.
| Detail | Numbers |
| Production time | 8 weeks |
| Animation frames | 2,160 frames at 24fps |
| Team size | 12 rotoscope artists |
| Software used | Rotoshop and After Effects |
| Total cost | $1.2 million production |
| Live-action footage | 6 hours condensed to 3.5 minutes |
| Total views | 400+ million across platforms |
3- A-ha “Train of Thought” (1986): Less famous than “Take On Me” but way more technically impressive. Plus, this was the first music video to mix rotoscoping with traditional animation techniques.
| Detail | Numbers |
| Animation time | 20 weeks |
| Frame count | 4,320 individual drawings |
| Innovation | First music video combining rotoscoping with traditional animation |
| Budget | $340,000 |
| Team | 8 animators from 4 different countries |
Rotoscope Animation in Movies
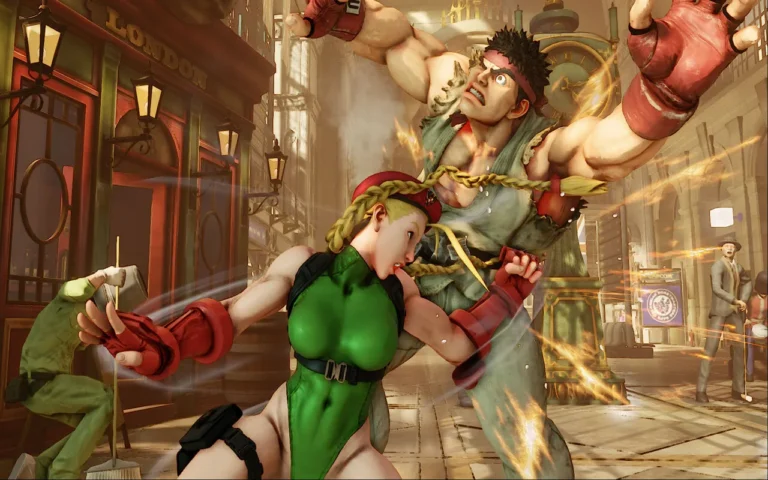
1- Star Wars Original Trilogy (1977-1983):
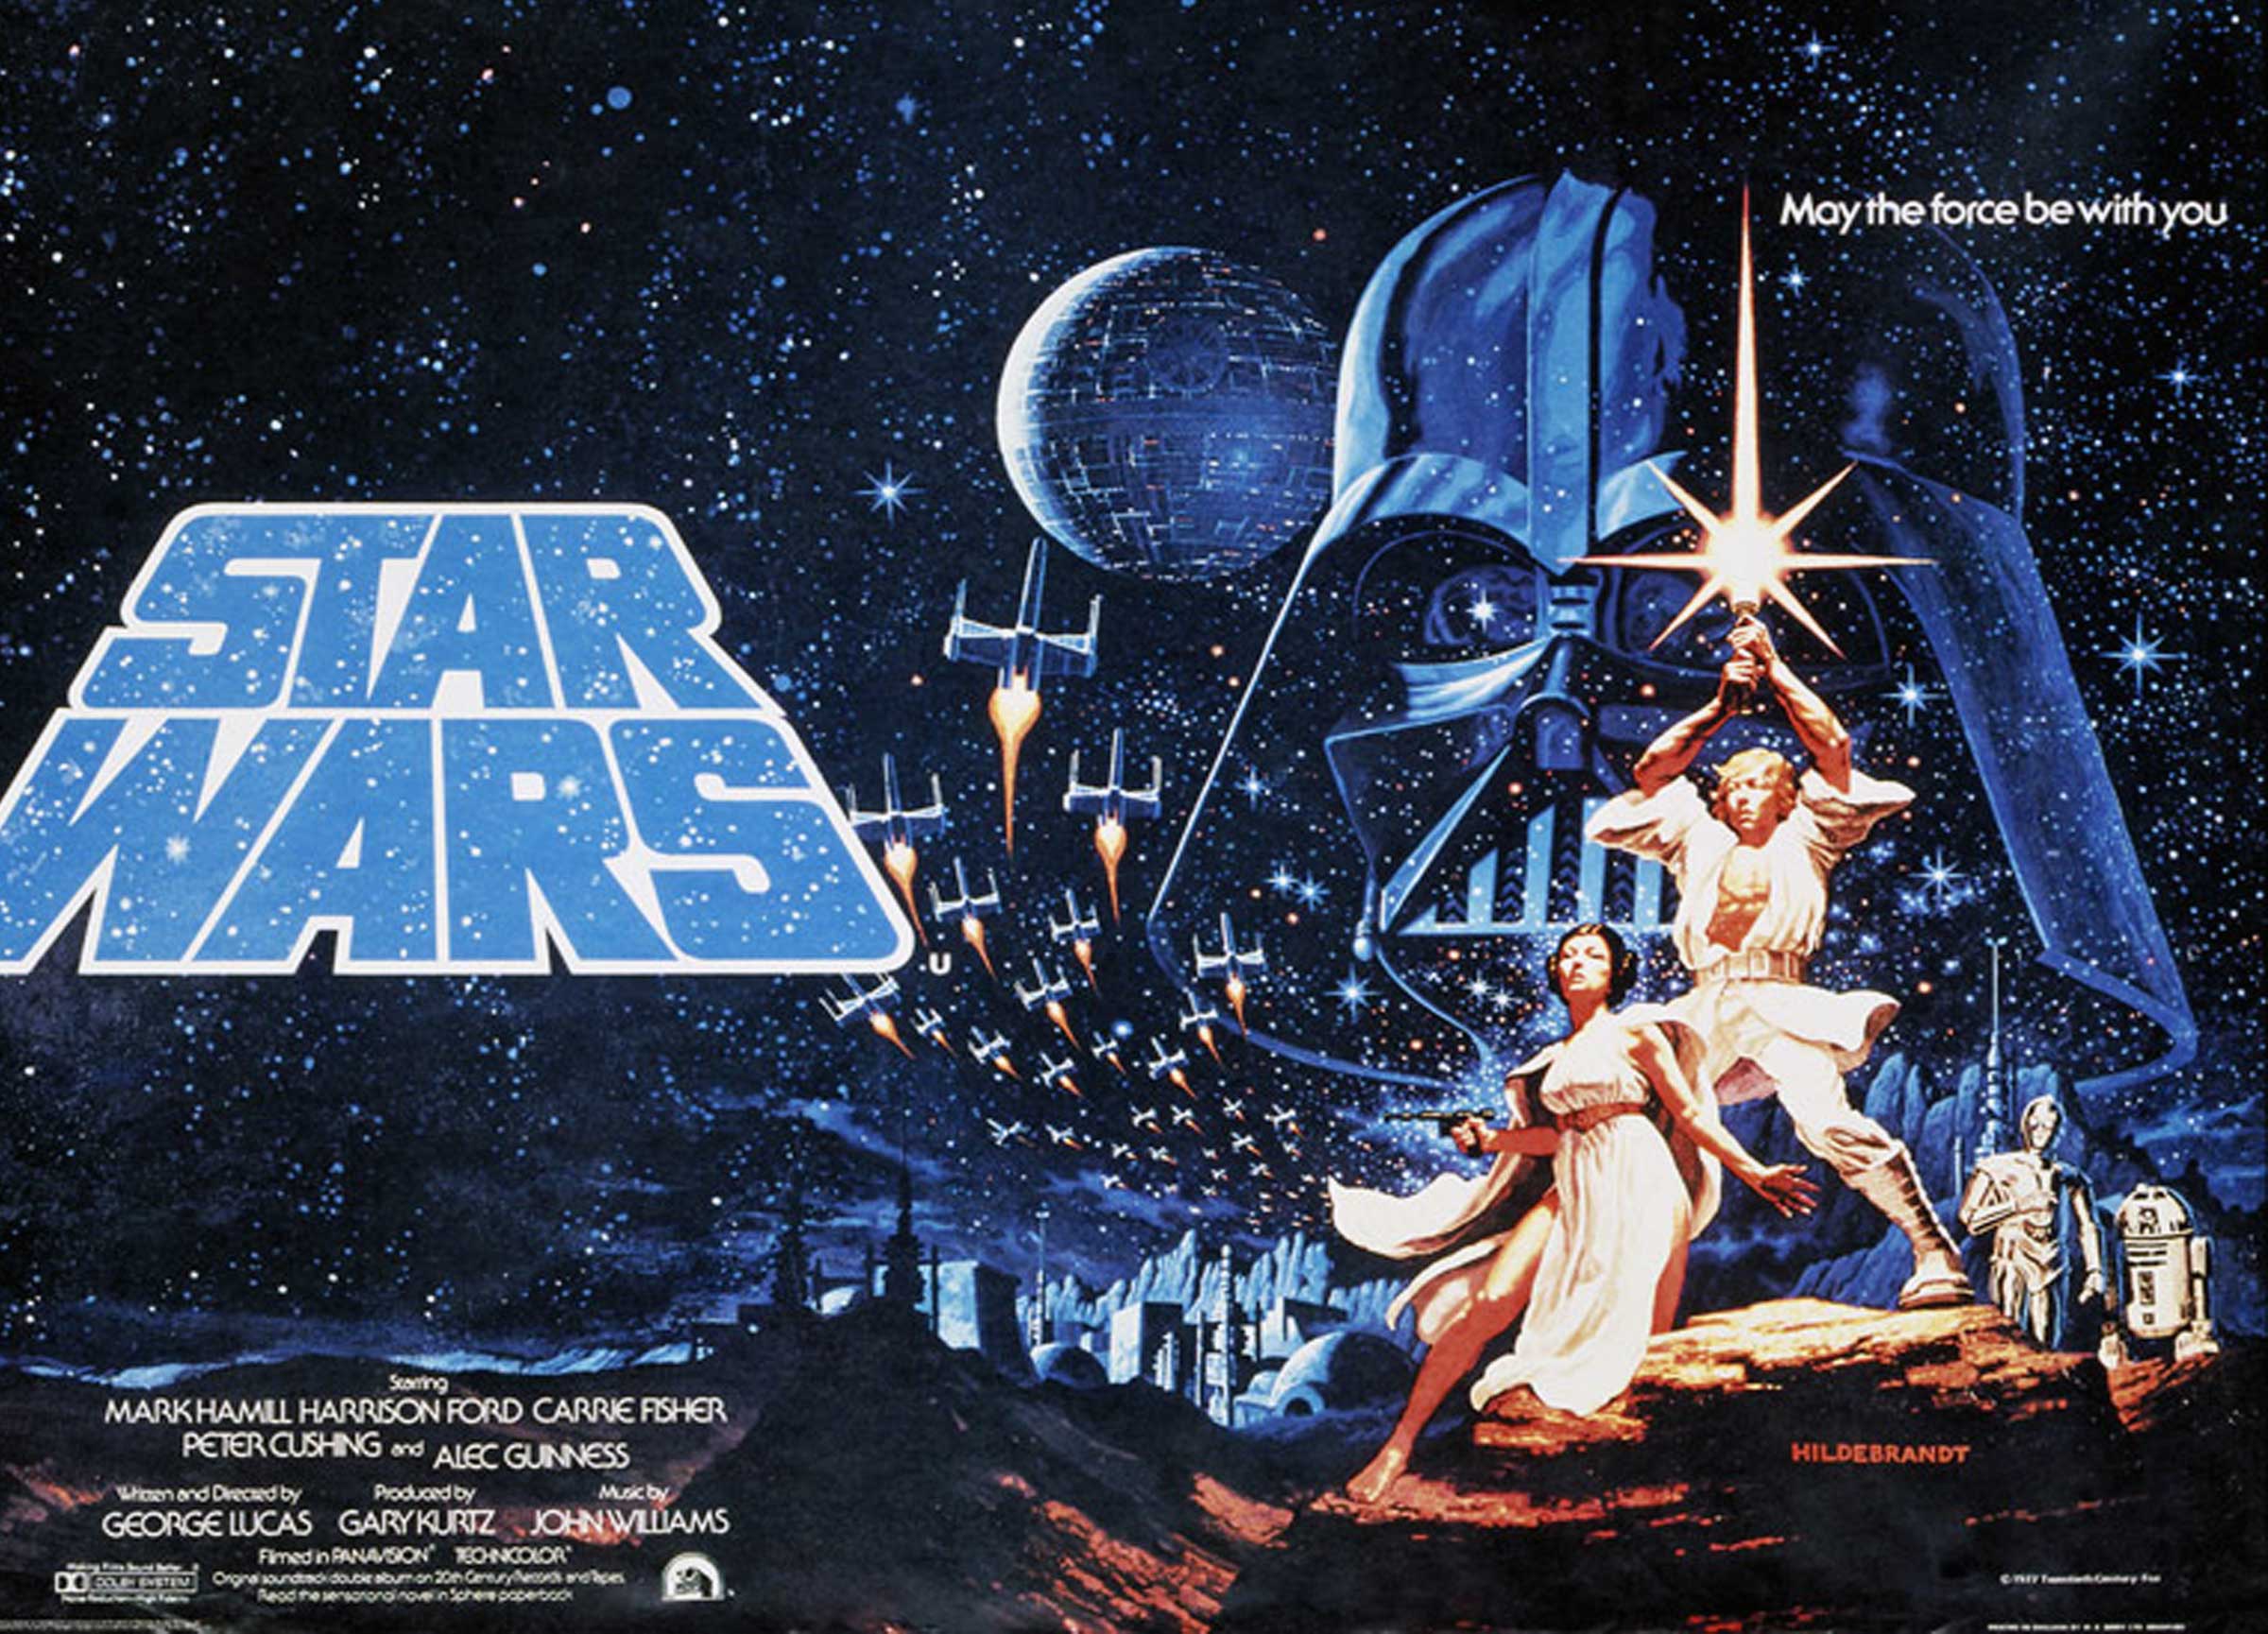
Who doesn’t like those obvious, bright lightsabers? That’s some amazing rotoscoping magic! Each lighting effect was painted by hand on every frame.
| Detail | Numbers |
| Total lightsaber footage | 47 minutes across three films |
| Animation time | 705 hours of rotoscoping work |
| Frame count | 67,680 individual frames enhanced |
| Team size | 23 rotoscope artists over 6 years |
| Cost per minute | $15,000 (1970s-80s rates) |
| Work per duel | 3-4 weeks of post-production each |
2- A Scanner Darkly (2006):

This paranoid thriller used rotoscoping to create a constantly shifting reality that matched the story’s trippy themes. Also, the technique helped show how the characters’ perception of reality kept changing.
| Detail | Numbers |
| Total footage | 100 minutes rotoscoped |
| Production time | 18 months of animation |
| Frame count | 144,000 frames at 24fps |
| Team size | 30 artists working in shifts |
| Budget breakdown | $8.7M total ($4.2M for rotoscoping) |
| Live-action shooting | 23 days |
| Processing power | 50 computers running continuously |
3- Waking Life (2001):
It’s Linklater’s philosophical movie about dreams and consciousness that used rotoscoping to create that floating, dreamlike feeling.
| Detail | Numbers |
| Runtime | 99 minutes of rotoscoped footage |
| Production timeline | 15 months total |
| Animation team | 31 artists with different styles |
| Frame count | 142,560 individual frames |
| Budget breakdown | $2.3M total ($1.8M for animation) |
| Live-action filming | 2 weeks |
4- Snow White and the Seven Dwarfs (1937):
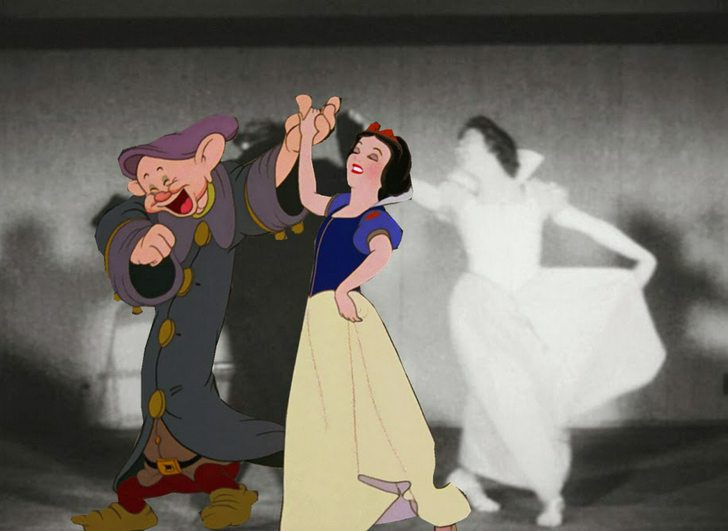
Disney’s groundbreaking first feature film used rotoscoping to make the characters move like real people. However, they only rotoscoped the most important dancing and movement scenes.
| Detail | Numbers |
| Rotoscoped scenes | 12 minutes of an 83-minute film |
| Reference footage | 20 hours of live-action dancing |
| Animation time | 8 months for rotoscoped sequences |
| Frame enhancement | 17,280 frames traced and redrawn |
| Budget impact | $200,000 of $1.5M total budget |
Rotoscope In TV Shows
1- Undone (Amazon Prime, 2019-2022):
This fascinating series on time travel really plays with the idea of reality and memory. You know, the technique really lined up well with the show’s themes about how we see time and reality.
| Detail | Numbers |
| Episode count | 20 episodes across 2 seasons |
| Runtime | 8 hours total content |
| Animation frames | 691,200 frames rotoscoped |
| Production time | 3.5 years |
| Budget | $2.5M first season ($312,500 per episode) |
| Team size | 45 rotoscope artists |
| Live-action shooting | 60 days |
| Post-production | 26 months |
| Work per episode | 4-6 weeks of rotoscoping |
2- The Flowers of Evil (2013):
People who watched this controversial cartoon didn’t all agree on what it looked like. Still, the realistic rotoscoped movement brought about a unique and kind of creepy vibe.
| Detail | Numbers |
| Episode count | 13 episodes |
| Animation style | 100% rotoscoped (unusual for anime) |
| Production cost | $3.2 million (higher than typical anime) |
| Frame count | 280,800 frames |
| Live-action reference | 26 hours of filmed footage |
| Initial controversy | 70% drop in manga sales |
| Later recognition | Cult following over 5 years |
Rotoscope Animation in Video Games
2- Prince of Persia (1989): Jordan Mechner’s game really took off when he used his own brother as a reference, which helped him create some super smooth character animations. It’s pretty surprising that all those smooth movements can fit into just 127KB of storage space!
| Detail | Numbers |
| Development time | 2 years |
| Animation frames | 880 unique character movements |
| Reference footage | 4 hours live-action (Mechner’s brother) |
| Storage requirement | 127KB for all animations |
| First-year sales | 2 million copies |
| Legacy | 15 sequels and remakes |
2- Another World (1991): Eric Chahi made this whole movie game by hand using rotoscoping methods. It’s pretty incredible that the entire game, with all those rotoscoped sequences, only takes up 720KB.
| Detail | Numbers |
| Development team | 1 person (Eric Chahi) |
| Development time | 2 years |
| Animation frames | 1,200 rotoscoped sequences |
| Total game size | 720KB |
| Worldwide sales | 1.5 million copies |
3- The Last Express (1997): This mystery game happens on a train and has some really cool digital rotoscoping with actual actors. Also, every character interaction was hand-painted right over the original footage.
| Detail | Numbers |
| Production time | 4 years |
| Animation frames | 40,000 hand-painted frames |
| Live actors | 30 professional actors filmed |
| Budget | $6 million |
| Sales | 100,000 copies |
Advantages & Disadvantages of Rotoscope Animation
Like any animation technique, rotoscoping has its sweet spots and its pain points.
| Aspect | Advantages | Disadvantages |
| Realism | Natural human movement | Can look at “uncanny valley” |
| Production Time | Faster than full hand-drawn | Slower than motion capture |
| Cost | Mid-range budget option | More expensive than basic animation |
| Artistic Control | High creative freedom | Requires skilled artists |
| Technical Difficulty | Moderate learning curve | Frame-by-frame precision needed |
Is Rotoscoping Cheaper Than Animation?
Good question! It all depends on what you’re comparing it to. Rotoscoping sits right in the middle when it comes to cost.
Traditional hand-drawn animation is definitely more expensive because artists have to create everything from scratch. However, rotoscoping costs less than full CGI but more than simple motion graphics.
| Animation Type | Cost Range | Time Needed |
| Traditional Animation | $300K-$800K | 8-12 months |
| Rotoscope Animation | $80K-$250K | 2-4 months |
| Motion Capture | $150K-$400K | 1-2 months |
| Full CGI | $500K-$1.5M | 4-8 months |
Bottom Line on Rotoscope Animation
Rotoscope animation is a cool technique where artists trace over real people as they move, doing it frame by frame. All of this began in 1915 when Max Fleischer decided that ordinary cartoons were too choppy. Now we see it everywhere, from Star Wars lightsabers to A-ha’s famous “Take On Me” video. It usually takes around 2 to 4 months to wrap up just one minute, and the cost can range from $80,000 to $250,000.