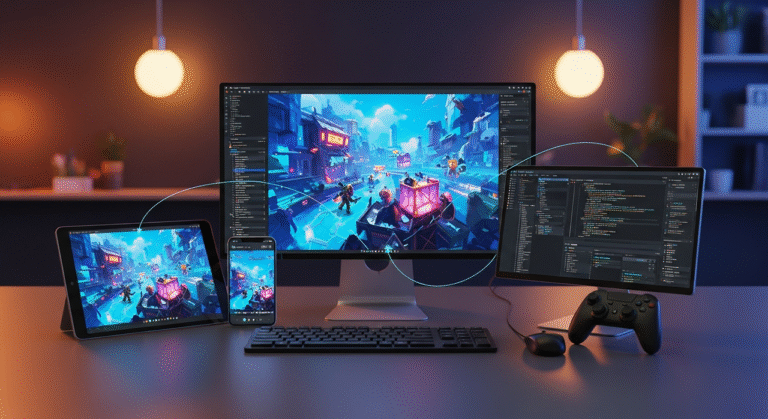

You’ve spent 20 hours creating the most detailed sword ever… and your game runs at 5 FPS. Every scratch, dent, and surface detail looks perfect, but when you put it in your game, everything crawls to a halt. Your computer is trying to draw millions of triangles 60 times per second and just can’t keep up. Meanwhile, a game art studio can create incredibly detailed models that run smoothly on the same hardware.
The core problems:
- High-detail models have too many triangles for real-time games
- Your computer can’t draw millions of triangles 60 times per second
- Games need to run smoothly while looking amazing
- Most people don’t know how to balance detail with performance
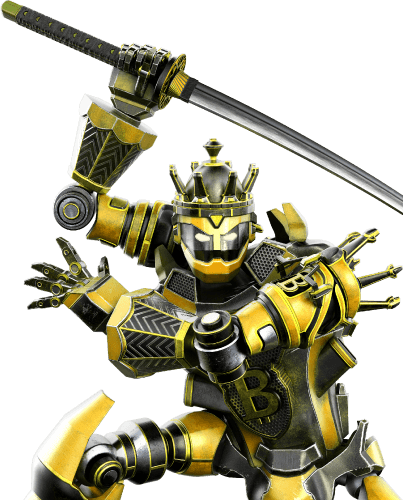
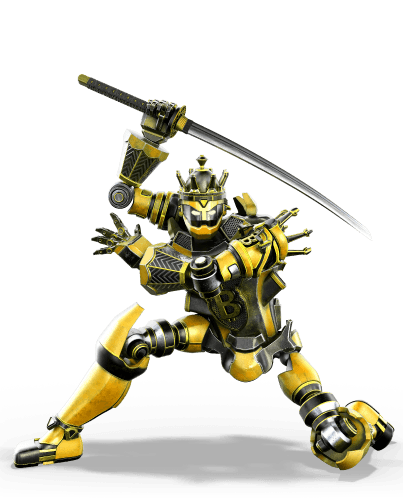
What High-Poly and Low-Poly Actually Mean?
You might get confused about the difference between high-poly vs. low-poly modeling. High-poly models are very detailed but take a long time to load because they have millions of triangles.
Low-poly models and creating low-poly game art, on the other hand, involve fewer triangles, which makes them run quickly but not look as good.
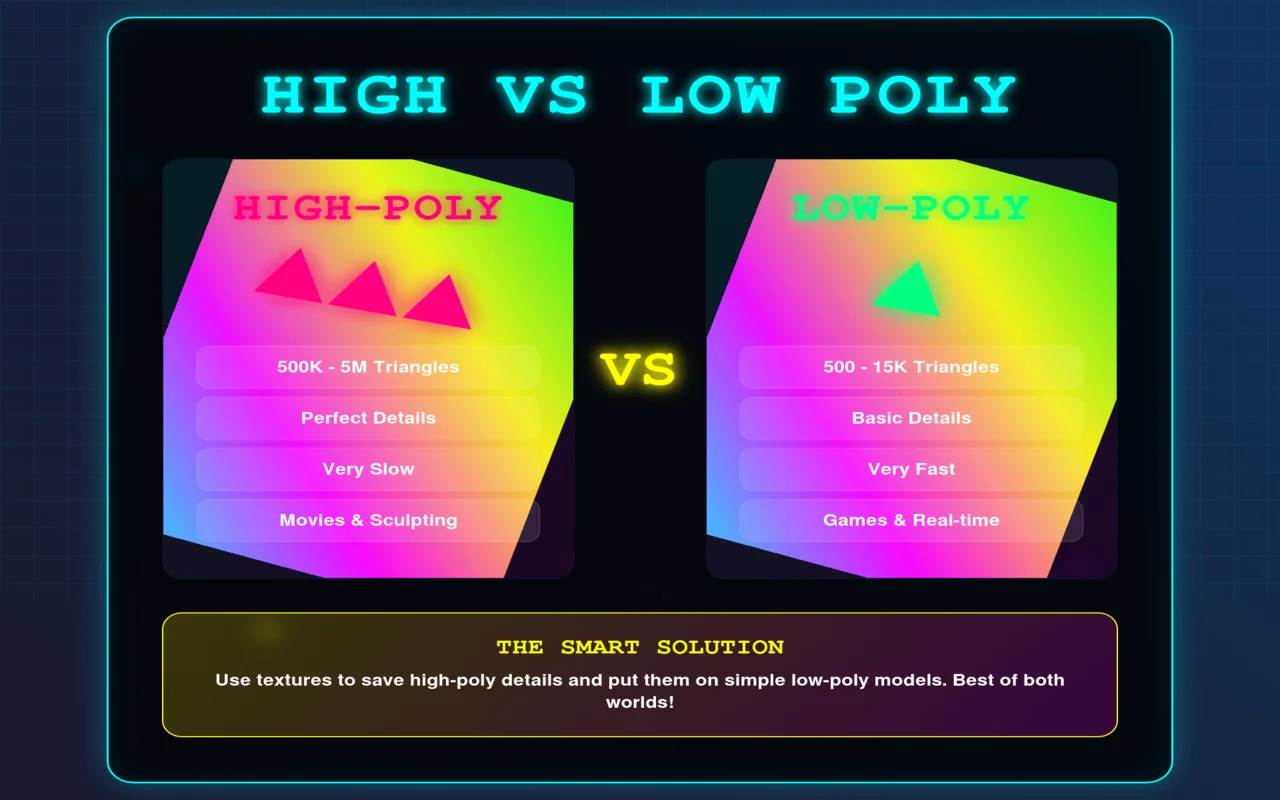
More triangles mean your game will really slow down because your computer has to draw each one 60 times per second.
That’s why we came up with a smart trick: we use textures to save all those fancy high-poly features and then put them on simple low-poly models. You get the best of both worlds this way.
| Feature | High-Poly | Low-Poly |
| Triangle Count | 500K – 5M | 500 – 15K |
| Performance | Very slow | Very fast |
| Detail Level | Perfect | Basic |
| File Size | 50-500MB | 1-5MB |
| Loading Time | 30+ seconds | 1-2 seconds |
| Best For | Sculpting/Movies | Games |
| Works On | High-end PCs only | Any device |
The Complete Step-by-Step Workflow (No BS Guide)
Let’s get to the main point.
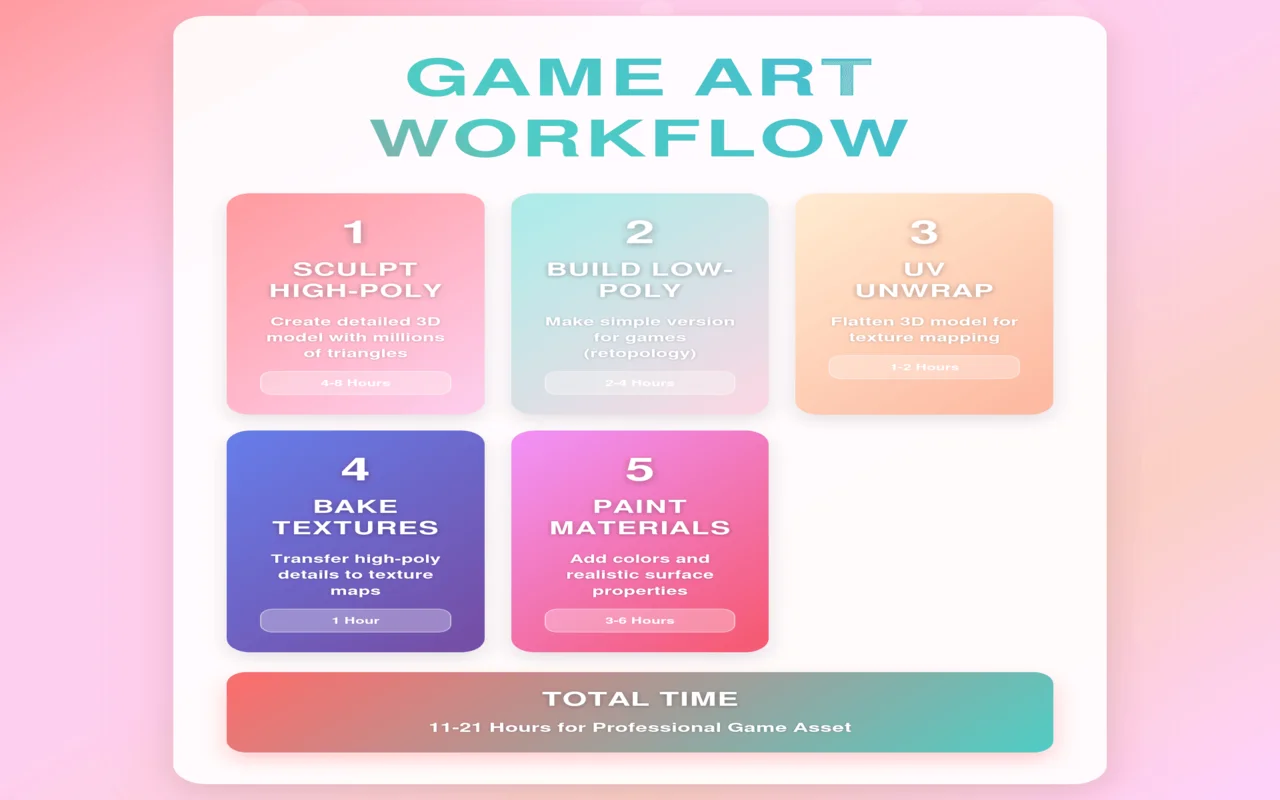
Step 1: Sculpt Your Detailed 3D Model
Time needed: 4-8 hours for most objects
To put it simply, you want to make the most beautiful and thorough version you can, and you should pay attention to every little thing at this point because success doesn’t matter yet.
You can add millions of shapes without feeling bad because we aren’t worried about game engines yet, and this is what you’ll use to remember everything else in the future.
Software that works well:
| Software | Cost | Best For | Learning Curve |
| ZBrush | $40/month | Professional sculpting | 2-3 months |
| Blender | Free | All-around modeling | 1-2 months |
| Maya | $215/month | Studio workflows | 3-4 months |
What details to focus on:
- Hard edges that create cool shadows
- Surface wear like scratches, rust, or fabric patterns
- Mechanical stuff like bolts, panels, or joints
- Anything that changes the outline or catches light nicely
What to skip completely:
- Tiny details nobody will ever see
- Hidden surfaces that face away from the cameras
- Small imperfections smaller than a coin on the screen
Quality checkpoint: Go for somewhere between 500,000 and 2 million triangles total. The exact number isn’t super important, and it just makes it look incredible.
Step 2: Build Your Performance-Friendly Base Model
Time needed: 2-4 hours, depending on how complex it is
Next, you need to make a version that is much easier for games to handle without breaking.
The process is known as 3D retopology, but all you’re really doing is making a smooth, basic shell around your complex work. It’s like putting a gift box around a pricey flower.
This step needs patience because you’re essentially throwing away 95% of your triangles while keeping the same basic shape.
How many triangles to use:
| Platform | Triangle Budget | Performance Target | Typical Use |
| Mobile | 300-1,500 | 30+ FPS | Casual games |
| PC Indie | 1,000-5,000 | 60+ FPS | Steam games |
| AAA Console | 5,000-25,000 | 60+ FPS | PS5/Xbox |
| Background | 50-500 | Any FPS | Far objects |
The process that works:
- Don’t hide your complex model; keep it obvious and locked in place.
- Then, put a brand-new version on top of it using only smooth, straight lines.
- Remember to keep the outline and get rid of any extraneous features.
- Just add extra geometry where things bend or where edge clarity is important.
| Object Type | Mobile Triangles | PC Triangles | Console Triangles |
| Main Character | 800-1,500 | 3,000-8,000 | 8,000-25,000 |
| Weapon | 200-500 | 800-2,000 | 2,000-5,000 |
| Props | 50-200 | 200-800 | 500-2,000 |
| Background Items | 20-100 | 50-300 | 100-800 |
Quality checkpoint: Your simplified model should have 20-100 times fewer triangles but still be instantly recognizable as the same object.
Step 3: Map Your Model for Textures (UV Unwrapping)
Time needed: 1-2 hours for most objects
Now comes the boring but super important part, and that’s unwrapping your 3D model into flat pieces so textures know where to go. Think of it like cutting up a cardboard box with scissors, then laying all the pieces flat on a table. That’s exactly what happens here, except with digital surfaces.
How to unwrap smartly:
- Cut seams only in areas where players won’t notice them, like under arms, back edges, bottom surfaces, or natural material boundaries.
- Keep related surfaces connected whenever possible so they share texture space efficiently.
| UV Layout Strategy | When to Use | Texture Quality | Seam Visibility |
| Single Shell | Simple objects | Best quality | Minimal seams |
| Multiple Shells | Complex objects | Good quality | Hidden seams |
| Symmetrical | Characters/weapons | Efficient space | Mirror seams |
| Tiling | Environments | Memory efficient | Repetitive |
Rules that prevent disasters:
- Hide all seams in places cameras rarely see
- Make texture density consistent across your entire model
- Leave small gaps between UV pieces to prevent color bleeding
- Test for stretching by applying a checkerboard pattern
Mistakes that ruin everything:
- Cutting seams right down the middle of visible surfaces
- Having some parts way bigger in UV space than others
- Overlapping pieces that should definitely be separate
- Rushing through without checking for distortion
Step 4: Capture Details as Texture Images (Baking Process)
Time needed: 1 hour of baking + 30 minutes fixing errors
All of your hard work pays off here. In general, you’re taking high-resolution “shots” of your beautiful, detailed model and then projecting them onto your simple model that’s ready for play.
The layers make the 5,000-triangle model look like the original 2-million-triangle masterpiece, even though your computer thinks it’s just creating a simple model.
This texturing process creates special texture maps that store all your detailed information.
- Normal maps capture surface bumps and scratches.
- Ambient occlusion maps add natural shadows in crevices.
- Curvature maps highlight edges and corners automatically.
| Baking Software | Cost | Ease of Use | Quality | Auto-Fix |
| Substance Painter | $20/month | Very Easy | Excellent | Yes |
| Blender | Free | Medium | Very Good | Limited |
| xNormal | Free | Hard | Good | No |
| Marmoset Toolbag | $199 | Easy | Excellent | Yes |
Software options that actually work:
- Substance Painter: Costs $20/month, but handles everything automatically with great results
- Blende: Completely free option that needs more manual setup, but works fine
- xNormal: Free specialized tool that’s a bit old but still reliable for basic baking
| Map Type | What It Stores | File Format | Typical Size | Use Case |
| Normal | Surface bumps | PNG | 2-4MB | Surface detail |
| AO | Shadow info | JPEG | 500KB | Depth/realism |
| Curvature | Edge data | JPEG | 300KB | Wear patterns |
| Height | Depth info | JPEG | 1MB | Parallax effects |
Settings that prevent headaches:
- Distance: Set to 0.1-0.5% of your object’s total size
- Resolution: 2048×2048 pixels for standard game assets, 4096×4096 for hero objects
- File format: PNG for normal maps, JPEG for everything else to save space
When things go wrong (and they will):
- Purple or green spots = models positioned too close together, increase baking distance
- Black empty areas = missing geometry on low-poly model, fill those gaps
- Blurry, unclear details = resolution set too low, bump up texture size
Step 5: Paint Materials and Add Final Polish
Time needed: 3-6 hours for detailed professional results
Finally, you can use colors, materials, and surface qualities to make everything look great.
This step brings all of your technical work to life by making the lights behave realistically and making the scene look good.
Today’s games use PBR, which means that you tell the computer how different materials should react to light instead of just assigning them colors.
Many texture maps work together in a PBR process.
- They belong in the reflection map.
- Roughness numbers determine how shiny a surface is.
- Metallic maps tell the engine which parts are made of metal and which are made of cloth or plastic.
| Texture Map | Value Range | What It Controls | File Format | Memory Impact |
|---|---|---|---|---|
| Albedo | 0-255 RGB | Base color | JPEG/PNG | High |
| Roughness | 0-1 Grayscale | Surface shininess | JPEG | Medium |
| Metallic | 0 or 1 Binary | Metal vs non-metal | JPEG | Low |
| Normal | -1 to +1 RGB | Surface bumps | PNG | High |
Maps you need for realistic materials:
- Albedo: Pure colors without any lighting or shadow information
- Roughness: Surface shininess from 0 (perfect mirror) to 1 (rough chalk)
- Metallic: Binary metal vs non-metal values (usually 0 or 1, nothing between)
- Normal: Surface detail information from your baking step
How to paint like a pro:
- Start with simple, flat colors that go with your idea or reference picture.
- Then, put all of your baked detail maps on top of the base colors.
- In the end, add wear patterns that make sense. For example, edges get worn down over time, cracks and holes collect dirt and grime, and metal parts rust where water touches them.
Texture resolution that makes sense:
| Object Importance | Mobile | PC | Console |
| Hero Characters | 1024×1024 | 2048×2048 | 4096×4096 |
| Main Props | 512×512 | 1024×1024 | 2048×2048 |
| Background Items | 256×256 | 512×512 | 1024×1024 |
What Tools and Budget do You Need?
You can start with zero dollars. Professional tools make life easier, but aren’t required when you’re learning.
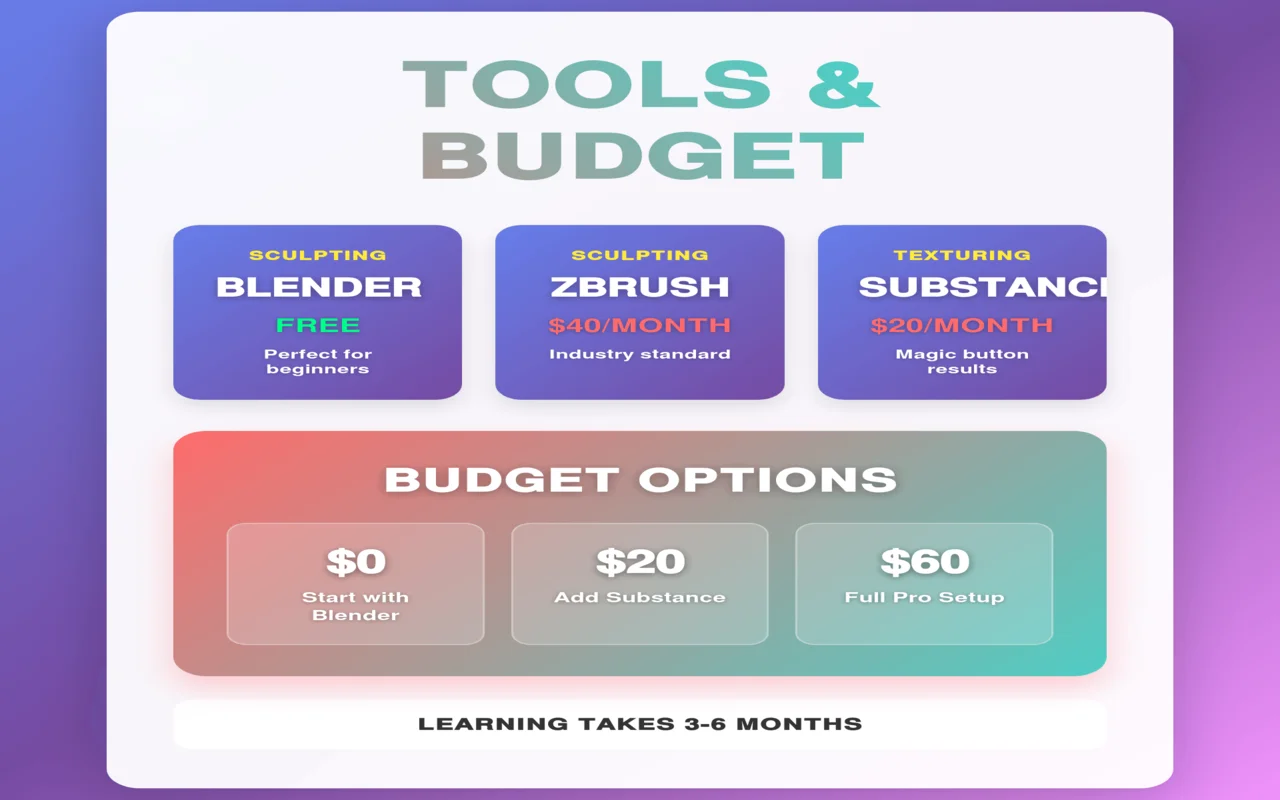
The smart move is starting free, then upgrading only when you hit real limitations.
Reality check: Learning takes 3-6 months, no matter what software you use
High-Poly Sculpting Tools
It’s important to have software that won’t crash when you have millions of shapes in your models.
ZBrush is what most pros use because it never slows down, even with crazy, detailed models. But honestly, Blender’s sculpting mode works just as well for 90% of projects and costs nothing.
| Software | Cost | Why People Use It | How Hard Is It to Learn |
| ZBrush | $40/month | Handles huge models perfectly | 2-3 months |
| Blender (Sculpt Mode) | Free | Does everything ZBrush does | 1-2 months |
| Maya | $215/month | Studios already own it | 3-4 months |
Low-Poly Modeling Tools
Blender’s retopology tools work great, and the price is unbeatable, and Maya feels a tiny bit smoother for retopo work, but not $215 smoother. Also, 3ds Max does the job, but there’s no reason to choose it over the other two.
| Software | Cost | Retopology Tools | UV Unwrapping |
| Blender | Free | Really good | Excellent |
| Maya | $215/month | Slightly better | Pretty good |
| 3ds Max | $215/month | Decent | Okay |
Texture Baking Software
This tool makes your beautiful high-poly features into texture maps.
Substance Painter is like magic; all you have to do is press a button, and the bakes will be perfect almost every time.
Blender needs more setting tweaking, but the products look expert.
Also, for some, Marmoset is better because it costs more up front and doesn’t charge regular fees.
| Software | Cost | How Easy to Use | Results Quality |
| Substance Painter | $20/month | Super easy | Perfect every time |
| Blender | Free | Takes some setup | Really good |
| Marmoset Toolbag | $199 one-time | Pretty easy | Excellent |
High-Poly to Low-Poly Polygon Count Guidelines
Different platforms have different power levels, so your triangle counts need to match what the hardware can actually handle.
| Platform | Per Character | Per Weapon | Per Prop | Background Stuff |
| Mobile | 800-1,500 | 200-500 | 50-200 | 20-100 |
| PC (Low-end) | 2,000-5,000 | 500-1,200 | 100-500 | 50-200 |
| PC (High-end) | 5,000-15,000 | 1,000-3,000 | 300-1,000 | 100-500 |
| Console (PS5/Xbox) | 8,000-25,000 | 2,000-5,000 | 500-2,000 | 200-800 |
Mobile phones have weak processors, so everything needs to be super optimized. Meanwhile, high-end PCs can handle way more detail, but you still can’t go crazy.
Console numbers are higher because the hardware is consistent – every PS5 has the same power level.
Asset Type Breakdown
Different types of objects get different triangle budgets based on how important they are and how close players get to them.
| Character Type | Mobile | PC | Console | Why These Numbers |
| Main Hero | 1,200-1,500 | 5,000-8,000 | 15,000-25,000 | Players see them constantly |
| NPCs | 600-1,000 | 2,000-4,000 | 5,000-10,000 | Less screen time |
| Background People | 300-600 | 800-1,500 | 2,000-4,000 | Far away, most of the time |
Weapons and Tools
First-person weapons need more detail since they fill half your screen, and third-person weapons can be simpler because they’re smaller. Pickup items just need to be recognizable.
| Weapon Type | Mobile | PC | Console | Usage Pattern |
| First-Person Weapons | 400-500 | 1,500-3,000 | 3,000-5,000 | Right in your face |
| Third-Person Weapons | 200-300 | 800-1,500 | 1,500-3,000 | Smaller on screen |
| Pickup Items | 100-200 | 300-800 | 500-1,500 | Brief interactions |
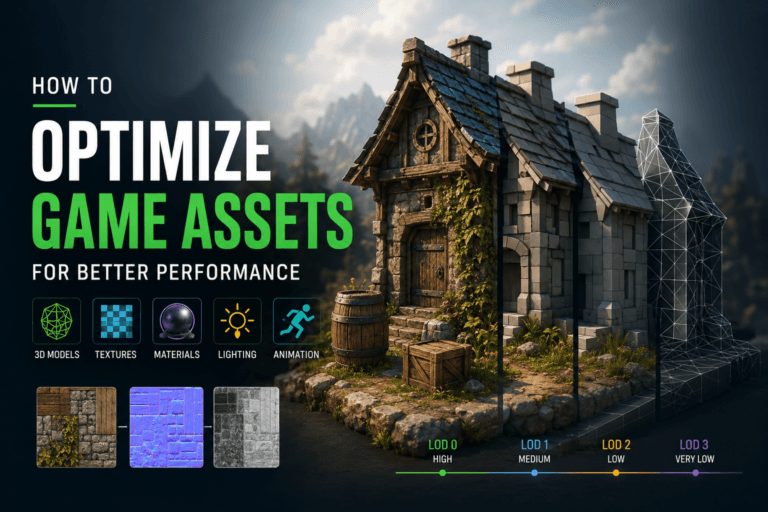
Level of Detail (LOD) Basics
LOD means having more than one copy of the same object, each with a different number of triangles. The game instantly changes to easier forms of things when they are far away.
A character with 10,000 triangles up close becomes 5,000 at medium distance, then 2,500 when far away, and finally 1,000 when barely visible.
| Distance | Triangle Percentage | When to Use |
| LOD 0 | 100% (full detail) | Close-up view |
| LOD 1 | 50% of the original | Medium distance |
| LOD 2 | 25% of the original | Far away |
| LOD 3 | 10% of the original | Very far or not important |
Common Mistakes That Will Ruin Your Day
Look, everyone screws up when they’re learning this stuff. The difference between beginners and pros isn’t that pros don’t make mistakes, but they just know how to spot problems early and fix them fast.
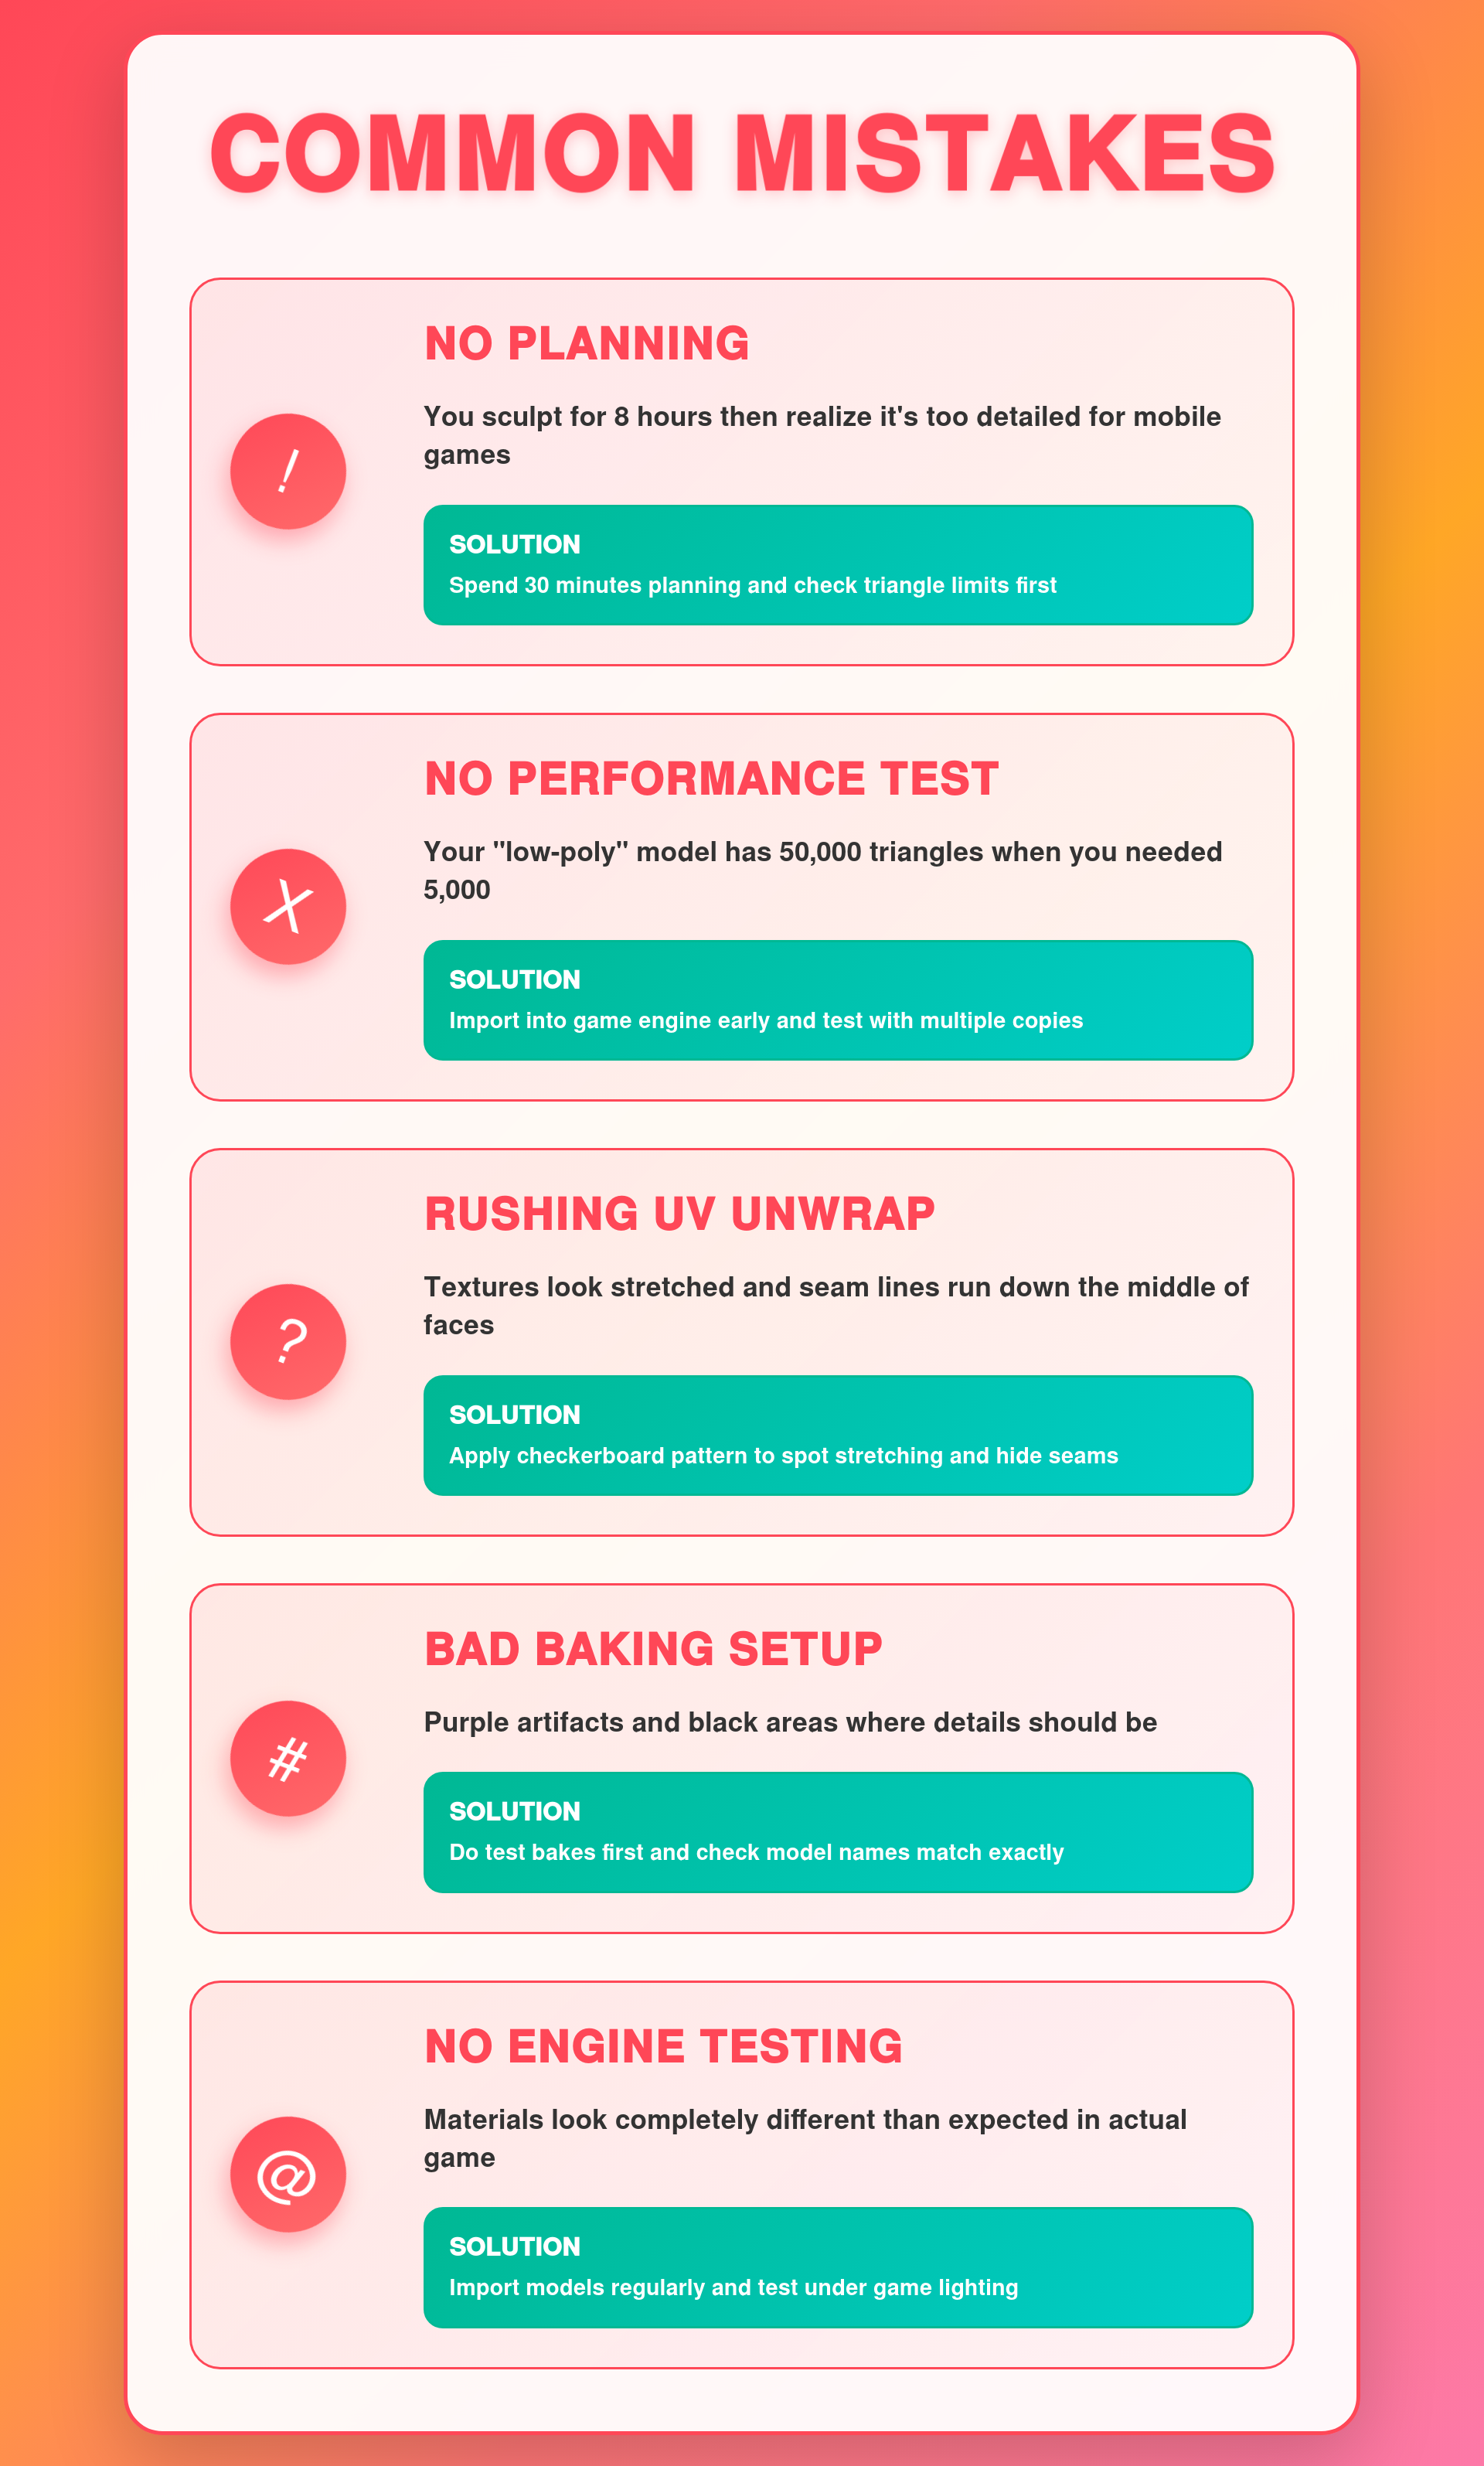
1. Jumping In Without Planning
What goes wrong:
- You sculpt for 8 hours, then realize it’s too detailed for mobile
- Your design doesn’t match the game’s art style
- You run out of triangle budget halfway through
- The proportions look wrong in the actual game
Quick fixes:
- Spend 30 minutes sketching and planning first
- Check triangle limits for your target platform
- Gather reference images from multiple angles
- Decide which parts need detail and which stay simple
2. Building Models Without Testing Performance
What goes wrong:
- Your “low-poly” model has 50,000 triangles when you needed 5,000
- The game freezes when you place multiple copies
- Loading times become unbearably slow
- You have to redo all the retopology work
Quick fixes:
- Import your low-poly into the game engine early
- Test with 10-20 copies in the same scene
- Check frame rates on your target hardware
- Stay within the platform triangle budgets from day one
3. Rushing Through UV Unwrapping
What goes wrong:
- Textures look stretched in some areas and squished in others
- Visible seam lines running down the middle of faces
- Wasted UV space means lower texture resolution
- Trying to fix UVs after texturing wastes hours
Quick fixes:
- Apply a checkerboard pattern to spot stretching immediately
- Hide seams in areas cameras rarely see
- Keep the texture density the same across the whole model
- Fix any UV problems before you start texturing
4. Ignoring Baking Setup and Settings
What goes wrong:
- Purple artifacts all over your normal map
- Black areas where details should be
- Blurry results that look amateur
- Having to rebake multiple times
Quick fixes:
- Do test bakes on small sections first
- Check that the high and low poly model names match exactly
- Set the proper cage distance for your object size
- Increase resolution if fine details look muddy
5. Never Testing In Your Actual Game Engine
What goes wrong:
- Materials look way darker or brighter than expected
- Normal maps don’t work properly
- Textures get compressed and look terrible
- Lighting behaves completely differently
Quick fixes:
- Import models into your target engine regularly
- While game testing, test materials under actual game lighting conditions
- Check how texture compression affects quality
- Verify that normal maps display correctly
Last Words
When you make game art, you have to make two copies of every 3D model. First, you make a very detailed high-poly model with a lot of triangles that looks great, but makes your game crash. After that, you make a simple low-poly version that only has a few thousand tiles and works well.