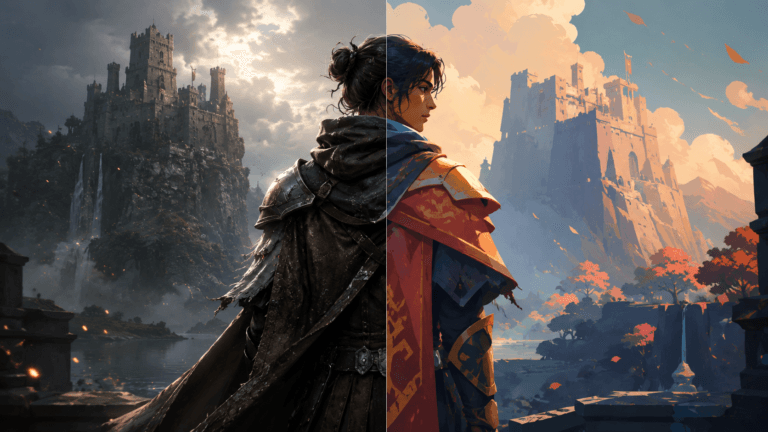
A 3D Layout Artist is the real MVP in creative teams across many industries. They build amazing 3D worlds and ensure everything looks perfect. They set up cameras, create lighting, and organize all the digital stuff that pops a scene with their Layout Design and Scene Composition. They work closely with directors to turn flat drawings into mind-blowing 3D spaces, and they must know their way around industry Software Tools (e.g., V-Ray, Arnold, Blender).
These pros start as junior artists, making around $35,000 a year, but the sky’s the limit—the top dogs in the industry can pull in over $150,000! They must be total pros at 3D software and have an eye for what looks good. They must also know Camera Placement, composition, architecture, and how to tell stories through visuals.
Need 3D Animation Services?
Visit our 3D Animation Service page to see how we can help bring your ideas to life!
What Are the Main Responsibilities of a 3D Layout Artist?
A 3D Layout Artist shapes entire digital worlds by planning and building every aspect of a 3D scene. These creative pros use environmental art skills to set up cameras, lighting, and scene composition while ensuring the whole thing tells a compelling story.
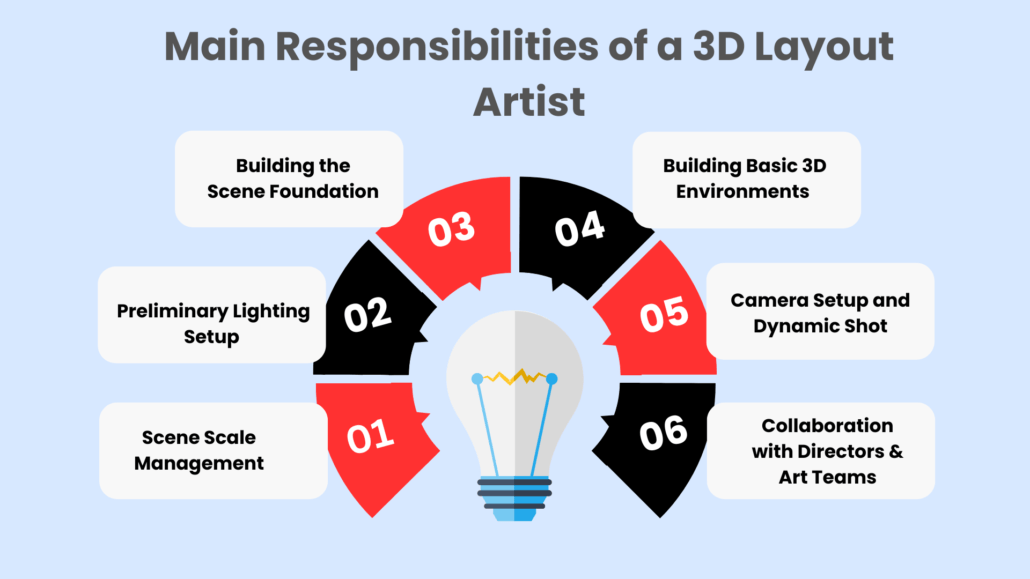
1- Building the Scene Foundation
When a 3D Layout Artist begins working on a scene, they build a basic layout. They first assemble the core parts, determining where everything goes in the 3D space.
Layout Artists use powerful software tools to map out the main areas and determine exactly where objects should be placed. This step helps them determine how the camera will move and ensures everything fits perfectly to tell the story they want to create.
2- Preliminary Lighting Setup for Mood and Atmosphere
The next big step is getting the Scene Composition just right. The artist sets up the first round of lights in the scene – this isn’t the final lighting, but it’s super important.
DesignLayout design shows everyone the mood and helps other team members understand what the director wants. They place lights strategically to highlight important parts of the scene and ensure everything can be seen clearly when characters move around.
3- Scene Scale Management and Spatial Relationships
In a 3D layout, getting the size of everything spot-on is important. The artist must ensure that all the objects in the scene are the right size compared to each other. To nail the proportions, they use real-world measurements mixed with artistic needs.
3D Artists control everything, whether ensuring a door is tall enough for a character or ensuring room sizes are just right. This creates a space that works perfectly for the character’s movements and storytelling.
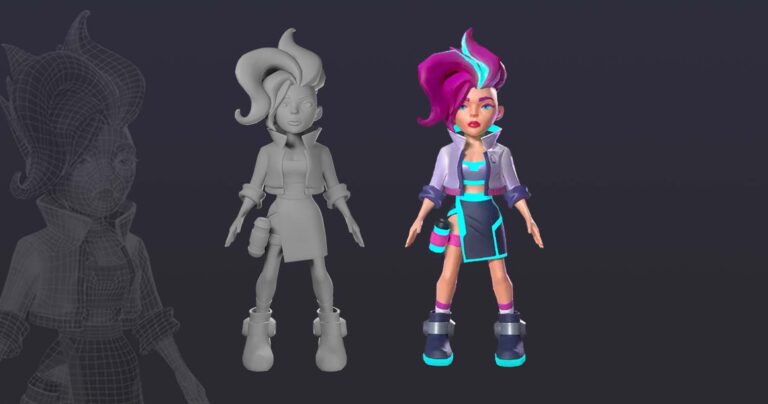
4- Building Basic 3D Environments and Set Blocking
The layout artist builds the basic shape of every space in 3D. They start with simple blocks and shapes to create rooms, outdoor areas, and any place where the action happens.
They make sure everything is the right size, and there’s enough room for characters to move around. They’re working with rough shapes at this stage – about a quarter of the final scene. The most important thing is getting the space to work for the story they want to tell.
5- Camera Setup and Dynamic Shot Creation
The 3D artist takes the flat drawings from the storyboard and figures out how to make them work in 3D space. They need to know their stuff about cameras—what makes shots look cool, how far away to place the camera, and how to move it around smoothly.
6- Collaboration with Directors & Art Teams
This is where the artist gets to team up with the creative crew. They take all those awesome sketches and ideas from the director and art team and turn them into actual 3D spaces. It’s a bit of a juggling act since they need to nail the Artistic Vision while ensuring everything can be built and animated. They’re constantly chatting with the team, sharing ideas, and tweaking things until everyone’s stoked with how it looks.
What Are the Essential Skills Needed to Be a 3D Layout Artist?
A 3D Layout Artist needs many skills, including professional know-how and an eye for art. These abilities are fundamental because they facilitate the transition from conceptual art to finished manufacturing by giving shape to imaginative ideas.
- Advanced knowledge of major 3D software (Maya, 3ds Max, Blender, Cinema 4D)
- Strong understanding of cinematography and camera techniques
- Solid foundation in composition and visual storytelling principles
- Experience with basic lighting and rendering concepts
- Strong organizational and file management abilities
- Proficiency in script and storyboard interpretation
- Knowledge of color theory and visual design fundamentals
- Understanding of real-world scale and proportions
- Experience with asset management and scene optimization
- Knowledge of current industry standards and best practices
- Basic understanding of rendering and compositing workflows
How Is the Layout Creation Process?
As a 3D Layout Artist, you’ll start each project by planning the scene’s basic structure and figuring out where everything needs to go in the 3D space. Then, you’ll get into setting up cameras, tweaking lighting and shadows, and ensuring every element works together to create exactly what the director wants.
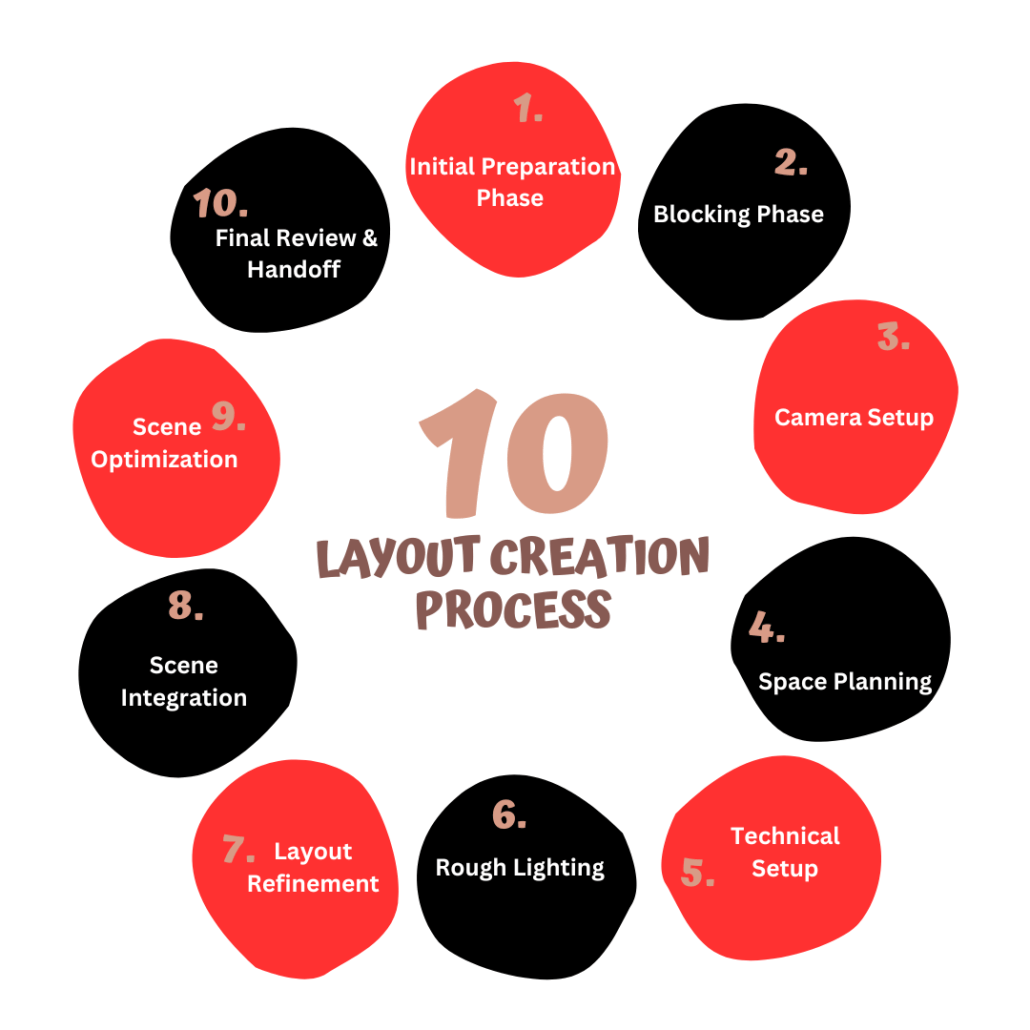
1- Initial Preparation Phase
Before jumping into any work, you, as a 3D Layout Artist, have to get organized – it’s a total game-changer. Using your Artistic and Technical Skills, here’s what you need to nail down:
- Put all your reference stuff in folders that make sense – one for art and one for storyboards.
- Come up with a naming system that works (Scene001_Shot010_Layout_v001)
- Set up a super organized spot for all your Materials and Textures.
- Give that creative brief three solid reads – first time quick, second time deep, third time for the tech stuff.
- List everything you need and rank it 1-5 for importance.
- Write down all the camera stuff from your storyboards.
- Get your folders sorted just right for the project.
2- Blocking Phase
Now, it’s time to get those basic shapes into 3D space. This part is all about getting the size and space right using the software tools:
- Start with a cube that’s exactly one meter – it’s your go-to measurement buddy.
- Put in the big shapes first – don’t sweat the small stuff yet.
- Make a collection of basic shapes you use a lot.
- Set your ground at zero and mark out your grid (every meter or two).
- Put markers every 1.8 meters up so you know how tall stuff should be.
- Put in some basic collision boxes where characters can’t walk through.
- Drop markers wherever important story stuff needs to happen.
3- Camera Setup
Getting your cameras right for post-processing is super important – it’s how people will see your whole world:
- Set up your go-to camera lenses (35mm, 50mm, 85mm)
- Group your cameras based on what they’re showing (whole scene, close-ups, reactions)
- Make sure your frame size is correct (1.85:1 or 2.39:1)
- Figure out how high your cameras should be (1.6m for standard view, 0.6m for looking up)
- Set up cameras that move the way you want
- Make some guidelines for your camera movements
- Put colored markers where your key camera spots are
4- Space Planning
Realism in Rendering requires your area to be perfect; here’s how to make it work for technical requirements as well as plot:
- Draw paths where characters will walk (gotta keep them at least 1.5m wide)
- Mark out spots where characters need to do stuff (minimum 2m all around them)
- Put in some planes to show where important story stuff happens
- Make sure ceilings are high enough (at least 2.4m for normal rooms)
- Mark spots where cameras can’t go – super important
- Show how much space characters need when they move around
- Leave enough room between shots (3-5m minimum) so everything flows
5- Technical Setup
Here’s the nuts and bolts of getting everything organized with software tools (e.g., V-Ray, Arnold, Blender) – it’s pretty straightforward:
- Set up your main folders (Environment/Characters/Cameras/Lights)
- Make a grid that makes sense (big lines every meter, small ones every 10cm)
- Name everything so it makes sense (ASSET_001_DESCRIPTION_V01)
- Create a camera setup that works for everyone
- Set different ways to view your scene while you work
- Keep track of all your scene info
- Make lighter versions of big objects so your computer doesn’t explode
6- Rough Lighting
Time to make everything look good with lighting and shadows and nail those layout techniques:
- Start with three leading lights (big one at 45°, softer one at -45°, backlight at 180°).
- Make different lighting setups for different times of day.
- Add some cards to bounce light around.
- Set up some basic shadows – nothing fancy yet.
- Put in some stuff to show the mood you want.
- Place shiny balls around to check your lighting.
- Ensure your leading light isn’t too bright (keep it 4:1 ratio).
7- Layout Refinement
This is where a layout in 3D animation shines, turning rough layouts into something extraordinary:
- Give characters plenty of room to move (2m all around).
- Make camera movements smooth (slow at the start, fast in the middle).
- Get your space measurements just right.
- Put up guides to make sure everything’s framed perfectly.
- Mark where cameras need to focus.
- Set up different blur effects to make scenes pop.
- Time your scene changes (24-48 frames each).
8- Scene Integration
Here’s where lighting and shadows become super important as you put all your scenes together:
- Make a template for putting scenes together.
- Make sure scenes overlap by at least 12 frames.
- Check everything’s consistent every 10 seconds.
- Set up guides for passing cameras between shots.
- Keep a toolkit to check sizes.
- Get your computer to check everything matches.
- Make a timeline where all scenes sync up.
9- Scene Optimization
Time for some technical skills to keep everything running smoothly:
- Cut down the detail on stuff far from the camera (100 units away).
- Clean up any unnecessary stuff on objects that move a lot.
- Name everything properly (Department_AssetType_Version).
- Organize your textures neatly – bigger ones for important stuff.
- Write down all your camera settings.
- Keep your scene organized with colors (Red for the main stuff, Blue for the backgrounds).
10- Final Review & Handoff
This is where your artistic and technical skills combine to wrap everything up:
- Save your scenes in the right format.
- Write down all the technical limits.
- Set up animation stuff to run at 24 FPS.
- Save your reference pictures in high quality.
- Document where everything’s centered and how big it should be.
- Make different quality versions of objects for different distances.
- Save stuff the computer needs to calculate ahead of time.
What Are Different Types of Layouts?
Let’s see all the different types of layouts:
1- Camera Position
The camera arrangement controls what people see and experience in your scenario. It’s also important as these camera angles lead viewers throughout the narrative beats. Here, your hidden weapon becomes camera placement; smart placement helps situations flow effortlessly. Software like Maya and 3ds Max can help you get the right angles.
Character layouts are designed so that everyone hangs around in your setting. Here, the 3D modeling effort is on properly aligning characters. Every character needs free channels to move through scenes without running over objects. The size must also be exact; characters should complement their surroundings exactly.
4- Lighting Layout
All the action happens on sets; environment art brings these places to life. The scene layout must include realistic movement as well as plot points. Every bit of the surroundings fulfills a function. Artistic vision links everything into one harmonic space. Good set designs provide areas with an authentic, lived-in sense.
5- Animation and Blocking Layout
Layouts for animation plan each move before they happen. It helps to know how to make games because the time and motions need to feel smooth.
On the other hand, blocking takes care of the basics before getting into the details. Early issue catching in layout design at this level The difficult sections were saved many years later. Consider blocking as your initial draft; it needs to be sturdy rather than flawless.
What Industries Actively Seek 3D Layout Artists?
The 3D Layout Artist is crushing it in many different industries:
- Feature Film Production
- Game Art Studios
- Game Development Studios
- Architectural Visualization Firms
- 3D Animation Studios
- Virtual Reality Development
- Medical Imaging and Healthcare
- Automotive Design Industry
- Theme Park and Attraction Design
- Educational Technology Development
- Technical Animation Companies
- Military and Defense Simulation
- Real Estate Virtual Tours
- Television and Streaming Production
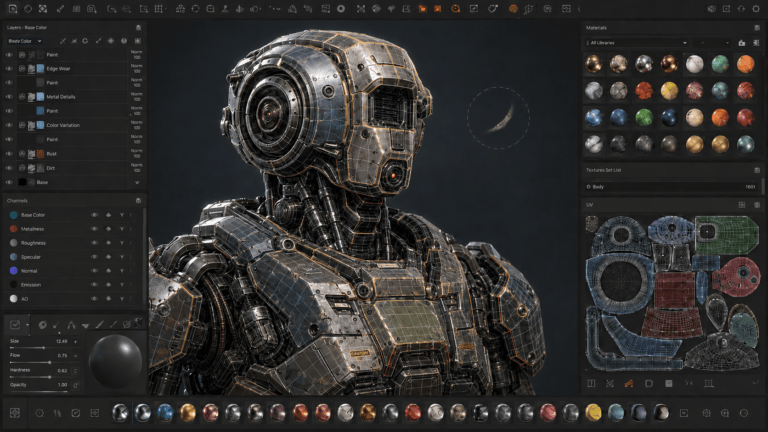
What Are the Industry Standard Tools and Software Packages for Layout Artists?
A 3D Layout Artist needs some seriously cool gear to make amazing 3D worlds. Let’s break down the must-have software tools that’ll help you crush it in the industry:
- Autodesk Maya: Film animation, character rigging, VFX production, game asset creation.
- Autodesk 3ds Max: Architectural visualization services, product design, interior rendering, furniture modeling.
- Blender: Independent film production, game asset creation, motion graphics, concept visualization.
- SketchUp: Architectural concepts, quick modeling, interior design, urban planning.
- ZBrush: Character sculpting, organic modeling, high-detail texturing, creature design.
- Substance Painter: Texture creation, material development, PBR texturing, asset finishing.
- V-Ray: Architectural rendering, 3D product modeling and rendering, interior visualization, lighting simulation.
- Unreal Engine: Real-time visualization, game development, virtual production, interactive presentations.
- Houdini: Effects simulation, environment generation, procedural modeling, destruction effects.
Read More: Maya vs. Blender
How Is the Career Path for a 3D Layout Artist?
Here is a detailed overview of the career path for a 3D Layout Artist, including job roles, responsibilities, and salary ranges:
Entry-Level: Junior 3D Layout Artist
Salary Range: $35,000 – $50,000 per year
Responsibilities:
- Assist senior artists in creating 3D layouts and environments
- Model, texture, and light basic 3D assets
- Collaborate with the art team to ensure consistency in style and quality
Mid-Level: 3D Layout Artist
Salary Range: $50,000 – $75,000 per year
Responsibilities:
- Create detailed 3D layouts and environments based on concept art and design briefs
- Develop and maintain 3D asset libraries
- Work closely with the art director to establish the visual style of projects
- Mentor junior artists and provide feedback on their work
Senior-Level: Lead 3D Layout Artist
Salary Range: $75,000 – $100,000+ per year
Responsibilities:
- Oversee the creation of 3D layouts and environments for complex projects
- Manage a team of 3D layout artists and delegate tasks effectively
- Collaborate with other departments (e.g., design, animation) to ensure seamless integration of 3D layouts
- Develop and implement innovative techniques to enhance the quality and efficiency of 3D layout production
Advanced: Art Director (3D Layout)
Salary Range: $100,000 – $150,000+ per year
Responsibilities:
- Set the overall artistic vision and direction for 3D layout projects
- Manage multiple teams of 3D layout artists across different projects
- Collaborate with clients and stakeholders to understand their requirements and provide creative solutions
- Ensure that all 3D layout work meets the highest standards of quality and aligns with the project’s goals
- Continuously stay updated with the latest industry trends and technologies
What Are the Most Game-Changing Trends in 3D Layout Art?
Let me tell you about the latest trends in 3D art:
- Photographically accurate things: Using rendering methods to create 3D scenes that look so real you won’t believe they’re computer-generated. View the incredible settings in Red Dead Redemption 2!
- Art Styles: Making 3D that seems handcrafted and original. Breath of the Wild masters this with its stunning look.
- Computer-Generated Worlds: Software tools like V-Ray, Arnold, and Blender can instantly create whole worlds. This is how No Man’s Sky generates countless distinctive planets.
- VR Spaces: Virtual reality in games is altering the 3D visualization game. Google Earth VR shows how amazing this can be. You can also read more about creating art for VR games.
- AR Magic: Using your phone to add Visual Effects (VFX) to the environment. Pokémon GO revolutionized the game with this technology.
- Real-Time Light Magic: Shadows and lighting now look great in real-time. Games such as Control highlight possibilities.
- Effects of the atmosphere: building epic emotions using textures and materials. Metro Exodus demonstrates how fog and illumination may create an ideal mood.
- Photo-to-3D: Taking real pictures and making perfect 3D models out of them. The Vanishing of Ethan Carter shows how real this may appear.
Conclusion
These creative pros are the architects of digital worlds, turning ideas into amazing 3D spaces we can explore. They’re the ones who know their way around powerful tools like Maya and Blender to build everything from movie scenes to video game worlds. Plus, they’re needed everywhere – movie studios, game companies, hospitals, and real estate firms want their skills. The money’s pretty good, too – start at around $35k and work up to $150k+ when you’re running the show.