Isn’t it crazy how much a good camera system can change the way you play? If the camera is slow, confusing, or just plain annoying, no one will stay to see your cool figures or amazing level design. But what’s great is that you can now play with a huge range of tools, from simple following cameras to high-tech sets that mimic movie theaters. Also, keep in mind that the best camera is one that players don’t even notice because it works so well that they can only think about the game.
What Are Camera Types & Perspectives?
There are a few main types of cameras that game designers and game art studios use all the time. Every type is useful for different things, and knowing when to use each one will make or break your job.
First-Person Camera
First-person cameras put players right inside the character’s head. You see hands, weapons, maybe a cool HUD, which is a key element in HUD game design, but not much else of your actual character.

This style of camera works great for realism. There’s nothing better than imagining that YOU are the one avoiding guns or visiting that creepy old hospital. That’s why this view is common in game genres like shooters and survival, as seen in games like Call of Duty and Minecraft.
| PROS | CONS |
| Total immersion and you ARE the character | Kiss those cool character outfits goodbye, since you never see yourself |
| Super intuitive aiming, and where you look is where you shoot | Can trigger motion sickness for some players |
| Creates genuine heart-pounding moments in scary games | Limited awareness of your surroundings |
Third-Person Camera
Most of the time, third-person cameras show your figure and the world around it from behind. This point of view works great in games like God of War and Uncharted because it lets you see your awesome character do cool moves while still feeling like you’re part of the action, just as the game director intended.

Third-person cameras come in a few common flavors:
- Tight over-the-shoulder view (great for action games)
- Medium follow camera (perfect for adventure games)
- Wide orbital camera (ideal for RPGs where great environment design matters)
Top-Down Camera
You can see everything going on below with a top-down camera. This view is great for strategy games, role-playing games, and other games where staying in the game is less important than seeing the big picture — a style often complemented by detailed game art design.

You’ll typically see this in two styles:
- Pure top-down: Straight down view (like old-school Zelda)
- Isometric: Angled view from above (like Diablo or Hades)
Diablo and Hades use an isometric style, similar to a top-down view. It is slightly angled rather than straight down, and you can see enemies coming from all directions and plan your moves accordingly.
Fixed Camera
Fixed cameras are like carefully put security cameras that you can find all over your game world. View doesn’t follow you; instead, as you move from one place to another, the camera settings change.

The first Resident Evil games did a great job with this. Fixing the angles lets the creators make scenes look very dramatic and hide scary things just off-screen. Talk about stress!
Fixed cams are a bit old-fashioned, but they are still used in some parts of newer games like Celeste.
2D Side-Scroller Camera
A classic view from the side! It follows your figure from the side as it moves around the world, going left and right. It’s what platform games are all about.

Games like Mario, Sonic, and Hollow Knight all use this view because it shows the jumps, gaps, and hazards that make platformers fun. The camera usually stays in the middle or slightly off to the side to show more of what’s coming next.
How Are Camera Properties & Controls?
Camera properties are all the settings and values that control exactly what players see and how the camera moves. Getting these properties right is super important. Bad camera settings can completely ruin an otherwise awesome game.
Position (X, Y, Z)
The location of your camera in the game world, shown by X, Y, and Z dimensions, is called its position. Pressing X moves you left or right, Y moves you up or down, and Z moves you forward or backward in most game systems.
The camera in third-person games usually sits behind and above the player. A great distance is very important. If it’s too close, players won’t be able to see enough of the world around them, and if it’s too far, the character will feel removed from the action. This also affects the psychology of character creation.
Smart games adjust camera position dynamically based on the situation:
- In tight spaces, the camera moves closer to avoid walls
- During big action sequences, it pulls back to show more
- When swimming underwater, it might be positioned differently than on land
Rotation
Camera rotation controls which way the camera is pointing. While it typically points at the player character, changing rotation can create some really cool effects. Most games connect rotation directly to player input (right stick or mouse), but automated rotation happens, too
Rotation tricks used by pro developers:
- Slight tilting during high-speed moments adds excitement
- Gradually pitching down when approaching edges helps with platforming
- Quick rotation toward loud noises creates situational awareness
Field of View (FOV)
FOV controls how wide the camera sees, measured in degrees. The perfect FOV creates a sense of space without distorting the game world.
Different genres typically use different FOV ranges:
- Shooters: 70-90° for good visibility and target acquisition
- Horror games: 55-65° for a claustrophobic, intense feel
- Racing games: 80-100° for a better sense of speed
- Cinematic games: Variable FOV for dramatic effect
Here’s a quick FOV comparison:
| FOV Range | Feel | Best Uses |
| 50-60° | Narrow, zoomed in | Horror, sniping, cinematic moments |
| 65-75° | Balanced, natural | Adventure games, story-focused games |
| 80-90° | Wide, action-focused | FPS, fast-paced action games |
| 95°+ | Ultra-wide, distorted edges | Racing, showcasing environments |
Many PC players change the FOV settings as soon as they start a new game. Everyone has their own tastes, and FOV can have a big effect on how comfortable you are during long game sessions.
Depth of Field
Depth of field creates that photography-style focus effect where only objects at a certain distance are sharp while everything else gets blurry.
Games typically use depth of field for:
- Highlighting important objects or characters
- Creating cinematic moments during cutscenes
- Simulating focusing when aiming down sights
- Adding realism to the first-person view (mimicking human vision)
The technical settings include focus distance (what’s perfectly sharp), focal region (the range that stays in focus), and blur amount (how fuzzy out-of-focus areas become).
Focal Length
Different distances of things look different in relation to each other, depending on the focal length. Like using different lenses on a real camera, it changes how “flat” or “depth” scenes look.
In practical terms:
- Short focal length (wide-angle): Exaggerates distance between objects and creates more dramatic depth
- Long focal length (telephoto): Compresses distance and makes far objects feel closer to near ones
What Are Camera Angles & Their Effects?
Camera angles change how players feel about what they’re seeing. A simple angle change can impact character development and make a character look powerful, weak, or even super creepy!
| Camera Angle | What It Does | Best Used For | Example |
| Eye-level | Feels neutral and natural | Normal conversations, everyday gameplay | Most standard gameplay in RPGs |
| Low angle | Makes subjects look powerful and imposing | Boss introductions, hero moments | God of War, when facing giant enemies |
| High angle | Makes subjects appear vulnerable or weak | Showing defeated characters, creating sympathy | Final Fantasy cutscenes for emotional moments |
| Bird’s eye/Top-down | Shows layout and relationships between objects | Strategy sections, mazes, and planning | Most RTS games like StarCraft |
| Dutch tilt | Creates immediate unease and disorientation | Horror sequences, unstable situations | Silent Hill, when things get weird |
| Over-the-shoulder | Creates a connection between the viewer and the subject | Aiming systems, conversation focus | Resident Evil 4’s aiming system |
| Point-of-view | Puts the viewer directly in the character’s position | Immersive moments, seeing through other eyes | Brief sequences in The Last of Us when seeing through Ellie’s eyes |
Top Basic Camera Movements
Even the most beautiful game will feel stiff and boring if the camera doesn’t move well. But if you do it right, even simple images can feel exciting and alive.
- Pan: This is when your camera moves from side to side but stays in the same place. Some games, like Red Dead Redemption 2, use soft rendering to show off their beautiful landscapes.
- Tilt: Similar to a pan but vertical. Your camera looks up or down. This is awesome for showing tall buildings or looking down cliff edges. Think about God of War when the camera tilts up to show those massive giants.
- Zoom: This brings you closer to or further from your subject without actually moving the camera position. Games often use a quick zoom (like 0.5 seconds) for “aha!” moments when a character realizes something important.
- Dolly: A dolly is different from a zoom because it moves the camera forward or backward through the scene. In scary games like PT, moving slowly down that creepy tunnel builds anxiety, which ties directly into game design psychology.
- Truck: This style keeps your camera at the same distance from your subject while moving it to the left or right. When Drake is going along cliffs in Uncharted, trailer shots keep him in the middle of the shot while showing off the beautiful (or dangerous) background.
- Pedestal: Moving the camera straight up or down without changing the angle. Think about Minecraft when you go up in an elevator.
- Arc: Your camera travels in a circle around your subject. God of War uses arc movements during finishing moves to show them from multiple angles.
- Follow: As your figure moves, the camera moves behind or next to them. Getting the right distance (usually 3–7 units behind) and smoothness is important.
What Are Shot Types for Camera Setups?
Shot framing is all about what you include in the scene and how much of it you show. Different shot types create different feelings and help tell your story in the most effective way.

Establishing Shot
Usually, establishing shots show scenery, houses, or whole rooms to help players get used to their new surroundings. These are great for games like Skyrim.
Remember when you first came out of the cave and saw the huge world spread out in front of you? That’s what an opening shot is for! The key is to hold this shot long enough (3-5 seconds) for players to take in all the details before moving to closer shots.
Wide Shot
A wide shot shows both your figure and a lot of the area around it. It doesn’t show as much as an opening shot, but it still gives a lot of information.
This is the “normal” camera that you use when playing many third-person games. It lets players see enough of their surroundings to get around and spot enemies coming from behind, but not so much that they can’t see the character or appreciate the character design.
When you’re exploring games like Horizon Zero Dawn, you can see Aloy and see enough of the beautiful scenery and robot dinosaurs to make it easy to find your way.
Full Shot
With a full shot, you can see your character from head to toe, and you can still see some of the background.
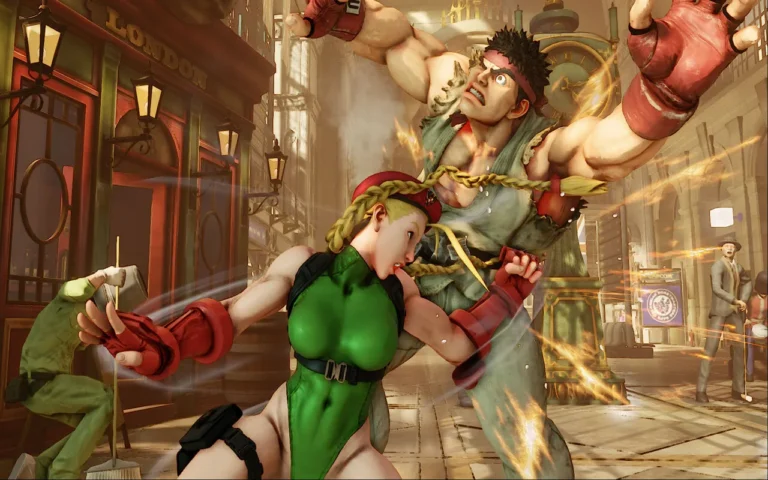
This type of shot is great for showing full character movements, which is especially important in fighting games where you need to see the whole body. You can see every kick and punch in Street Fighter because it uses full shots.
Medium Shot
There is some body language in the medium shot because it shows your figure from about the waist up.
This is a great shot for conversation scenes where you want to see movements as well as facial reactions. Medium shots are used in games like Mass Effect to show how characters behave during talks.
Close-Up
Close-ups show intense feelings and reactions by focusing closely on a character’s face. This kind of shot works well when the story is emotional, and every little reaction counts. Close-ups are used in The Last of Us’s most emotional scenes to make you feel like you know what Joel and Ellie are going through.
A good close-up usually starts just below the shoulders and ends a bit above the head. For the most effect, the eyes should be in the top third of the frame.
Extreme Close-Up
This extremely close-up picture focuses on small features, like eyes, a hand holding something, or a very small thing.
Extreme close-ups make things more intense and draw the player’s attention to a specific area. Horror games like Resident Evil use these to draw attention to scary details or important things.
Two-Shot
There are two people in a two-shot, which shows how they relate to and interact with each other. Players can see both people talking at the same time in this shot, which is essential for conversation scenes.
The Walking Dead by Telltale Games uses two-shots a lot when you have to make important conversation choices.
Platformer-Specific Camera Techniques
Have you ever played a game where you couldn’t see where to jump next? Total nightmare, right?

The thing is, platformers are super fast, and players are constantly moving, jumping, and changing direction, so your camera needs to keep up without making everyone dizzy. Plus, a smart camera can actually help guide players through tough sections by showing them what’s coming next.
| Technique | What It Does | Best For | Watch Out For | Great Examples |
| Follow the player | The camera sticks directly to the player’s position | Simple games, tutorial areas | Gets super jerky during fast movement | Early Mario games |
| Position smoothing | Camera follows with a slight delay for smoother movement | Most platformers | Too much lag can hide upcoming obstacles | Celeste, Hollow Knight |
| Camera drag | The player can move freely in a box before the camera starts moving | Games with lots of small movements | Too large a window reduces visibility ahead | Super Meat Boy |
| Camera shifting | Shows more space in the direction the player is moving | Fast-paced games | Can feel weird during direction changes | Sonic games |
| Camera limits | Stops the camera from showing empty space or boundaries | All platformers | Can trap the player if set incorrectly | Nearly all modern games |
| Dynamic zoom | Adjusts the zoom level based on speed or environment | Games with varied spaces | It can be disorienting if it changes too quickly | Ori and the Blind Forest |
Technical Implementation Aspects
The technical side might sound complicated, but I’ll break it down into simple steps that’ll help you create pro-level camera systems.

Cinemachine in Unity
This is Unity’s built-in camera system that handles a ton of complex camera stuff for you automatically!
- Install Cinemachine through the Package Manager
- Create a virtual camera (right-click > Cinemachine > Virtual Camera)
- Set your player as the “Follow” target
- Adjust damping settings for smoothness
- You can create multiple virtual cameras and blend between them for different situations.
Real-time Camera Scripting
Just like how an animation script guides the narrative, custom scripts give you total control over exactly how your camera behaves in every situation.
- Create a camera controller script attached to your main camera
- Add references to your player and any other important objects
- In the update function, calculate the desired camera position based on the player’s position
- Add smoothing by using Lerp (linear interpolation) between the current and target positions
- Add optional offsets for looking ahead or showing more of specific areas
Camera Clipping Prevention
This technique keeps your camera from going through walls or other objects.
- Cast rays from your player toward the desired camera position
- If the ray hits something (like a wall), position the camera at the hit point
- Add a small offset to prevent the camera from being exactly on the surface
- For extra smoothness, gradually move the camera closer when approaching walls
- Consider fading out objects between the camera and the player instead of moving the camera
Collision Detection for Cameras
Like stopping cutting, but more thorough; treats the camera like a real thing.
- Add a small collider to your camera (usually a sphere works best)
- Make it trigger only so it doesn’t physically push things
- Create layers specifically for camera collision
- When the camera collider hits something, adjust its position
- Add smoothing for the adjustment to avoid jarring movements
Parallax Effects
Creates an illusion of depth by moving different layers at different speeds as the camera moves.
- Divide your background into multiple layers (far, middle, close)
- As the camera moves, move the far layers slower than the close layers
- Use a simple formula: layerMovement = cameraMovement × depthFactor
- Typical depth factors: far background (0.1-0.3), middle (0.4-0.7), foreground (0.8-0.9)
- Make sure your art has enough overlap to prevent seeing edges during movement
Camera Masks
Changes the picture, like using glasses, by adding shapes or filters.
- Create a mask texture (black where transparent, white where visible)
- Apply the mask as a post-processing effect on your camera
- For simple masks, you can use a UI element positioned over the screen
- For advanced effects, use shader-based masks that can change dynamically
- Consider adding subtle animations to masks for a more organic feel
Read More: Camera in Animation
Split Camera Rendering
Using different camera settings for the player model vs. the environment creates better visuals.
Implementation steps:
- Create two cameras: one for the character model and one for the environment
- Set different FOV values for each (usually wider for the character camera)
- Use culling masks to make each camera render only specific layers
- Ensure proper depth sorting between the two renders
- Sync movement between both cameras while maintaining their separate settings
What Are Game-Specific Camera Setups?
Different games need totally different camera setups! I mean, what works for a racing game would be a disaster in a horror game, right?
| Game Type | Camera Setup | Key Features | Examples |
| FPS Cameras | First-person, eye level | Weapon models often at different FOV than the world- Slight bob for walking | Call of Duty, DOOM, Counter-Strike |
| Action Game Cameras | Third-person, over the shoulder | Auto-adjustment during combat- Target lock systems- Dynamic repositioning around obstacles | God of War, Uncharted, Assassin’s Creed |
| Horror Game Cameras | Restricted, tight FOV | Narrower FOV (50-65°)- Limited view behind character- Deliberately slow turning | Resident Evil, Dead Space, and Amnesia |
| Racing Game Cameras | Multiple options | Bumper cam (on car front)- Cockpit view (in driver seat)- Chase cam (behind car) | Forza, Gran Turismo, Need for Speed |
| Strategy Game Cameras | Top-down/isometric | High angle looking down- Wide viewing area- Zoom in/out functionality | StarCraft, Civilization, Age of Empires |
Final Thoughts
The truth is that learning camera methods isn’t just a list of technical skills; it’s a real art form that calls for both technical knowledge and an eye for what looks good. You don’t have to use just one method! Depending on what’s going on in the game, most professional games use a mix of different camera angles. For example, you could use a tight follow camera while exploring and then switch to a more dramatic angle when the story needs it. Or maybe your game has fast parts where the camera moves around a lot and puzzle areas where the camera stays in one place.