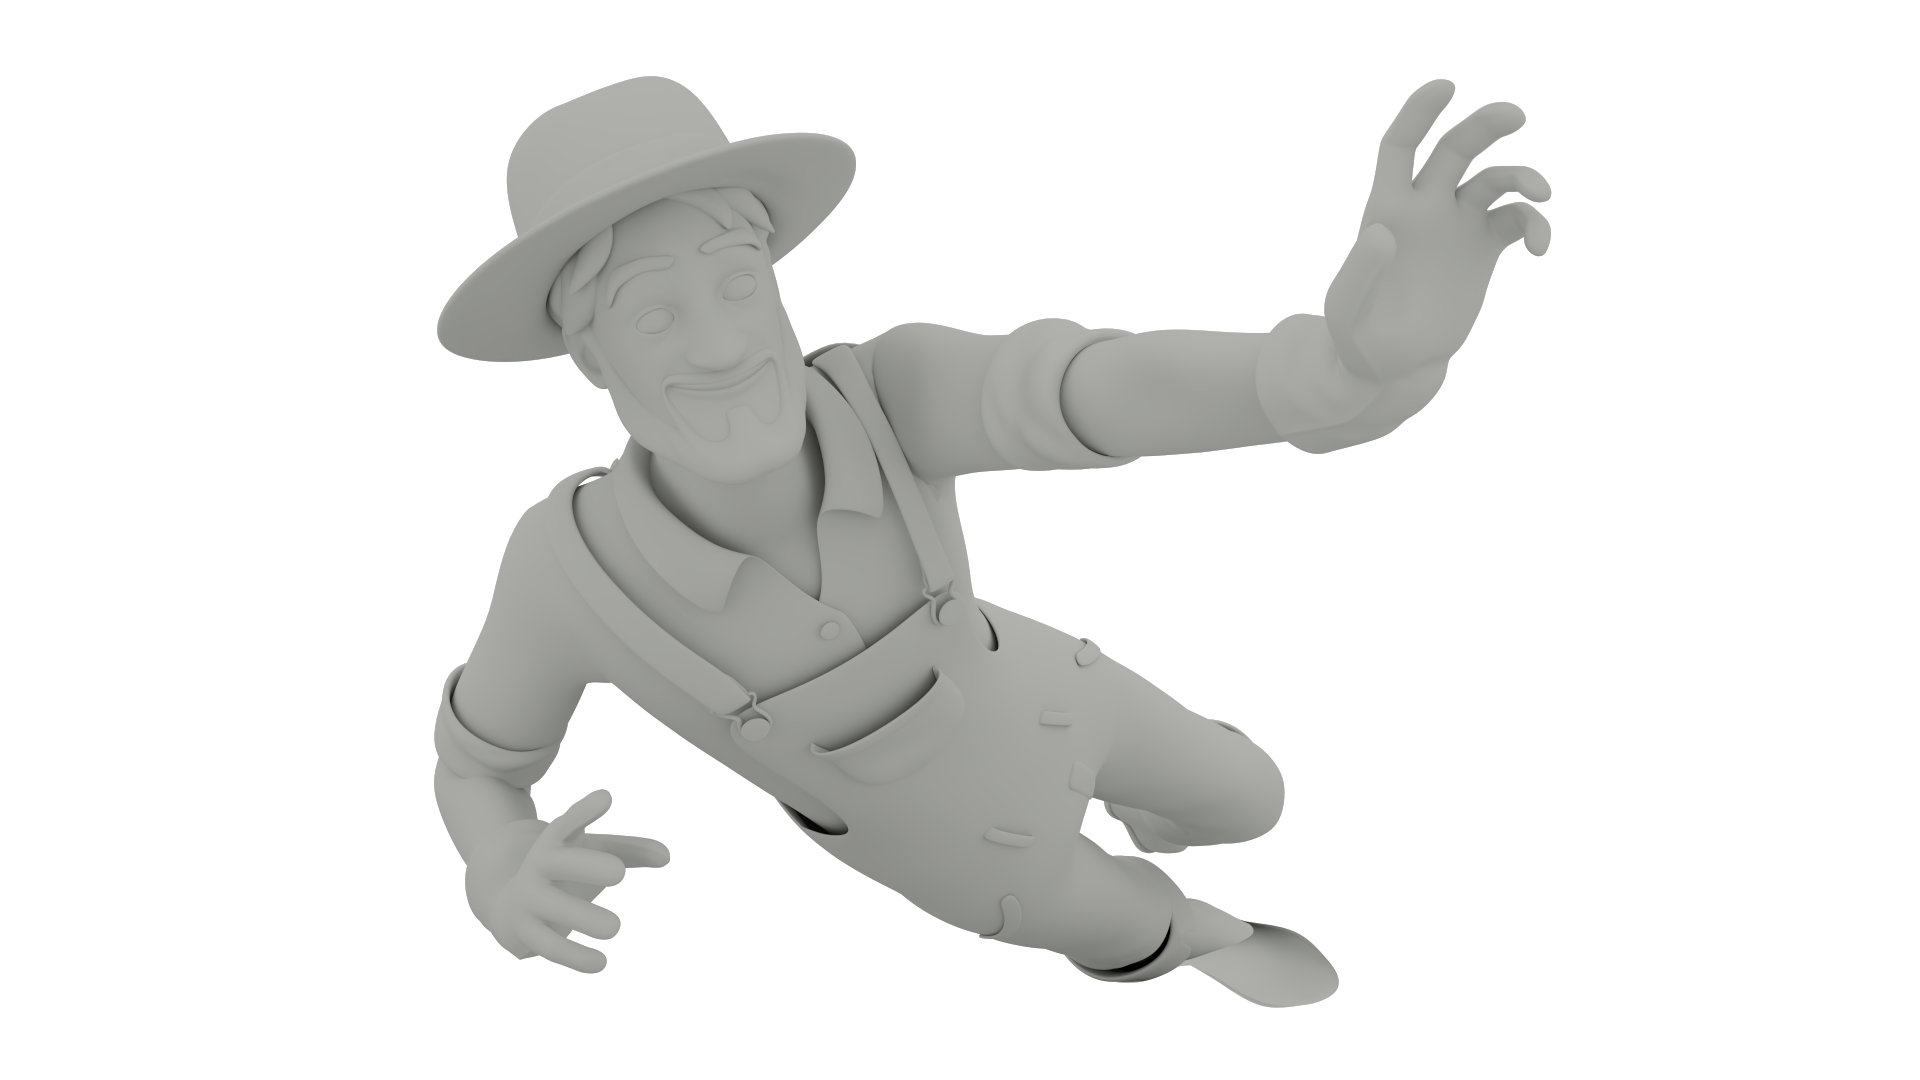
A 3D model without texture is only a shape. It may have the right form, proportions, and topology, but it will still look unfinished until the surface tells the viewer what the object is made of. 3D texturing is the process that gives a model its visible surface details, such as color, roughness, metalness, skin pores, fabric patterns, scratches, dust, and material behavior.
In games, animation, product visualization, and VFX, 3D texturing is one of the most important steps in making an asset feel believable. A sword can look like polished steel, a creature can have rough skin, a building can show age and damage, and a product can look like plastic, glass, rubber, or brushed metal. All of this comes from the texturing and material work applied to the 3D model.
Good 3D texturing is not just about adding images to a model. It is about understanding materials, light, scale, references, UVs, texture maps, rendering, and the final purpose of the asset. A texture made for a mobile game will not be built the same way as a texture made for a cinematic animation or a high-end product render.
What Is 3D Texturing?
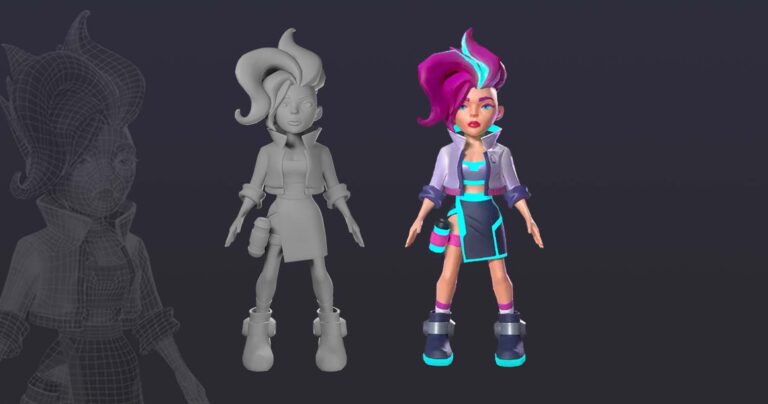
3D texturing is the process of creating and applying surface details to a 3D model. These details define how the model looks and reacts to light. Textures can show color, material type, bumps, scratches, reflections, transparency, dirt, fabric patterns, and many other visual qualities.
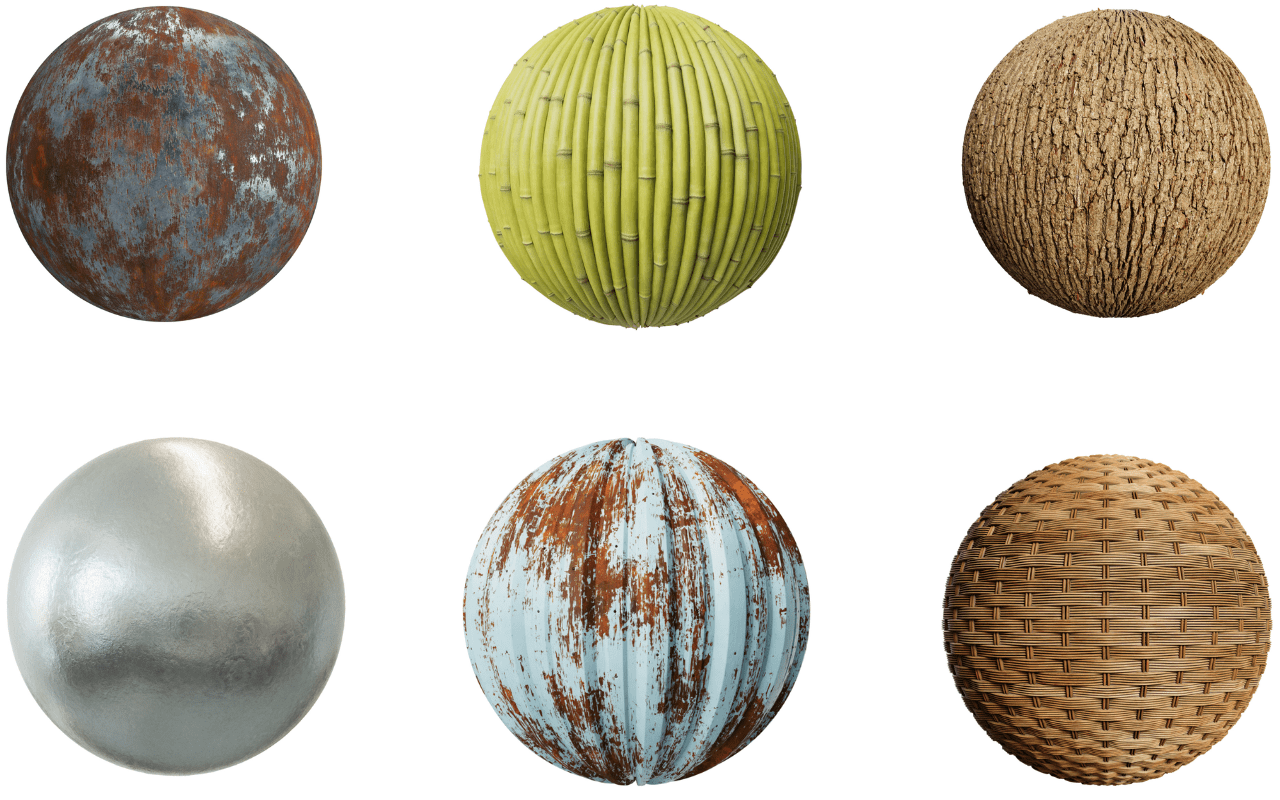
For example, the same 3D cube can become a wooden box, a metal container, a stone block, or a plastic toy depending on the textures and materials applied to it. The geometry may stay the same, but the surface information completely changes how the object is perceived.
In a professional 3D art pipeline, texturing usually comes after modeling and UV unwrapping. The model is created first, then its surface is prepared for texture placement, and then artists paint or generate the textures. After that, the asset is tested in lighting and rendering to make sure it looks right in the final scene.

Why Texturing Matters in 3D Models
Texturing matters because it adds identity, detail, and realism to 3D assets. Without texture, even a well-modeled object can look plain or artificial. Textures help the viewer understand what an object is made of and how it has been used.
A clean metal surface can suggest a new product. A scratched and dusty metal surface can suggest age, battle, or industrial use. A character’s skin texture can show age, emotion, stylization, or species. A game environment can feel abandoned, futuristic, magical, or realistic depending on the texture direction.
Texturing is also important for storytelling. In animation and games, surface details can communicate history without dialogue. A worn weapon, a dirty jacket, or a cracked wall can tell the audience something about the world and the character.
3D Texturing vs 3D Modeling
3D modeling and 3D texturing are closely connected, but they are not the same. Modeling techniques create the shape of the object. Texturing defines the surface appearance of that object.
A modeler focuses on form, topology, silhouette, and proportions. A texture artist focuses on color, material definition, surface details, and how the asset reacts to light. In many projects, especially smaller ones, the same artist may handle both tasks. In larger pipelines, modeling and texturing are often separate roles.
A strong model makes texturing easier. Clean topology, correct scale, and good UVs help the texture artist create better results. At the same time, good texturing can make a simple model look much richer and more detailed than its geometry alone.
Read More: 3D Modeling vs 3D Sculpting
How Textures Add Realism to 3D Assets
Textures add realism by introducing the small imperfections that exist in real materials. Real surfaces are rarely perfect. Wood has grain, skin has pores, metal has scratches, fabric has fibers, and stone has cracks or color variation.
In 3D, these details are often created through texture maps. Some maps control color, while others control roughness, height, reflection, or surface depth. Together, they help the renderer understand how the material should behave under light.
This is why realistic texturing depends heavily on reference. A texture artist studies how real materials look in different lighting conditions, then recreates those qualities in a controlled digital workflow.
How Does Texturing Work in 3D?
Texturing in 3D usually starts with a finished or nearly finished model. The artist prepares the model’s UVs, creates or applies texture maps, builds materials, and tests the asset in the target render engine or game engine.
The exact workflow depends on the project. A stylized mobile game asset may use hand-painted textures and simple maps. A realistic cinematic character may use high-resolution skin maps, displacement, subsurface scattering, and detailed shader work. A product render may require clean, accurate materials that match real manufacturing references.
The goal is always the same: to make the model look correct for its art style, purpose, and final platform.
From 3D Model to Textured Asset
The texturing process usually begins after the model is approved. The artist checks the model for technical issues, prepares UVs, and decides how much texture resolution is needed.
Then the artist creates the main surface information. This can be painted by hand, generated procedurally, baked from a high-poly sculpt, captured from real-world photos, or built using a mix of techniques.
After the textures are created, they are connected to materials or shaders. The artist then tests the asset under lighting to see if the surface behaves correctly. This step is important because a texture that looks good in isolation may look wrong when placed inside the final scene.
UV Mapping and Texture Placement
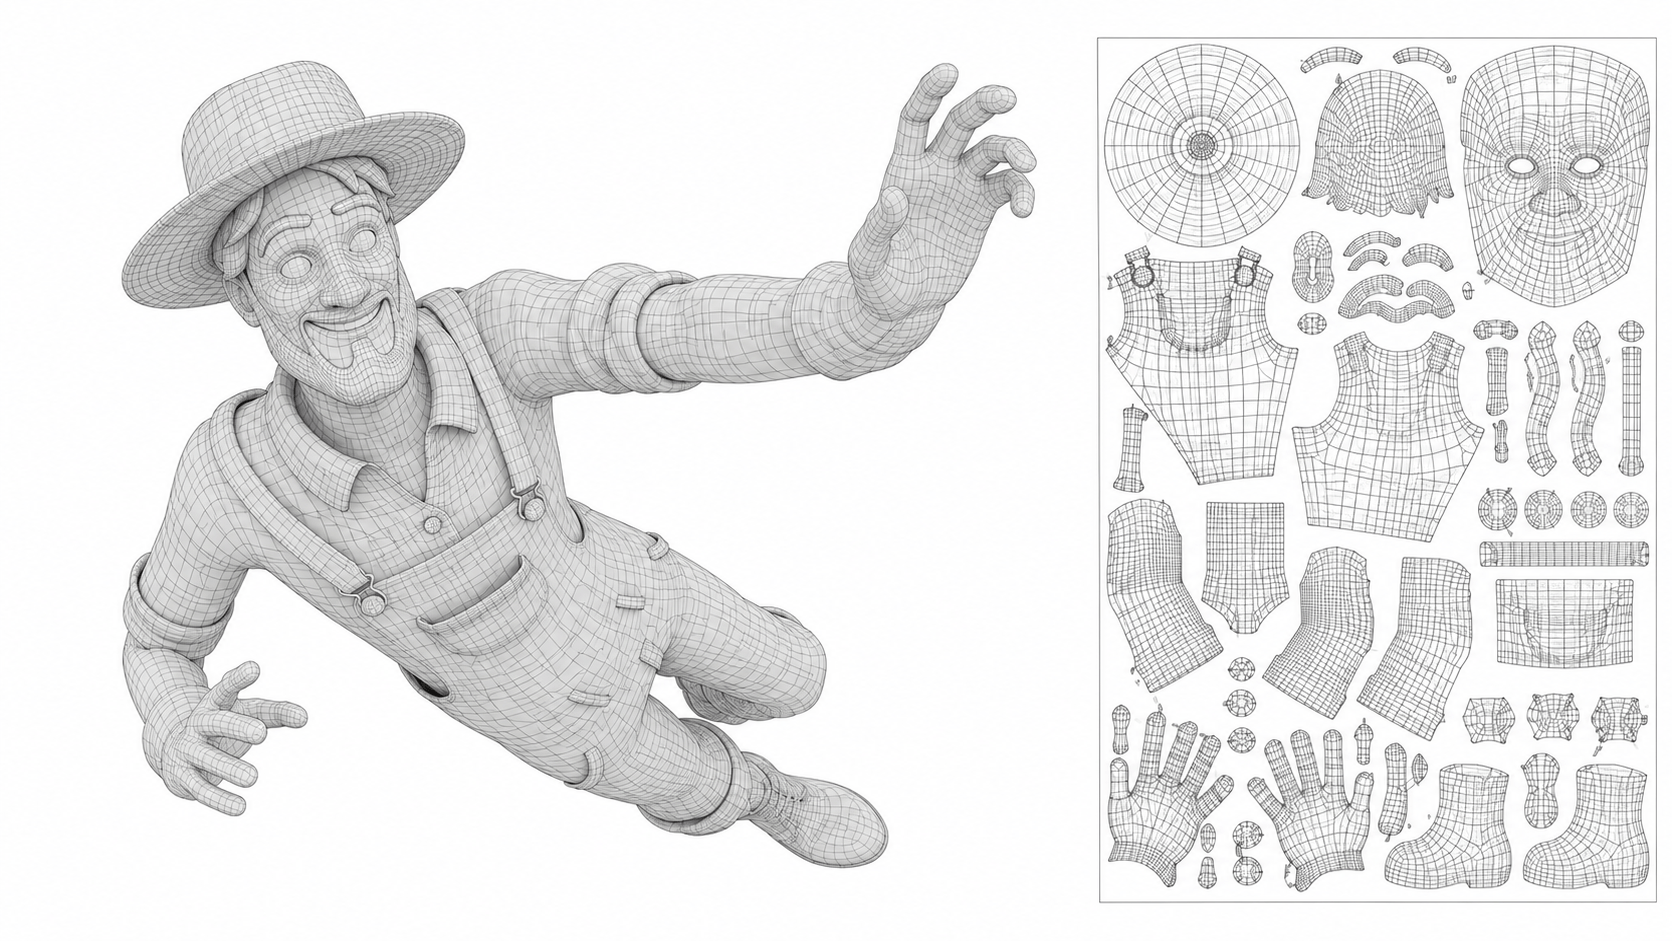
UV mapping is the process of unfolding a 3D model’s surface into a 2D layout so textures can be placed correctly. It is similar to cutting and flattening a paper model so an image can be painted on it.
Good UVs are important because they affect texture quality. If the UVs are stretched, the texture may look distorted. If the UV layout wastes space, the final texture may lose resolution. If seams are placed badly, visible texture breaks can appear in the final render.
For characters, UV seams are usually placed in less visible areas. For props and hard-surface objects, UVs are often planned around edges, panels, and natural material separations. A clean UV layout helps the texture artist work faster and produce better results.
Texture Rendering and Final Look Development
Texture rendering is where textures are tested inside the final lighting and material setup. This step shows how the texture reacts to light, reflection, shadows, and camera movement.
A texture can look strong in a painting tool but too shiny, too flat, or too noisy in the final render. That is why look development is an essential part of professional texturing. Artists adjust roughness, color values, material response, and small details until the asset fits the scene.
For games, texture rendering also includes performance considerations. Textures must look good while staying optimized for real-time rendering.
For 3D animation services and VFX, the priority may be higher resolution, more accurate shading, and cinematic detail.
Main Types of 3D Textures
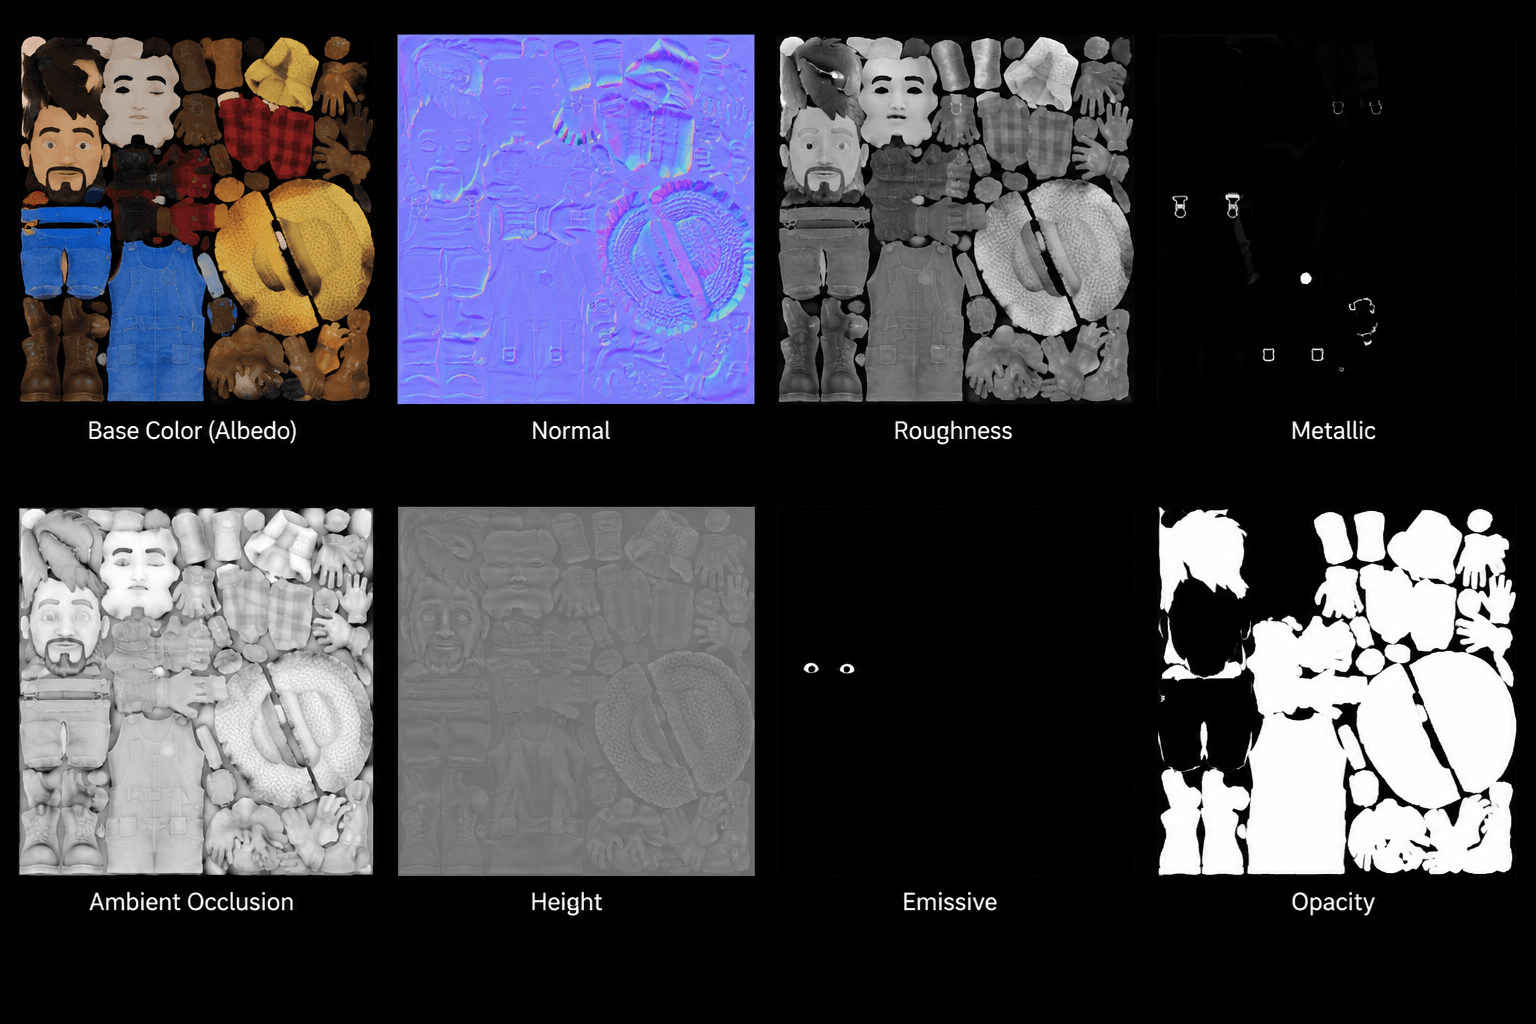
A 3D texture is not always one image. In modern pipelines, a material is often built from several texture maps. Each map controls a different part of the surface.
The most common texture maps include color, normal, bump, displacement, roughness, metallic, specular, opacity, and ambient occlusion maps. These maps work together to create the final material.
Understanding these maps is important because they define how the asset will appear in the final render.
Color, Albedo, and Diffuse Maps
Color, albedo, and diffuse maps define the base color of a material. They show the visible color information of the surface without strong lighting or shadow information.
For example, the color map of a wooden table contains the wood tone and grain pattern. The color map of a character’s face contains skin tone, freckles, scars, makeup, or painted details.
In PBR workflows, the albedo map should usually avoid baked-in lighting or strong shadows because lighting should come from the render engine, not the texture itself.
Normal, Bump, and Displacement Maps
Normal, bump, and displacement maps are used to create surface depth and detail.
A bump map creates the illusion of small height changes using grayscale information. A normal map changes how light reacts to the surface, making details appear raised or recessed without adding actual geometry. A displacement map can physically move the geometry or render-time surface, creating more accurate depth.
Normal maps are widely used in games because they add detail without increasing polygon count. Displacement maps are more common in high-end rendering, cinematic assets, environments, creatures, and close-up shots where real surface depth matters.
Roughness, Metallic, and Specular Maps
Roughness, metallic, and specular maps control how a material reflects light.
A roughness map defines whether a surface looks smooth and shiny or rough and matte. A metallic map defines which parts of the surface behave like metal. A specular map controls the strength and quality of reflections in certain workflows.
These maps are especially important for realistic materials. Metal, plastic, rubber, glass, skin, fabric, and stone all reflect light differently. Without proper roughness and reflection control, even a detailed texture can look fake.
3D Texturing Techniques
There are several 3D texturing techniques, and each one fits a different production need. Some projects need stylized hand-painted textures. Others need realistic PBR materials. Some assets are built from procedural systems, while others use scanned or photo-based data.
Professional texture artists often combine several methods instead of relying on one technique. The best approach depends on the art direction, budget, timeline, target platform, and final quality level.
Hand-Painted Texturing
Hand-painted texturing is a technique where the artist manually paints the surface details of the model. This style is common in stylized games, fantasy assets, mobile games, animation, and projects that need a strong artistic look.
In hand-painted texturing, the artist may paint shadows, highlights, color variation, scratches, and material details directly into the texture. The final look can be very expressive and art-directed.
This technique is not always focused on realism. Instead, it focuses on clarity, shape, color harmony, and style. Many stylized game assets use hand-painted textures because they are lightweight, readable, and visually charming.
Procedural Texturing
Procedural texturing uses mathematical patterns, nodes, and rules to generate textures. Instead of painting every detail manually, the artist creates a system that can produce patterns such as noise, scratches, dirt, stone, wood grain, fabric, or metal wear.
Procedural texturing is useful when artists need flexible and repeatable results. It allows quick changes to scale, color, roughness, and detail density. It is also useful for large environments, terrain, architecture, and assets that need variation.
The main advantage of procedural texturing is control. The artist can create a material system and adjust it without repainting everything from scratch.
PBR Texturing
PBR stands for Physically Based Rendering. PBR texturing is a workflow that creates materials based on how real surfaces react to light. It is widely used in games, animation, VFX, and product animation services.
In a PBR workflow, texture maps such as albedo, roughness, metallic, normal, and ambient occlusion work together to create consistent material behavior. This helps assets look more believable under different lighting conditions.
PBR is especially important for real-time engines like Unreal Engine and Unity, because assets need to look consistent across different scenes and lighting setups.
Read More: PBR vs NPR
Photogrammetry and Image-Based Texturing
Photogrammetry uses photos of real objects or surfaces to create 3D models and textures. Image-based texturing uses real photos as a base for creating material details.
These techniques are useful for realistic environments, props, historical objects, natural surfaces, and production assets that need real-world accuracy. Stone walls, tree bark, roads, ruins, fabrics, and scanned props can all benefit from image-based workflows.
The challenge is cleanup. Raw photo textures often need correction, tiling, color balancing, seam removal, and material map generation before they are ready for production.
Decals, Sculpting, and Detail Maps
Decals are texture elements placed on top of a surface, such as stickers, scratches, logos, dirt, cracks, labels, or damage marks. They are useful for adding detail without repainting the entire texture.
Sculpting is often used to create high-resolution details that can be baked into texture maps. A character artist may sculpt wrinkles, pores, scars, or armor details, then bake those details into normal or displacement maps.
Detail maps are smaller repeating textures used to add fine surface information. They can help materials look sharper in close-up shots without requiring extremely large texture files.
3D Texturing Workflow
A professional 3D texturing workflow is not random. It follows a controlled process that helps artists create clean, consistent, and production-ready assets.
The workflow can change depending on the studio and project type, but most 3D texturing pipelines include model preparation, UV unwrapping, baking, texture creation, material setup, look development, optimization, and final export.
Each step affects the final quality of the asset.
Preparing the 3D Model
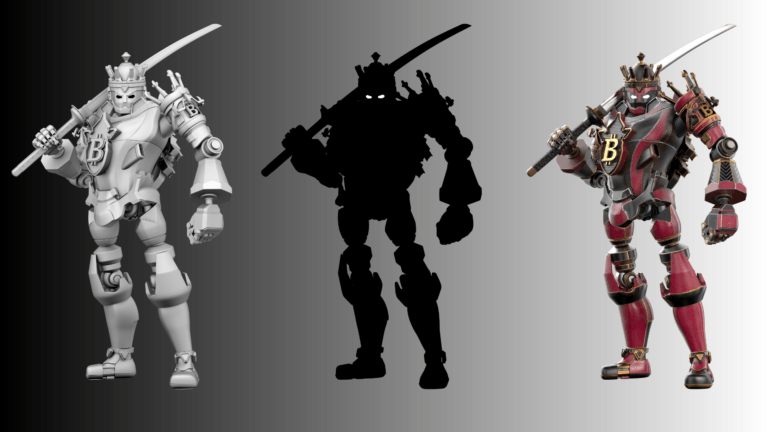
Before texturing begins, the model should be checked for technical and artistic issues. The geometry should be clean, the scale should be correct, and the asset should be ready for UV unwrapping.
For game assets, artists may also prepare high-poly and low-poly versions. The high-poly model contains detailed sculpting or modeling information, while the low-poly model is optimized for real-time performance. Details from the high-poly model can be baked into maps for the low-poly version.
If the model has problems, texturing becomes harder. Bad topology, incorrect scale, overlapping surfaces, or messy geometry can create issues during UV mapping, baking, and rendering.
UV Unwrapping the Asset
UV unwrapping prepares the model for texture placement. The artist creates a clean 2D layout of the model’s surface and organizes the UV islands.
Good UVs help maintain texture resolution and reduce distortion. Important visible areas may receive more texture space, while hidden areas may receive less. For example, a character’s face usually needs more texture detail than the bottom of a shoe.
UV planning is especially important for game assets, where texture space and performance are limited. A good UV layout can improve quality without increasing the texture size.
Painting or Generating Textures
After UVs are ready, the artist creates the texture maps. This can be done in software such as Substance Painter, Mari, Blender, ZBrush, or 3D-Coat.
The artist may paint textures manually, use smart materials, generate procedural layers, bake details from a high-poly model, or combine photo references with hand-painted work. The goal is to create surface details that match the art direction and production requirements.
At this stage, artists focus on color, wear, roughness, material separation, dirt, edges, scratches, and small imperfections. The texture should not only look detailed, but also make sense for the object’s use and story.
Testing Materials in Lighting and Rendering
Once the textures are created, they must be tested in the final rendering environment. This could be a game engine, animation renderer, or product visualization setup.
Lighting can completely change how a texture looks. A material that appears correct in one lighting setup may look too dark, too shiny, too flat, or too saturated in another. Artists often adjust maps several times during look development.
Testing is especially important for hero assets, close-up characters, product renders, and cinematic shots. These assets need to hold up under strong lighting, camera movement, and high-resolution output.
Best Software for 3D Texturing
There are many tools for 3D texturing, and each one has different strengths. The best 3D software depends on the type of asset, project scale, pipeline, and final output.
Some tools are better for game assets, while others are stronger for film, VFX, or high-resolution character work. Many studios use more than one software in the same pipeline.
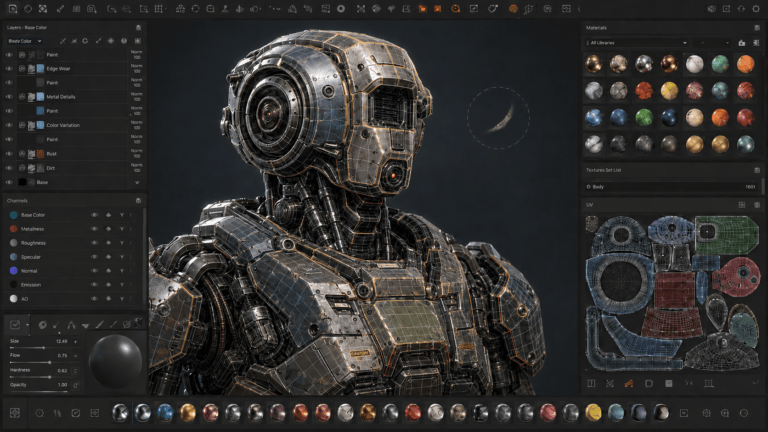
Substance Painter
Substance Painter is one of the most popular tools for 3D texturing. It is widely used in game art, animation, product visualization, and real-time production.
Artists use Substance Painter to paint directly on 3D models, create PBR materials, add masks, use smart materials, and export texture maps for game engines or renderers. It is especially strong for props, characters, weapons, vehicles, and environment assets.
Its layer-based workflow makes it flexible and familiar for artists who already understand digital painting and material building.
Mari
Mari is a high-end texturing tool used in VFX production, film, and large-scale production. It is known for handling very high-resolution textures and complex assets.
Mari is often used for creatures, realistic characters, large environments, and cinematic assets that need extreme detail. It can handle heavy texture data that may be too demanding for smaller tools.
For studios working on feature films, high-end VFX, or close-up creature work, Mari can be a strong choice.
Blender
Blender includes modeling, UV mapping, material creation, painting, and rendering tools in one package. It is a flexible option for artists who want to manage several parts of the 3D workflow in the same software.
Blender’s shader nodes are useful for procedural materials, look development, and rendering techniques. It can also be used for texture painting and UV editing.
While many studios use specialized texturing tools, Blender is still powerful for independent artists, small teams, stylized assets, and projects that need an all-in-one workflow.
ZBrush and 3D-Coat
ZBrush is mainly known for digital sculpting, but it is also important in the texturing pipeline because artists can sculpt high-resolution details and bake them into texture maps. It is widely used for characters, creatures, props, and organic assets.
3D-Coat is another useful tool for sculpting, retopology, UVs, and painting. It is popular among artists who want a flexible asset creation workflow with strong painting and surface detail features.
Both tools can support the texturing process, especially when the asset needs sculpted details, hand-painted surfaces, or high-resolution surface information.
Where Is 3D Texturing Used?
3D texturing services are used in almost every industry that works with 3D visuals. Games, animation, VFX, product design, architecture, advertising, education, and virtual production all rely on textures to make assets visually complete.
The workflow may change from one industry to another, but the purpose remains the same. Texturing helps 3D assets look finished, readable, and believable.
Game Art and Real-Time Assets
In game art services, texturing must balance quality and performance. Assets need to look good while running in real time on the target platform. A mobile game, PC game, console game, and VR experience may all require different texture budgets.
Game textures often use optimized maps, texture atlases, tiling materials, trimsheets, and PBR workflows. Artists must think about memory limits, texture resolution, draw calls, and engine compatibility.
Good game texturing also improves readability. Players need to understand characters, environments, items, and interactive objects quickly during gameplay.
Animation and Cinematic Production
In 3D animation pipeline and cinematic production, textures help define the look and mood of the story. A stylized animated film may use simplified textures and strong colors, while a cinematic game trailer may use realistic materials and detailed surface information.
Character textures are especially important in animation. Skin, clothing, hair, props, and accessories all need to match the character’s personality and the visual style of the project.
For cinematic projects, texture quality is often higher because assets may appear in close-up shots and high-resolution renders.
Product Visualization and Architecture
In 3D product visualization services, texturing helps digital products look like real manufactured objects. Materials such as glass, rubber, plastic, leather, metal, fabric, and ceramic must look accurate and appealing.
Architecture also depends heavily on texturing. Walls, floors, furniture, stone, wood, concrete, tiles, and fabrics all need strong material definition. Good textures can make a 3D architectural render feel realistic and convincing.
For both product visualization and architecture, material accuracy is often more important than stylization. The texture must match the real product, brand, or design reference.
Tips for Creating Realistic 3D Textures
Creating realistic textures starts with studying real materials. Artists should observe how surfaces reflect light, show wear, and vary in color and detail.
Use Real References:
References help artists understand material properties such as color, roughness, and wear patterns. Even for stylized projects, real-world references provide a strong foundation.
Balance Detail and Texture Resolution:
Texture detail should match the asset’s importance and viewing distance. Use enough resolution to maintain quality without wasting resources or affecting performance.
Test Textures Under Different Lighting Conditions:
Always test textures under multiple lighting setups. Materials can look very different depending on the environment, and early testing helps identify issues before final rendering.
Conclusion
3D texturing is the process that turns a plain 3D model into a believable asset. It defines color, material, surface detail, roughness, reflection, and visual character. Without texturing, even a strong model can look unfinished.
A good texture artist does more than paint details. They understand materials, UVs, texture maps, lighting, rendering, optimization, and the final purpose of the asset. This is why 3D texturing is such an important part of game art, animation, VFX, product visualization, and architectural rendering.
Whether the project needs hand-painted textures, realistic PBR materials, procedural surfaces, or cinematic-level detail, the texturing workflow must support the creative direction and technical requirements of the final product.