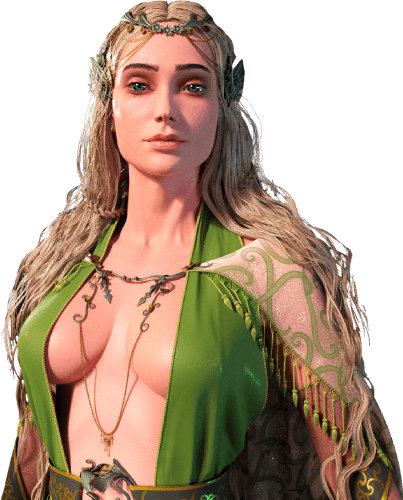
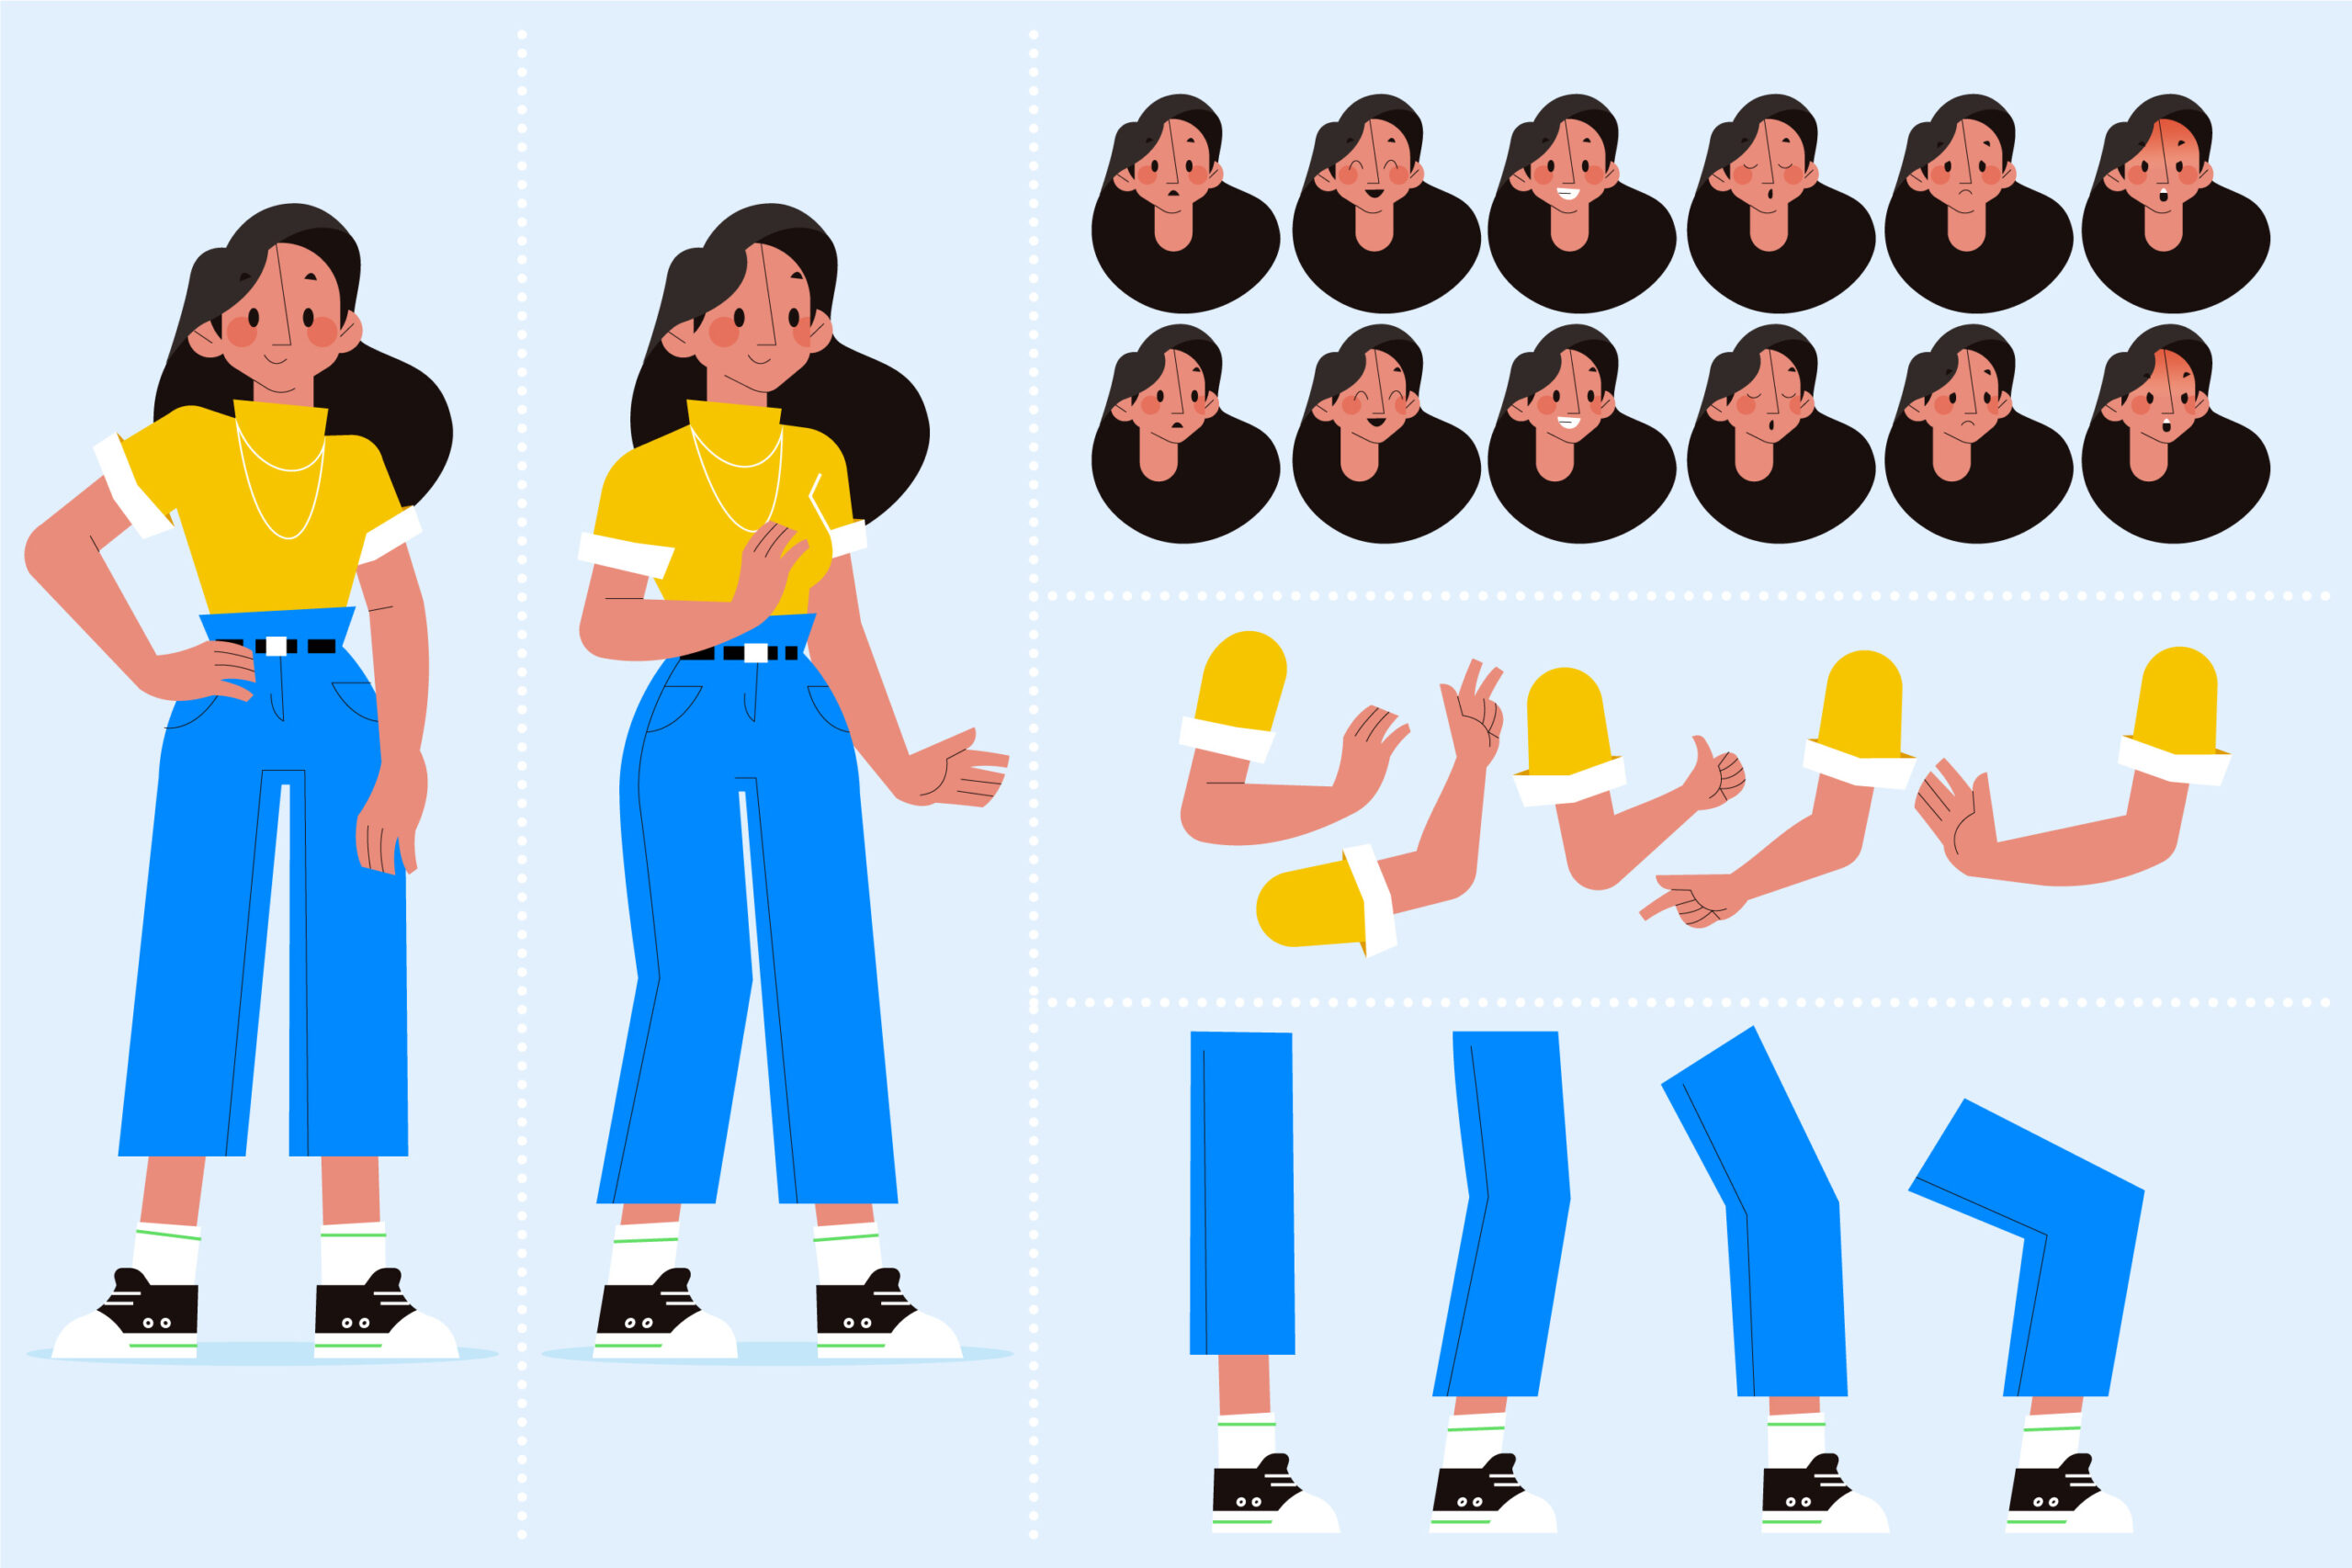
The rigging and skinning pipeline truly is the heartbeat of what makes characters feel alive in your favorite games and movies! Artists and animation studios start by carefully building the character’s digital base. Next, they make the tools that animators use.
After that, they use that careful skinning process to connect the outer model to the bones. Finally, they do some very patient weight drawing and testing to make the figures move naturally, instead of like those awkward toy robots we had as kids.
Sometimes rigging and skinning are very difficult and technical, but when they’re done with love and care, they give figures a unique life that makes us laugh, cry, and feel like they’re real.
What Is the Rigging and Skinning Pipeline for Characters?
We use 3D rigging and skinning to create motion for 3D figures. In the same way that we have bones, rigging gives the figure a skeleton.
And, skinning allows the 3D model to move smoothly by wrapping it around the frame, a process typically done within 3D modeling software by an animation modeler to ensure natural deformations during movement.Once the skeleton is built inside a game character, the skin is attached to the bones. This process is called “skinning.”
It works a bit like a doll; to make it move right, you need to put sticks and lines inside it. This step is a key part of the 3D animation pipeline. As a result of this step, game figures would be frozen models instead of the moving and dancing ones we love.
What Is a Character Rigging Pipeline?
Actually, character rigging is a key technique used to prepare digital characters for various types of animation. It’s a process that happens behind the scenes to turn static 3D models into animated, emotive, and narrative characters, bridging the gap between the 3D modeling process and animation by applying specialized 3D modeling techniques that allow for realistic movement and expression.
1- Preparation and Clean-Up
Every skilled rigging artist is aware that before any rigging can occur, the model must be perfect. The important work you do ahead of time will save you a lot of trouble later on.
- Model inspection: Hunting for those sneaky geometry issues that could cause weird deformations
- Topology check: Making sure there are nice, clean edge loops around joints (you know, the bendy parts!)
- Symmetry verification: Double-checking that both sides match up perfectly
- Scene setup: Getting everything organized just right in the workspace
- Reference gathering: Collecting all those design docs and animation requirements
Usually, professional character models need between 8 and 12 edge loops around their knees, elbows, and other major joints. If you don’t add enough loops, your figure will bend like its limbs are made of cardboard instead of flesh and bone.
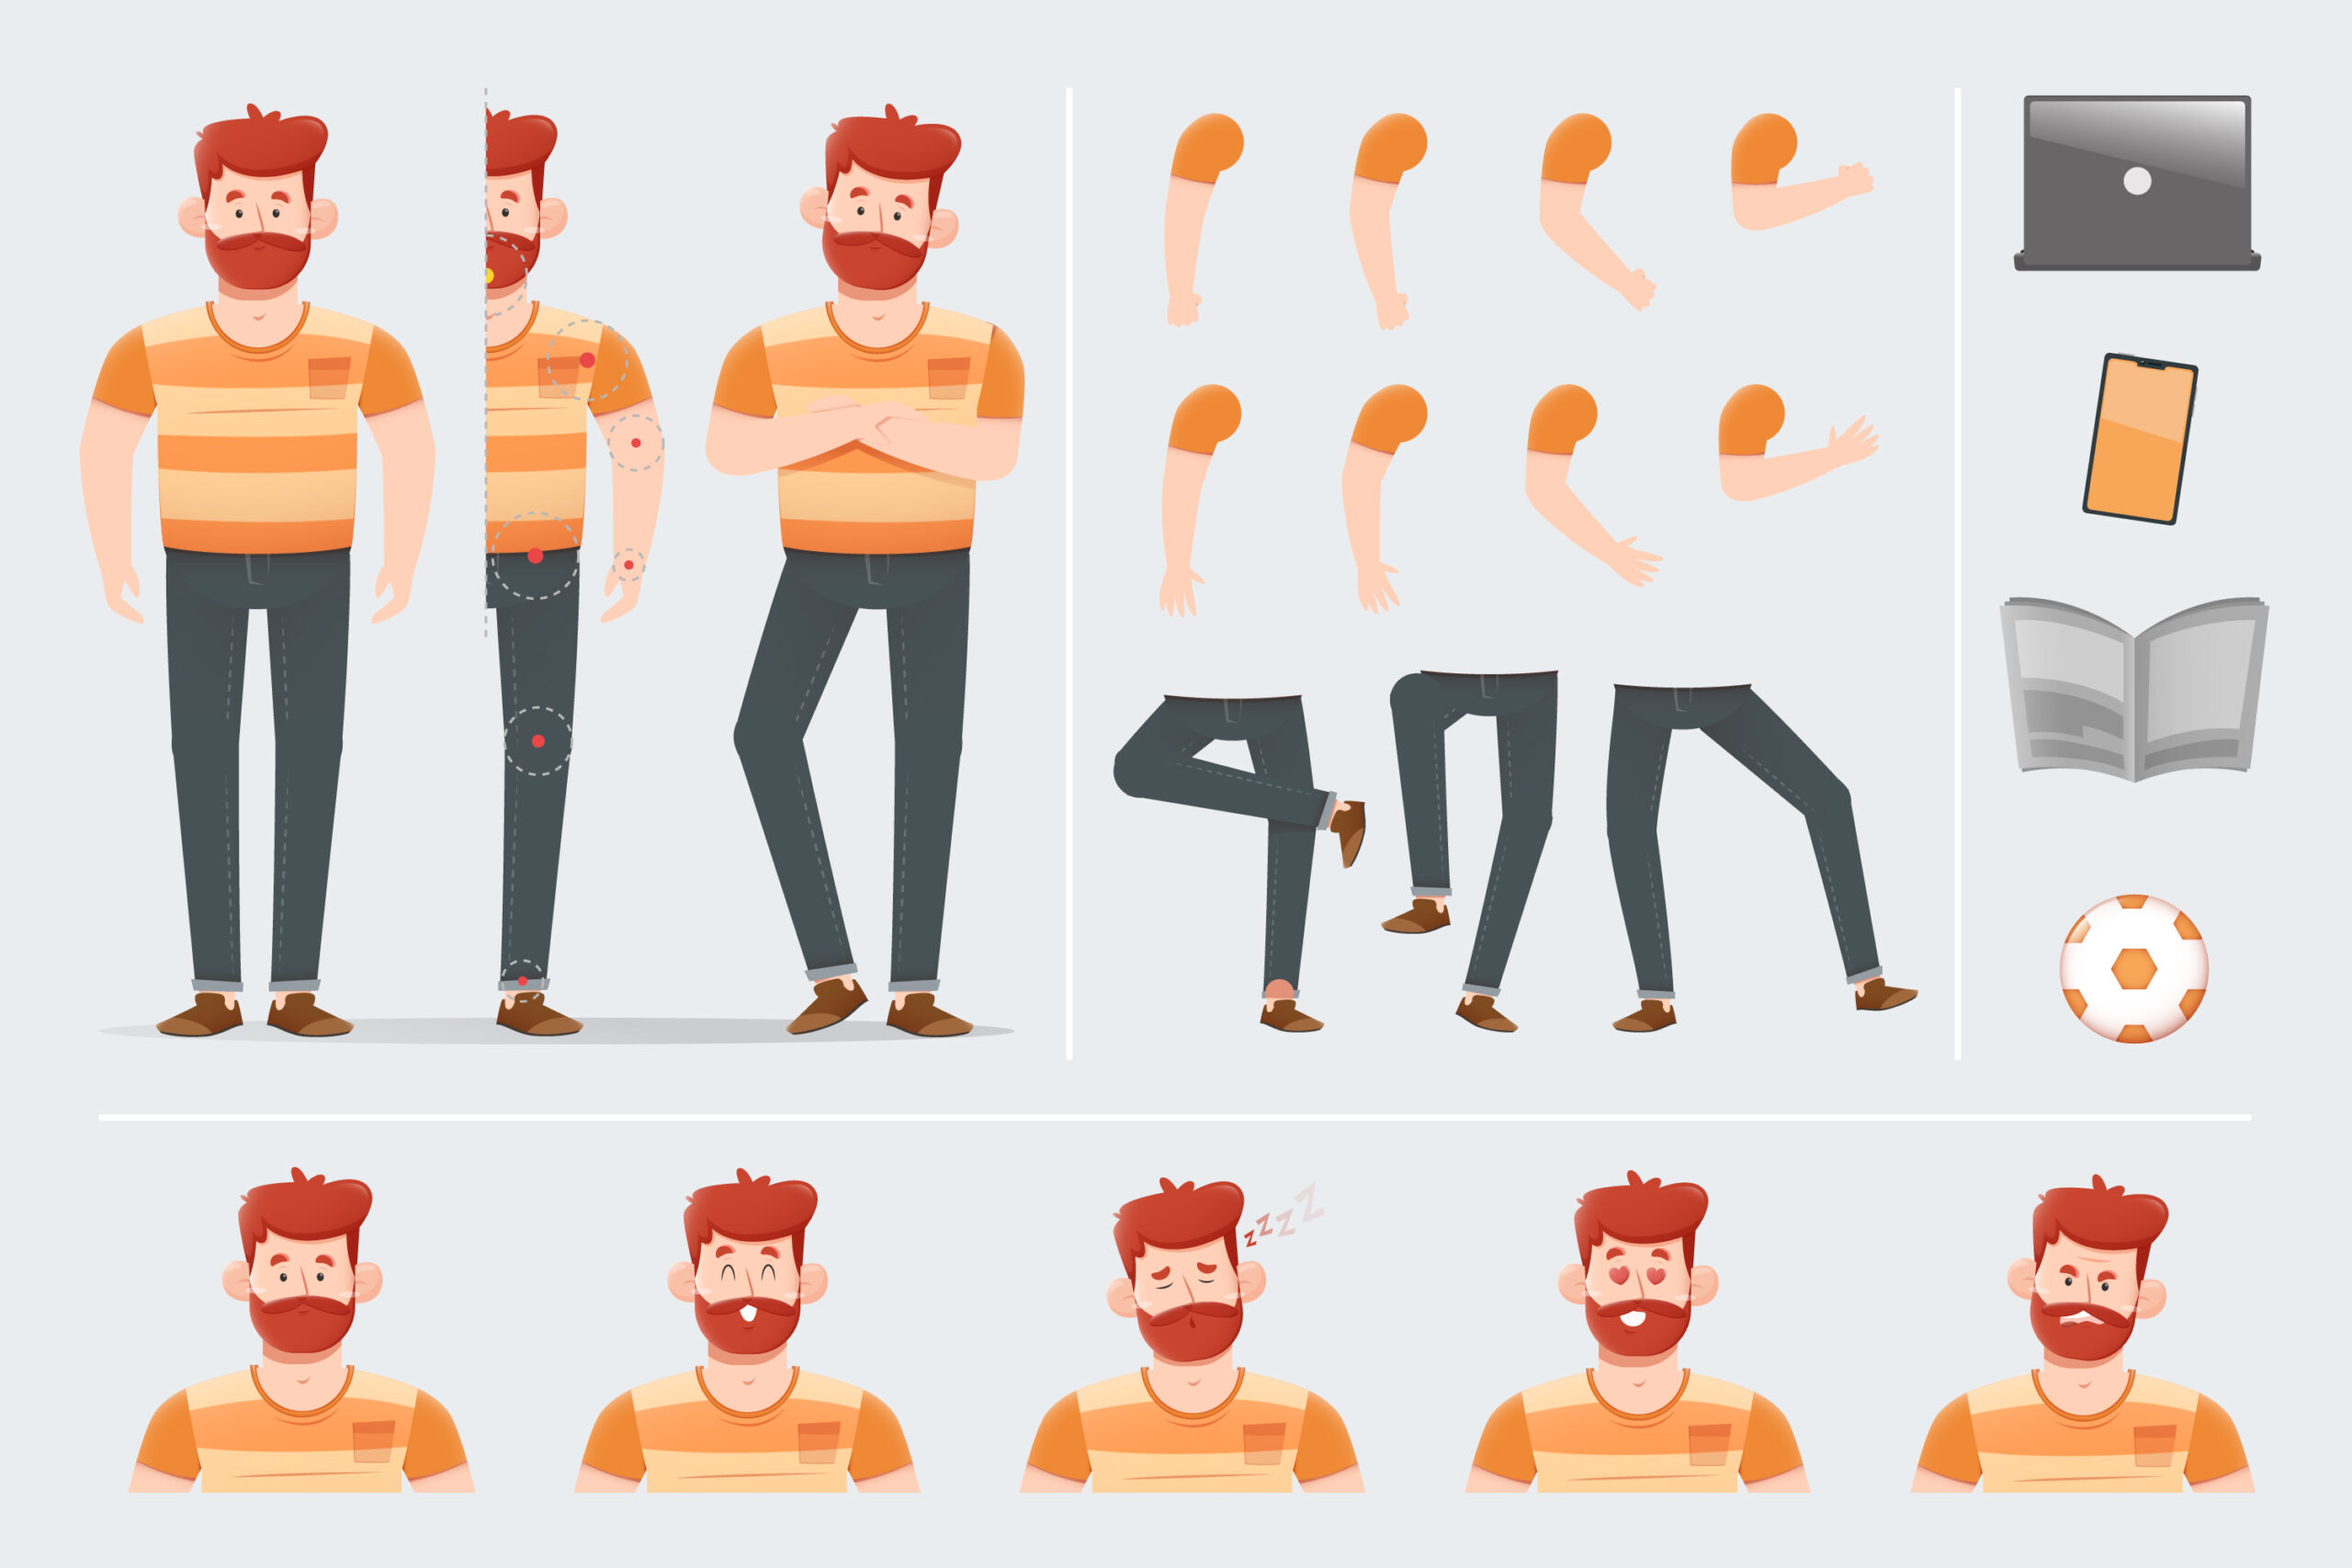
2- Building the Skeleton
Now comes the part where I feel like a digital doctor: creating the bones that will bring everything to life!
During this part of making the body, you have to be very careful since each joint’s position is very important for normal movement.
| Character Type | Typical Joints | Special Features |
| Humanoid | 50-80 joints | 15-20 finger joints alone! |
| Quadruped | 80-120 joints | Extra spine flexibility |
| Cartoon | 30-60 joints | Stretchy limbs capability |
| Fantasy Creature | 100+ joints | Wings, tails, tentacles, etc. |
- Joint placement: Strategically positioning bones exactly where natural movement happens in the body, like placing a joint at the elbow rather than the middle of the forearm.
- Joint orientation: Setting the rotation axes just right (this is so easy to mess up!) for proper bending direction. For example, knee joints should rotate only on one axis.
- Hierarchy setup: Building that parent-child relationship between all the bones so when you move a shoulder, the entire arm follows naturally.
- Joint naming: Using super clear naming systems that everyone can understand (e.g., “L_forearm_01_jnt” vs just “joint27”)
- Spine construction: Creating a backbone with just the right flexibility, typically using 5-7 joints for a human character to balance movement range and control
3- Creating Controls and Rig Interface
No one wants to draw with real bones because it would be awful! Instead, artists use these pretty, bright control buttons that make it much easier to understand how to move.
- Create a control curve: Use different colored forms, like circles, squares, and lines, to show different body parts. For example, blue controls are on the left, red controls are on the right, and yellow controls are in the middle.
- Hierarchy of control: Set up which controls move other controls so that when the parent moves the hip control, the children’s legs move along with it.
- Set up attributes: A Simple “foot roll” slider from 0 to 10 that handles the 12 or more bones in a realistic foot automatically is one example of a useful slider or button.
- IK and FK systems: Most expert rigs have FK/IK switches for each limb, so you can build both Forward Kinematics (moving joints one at a time) and Inverse Kinematics (putting the hand and the arm follow).
- Space switching: Input different coordinate systems. For instance, a hand control can be set with a simple 0-1 scale to follow the body (local space) or stay still in the world (world space).
4- Rig Testing and Troubleshooting
Before handing off to animation, every rig needs a serious workout to make sure it can handle everything thrown at it. Trust me, finding problems early saves so much heartache!
- Range of motion tests: Check if joints bend right without that ugly pinching, like twisting an arm 360° to catch those weird texture stretches that happen around 180° rotation
- Animation cycles: Try out everyday movements like walking, running, and jumping – a decent rig test should include at least 3-5 basic movement loops for a full checkout
- Extreme poses: Push your character into crazy positions they might need – heroes often need to hit at least 25-30 extreme poses that would break a poorly made rig
- Performance testing: Make sure the rig doesn’t slow things down – game characters should stay above 30fps even with 4-5 instances on screen at once
- Bug fixing: Crush those weird glitches nobody expects – like fingers that suddenly shoot off in random directions (yep, happens more than you’d think!) or knees that bend backward when a character crouches
Did you know? About 15-20% of rigging time is typically spent just on testing and fixing issues. It might seem like a lot, but finding that one weird deformation before animation starts can save 100+ hours of animation fixes later!
5- Facial Rigging
The face is where the real emotion happens, so facial rigging, along with facial animation, deserves special attention! A production-quality facial rig for a main character typically needs between 40 and 75 blend shapes just to handle basic expressions and speech! Rigging is vital for good character expressions, and that’s why specialists emphasise the importance of correct rigging.
Read More: The Most Important Facial Animation Tips
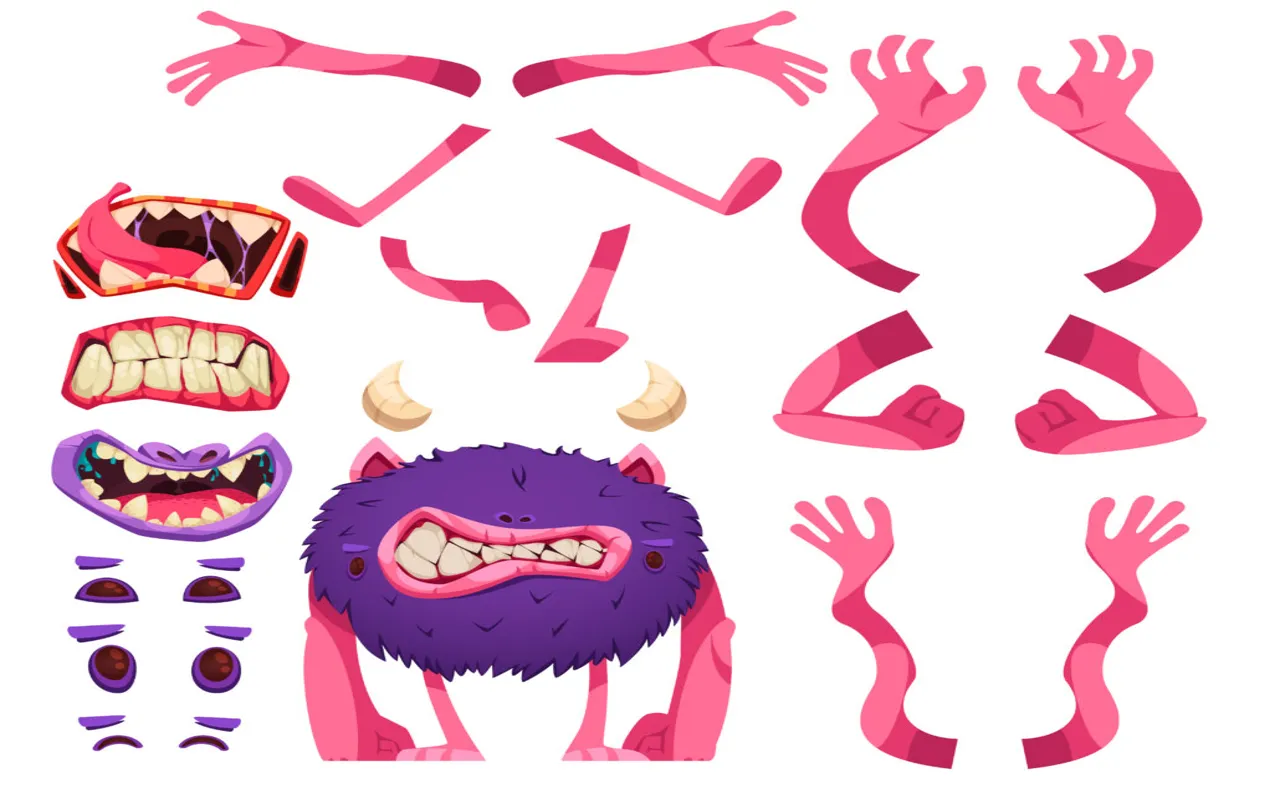
- Jaw and mouth setup: Make a jaw system that opens and closes naturally. Most face rigs need at least 15 to 20 mouth shapes that blend together to make speech sound real.
- Eye rigging: Set up controls for eye movement and faces. A good eye rig has limits on spinning (usually 30° in each direction) and separate controls for blinking and closing the eyes.
- Blend shapes: Create target expressions that blend together. Professional character faces need between 40 and 60 different blend shapes to cover all speech and mood positions.
- Control interfaces: Make panels with sliders and buttons that are easy for people to use. The best face rigs organize controls wisely (eyes, mouth, cheeks) and give each attitude a clear 0–10 value range.
- Advanced features: Realistic faces usually have between 5 and 8 auto-triggered wrinkle maps that activate based on main emotions. You can add secondary movements like lines around the eyes when the face smiles.
6- Optimizing the Rig for Game Engines
When it comes to video game character development, optimization isn’t optional—it’s absolutely essential. A beautiful rig that runs at five frames per second is useless in a game!
- Joint reduction: Get rid of bones that aren’t needed to make the game run better, since each extra bone uses up important processing power. For example, characters in mobile games only need 30 to 40 joints, but characters in movies can have 100 or more joints.
- Influence limits: Limit the number of bones that can change each part of the mesh. Too many effects can make games run much more slowly. As a result, most game engines only allow four bones per point.
- LOD setup: Make different levels of detail for your rig based on the viewing distance. This way, you won’t waste time or resources on models that are too far away from the camera. A well-optimized game usually has between 3 and 4 LOD levels.
- Animation retargeting: Build up your rig to use common animation tools so you don’t have to make each movement from scratch. This means setting up a control rig carefully so that it follows standard naming rules.
- Export preparation: Clean up any unwanted nodes and freeze changes to get your rig ready for a smooth move into game engines. This last step of cleaning up is very important because it makes sure that your character will move correctly when you bring it into Unity or Unreal.
The difference between an optimized and unoptimized rig can be dramatic; we’re talking 60 FPS versus 30 FPS in some cases!
What Is Skinning Pipeline?
Skinning is where we connect all that outer stuff (you know, the actual character model) to the skeleton inside. Kind of like how your muscles attach to your bones, but in the digital world!

1- Binding the Mesh to the Skeleton
This first step feels like digital matchmaking and introducing your character’s outside to its inside!
- Binding method choice: You get to pick between different styles (like rigid binding for hard objects or smooth binding for squishy characters)
- Influence zones: Setting up little neighborhoods around each bone
- First pass weights: The computer makes its best guess at how everything should connect
You know how when you bend your arm, your skin just knows what to do? Computers have no clue about that stuff naturally! This step is teaching them the very basics of how skin works.
2- Weight Painting
The weight Painting part is honestly my favorite.
- Painting weights by hand: Use your digital brush to paint the weight values right on your model. It’s important for artists to get the changes between tracks just right, so they use 1.0 near the joints and fade out as they move away.
- Creating smooth mixes: Get the changes between bone effects just right so your character doesn’t move like a robot. The real movement happens when you have 3 to 5 rings of smooth, varying degrees around joints where different forces meet.
- Troubleshooting: Pay extra attention to the areas that won’t move, like the armpits and inner legs. An average professional skinner spends about 70% of their time on these tricky areas, and they often use very light brushstrokes to get very precise results.
- Cutting and pasting: It’s not necessary to do all that work twice on your properly made weights, so mirror them each way. One way to save hours of work is to make sure that your name is consistent. For example, use “L_” and “R_” labels for all of your files.
- Always checking: Do not wait until the end to test your weights; move your figure into different poses often. A good rigger should try their work with a few standard poses every 15 to 20 minutes.
3- Cloth and Secondary Element Setup
For all those flowy, bouncy bits that make characters feel alive!
- Find the dangly parts: Look for all the parts that hang off and need to move on their own, like jacket flaps that need to flap in the wind or ponytails that should bounce when a figure runs.
- Adding unique bones: You should make those little mini-skeletons just for these moving parts. You might need 3–4 bones in a chain for a ponytail, but 6–8 bones for a longer coat to get that beautiful, flowing movement.
- Getting things to move: Add some physics tricks to make sure that when your model moves, everything bounces and sways just right. For best results, play with the mass settings, which are usually between 0.1 and 5.0 in most game systems.
- Preventing the dreaded “pass-through”: Install invisible barriers to prevent hair and clothing from accidentally passing through the body. A simple impact shell around the main body parts of 8 to 12 will catch most of those embarrassing clip-throughs.
- Changing how springy it is: Adjust the degree of rigidity and reduction settings until the motion is just right, not too stiff or too loose. Slightly less stiff cloth (0.2–0.8) makes skirts and dresses flowy, while more stiff cloth (like leather jackets or jeans) works best with higher values.
The Importance of Rigging and Skinning in Game Development
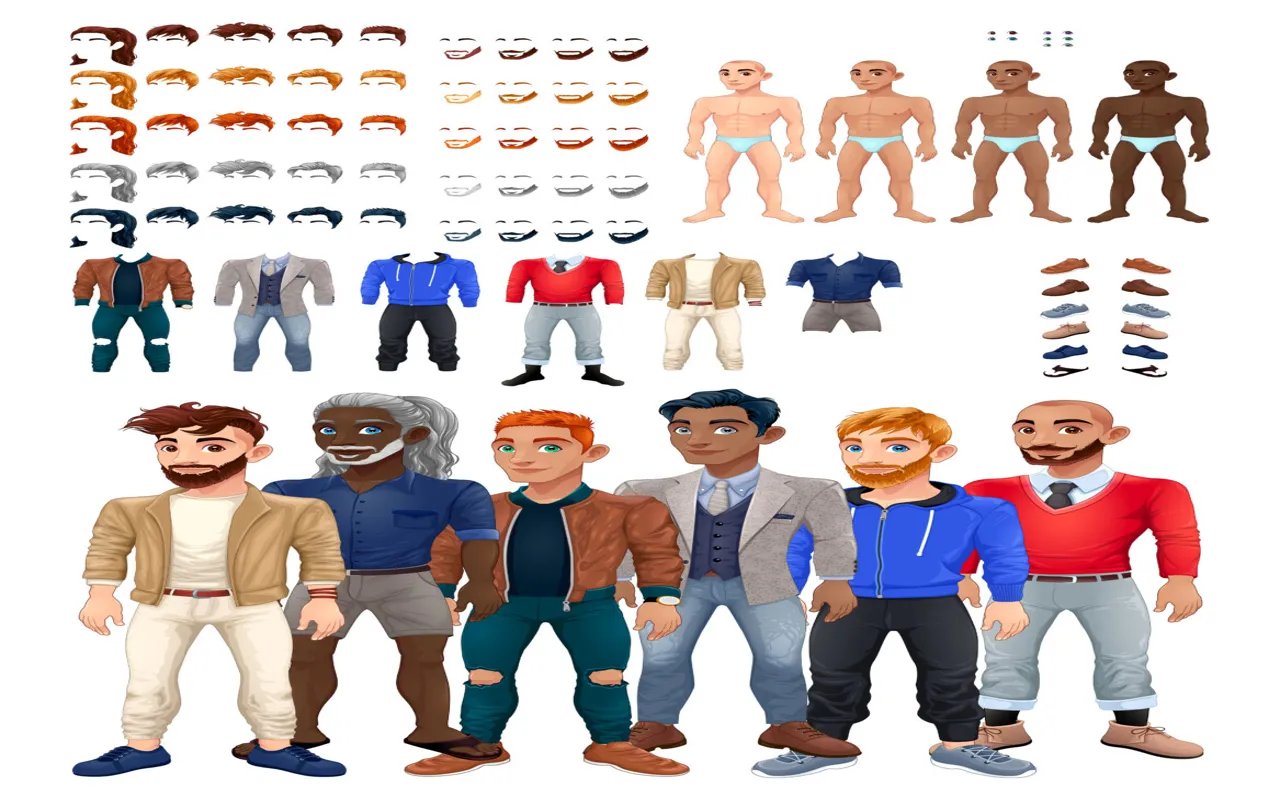
Tools and Software for Rigging and Skinning
Character shaping and skinning are a lot easier if you use the right tools.
| Software | Best For | Special Features | Learning Curve |
| Maya | Professional production | HumanIK system, excellent skinning tools | Steep |
| Blender | Indie & hobbyists | Completely free, the Rigify system | Moderate |
| 3ds Max | Game development | CAT rigging system, good for technical rigs | Steep |
| Cinema 4D | Motion graphics | User-friendly Character Object tool | Gentle |
| ZBrush | Detailed sculpting | ZSphere rigging is great for organic models | Moderate |
| Houdini | Technical/procedural | Node-based rigging, simulation tools | Very steep |
Read More: What Are the Differences Between 3D Modeling and Sculpting?
Best Practices in Rigging and Skinning
Expert artists use a lot of little tricks that you won’t even find in most lessons.
1- Plan Your Character’s Range of Motion First
Before you place a single bone, take some time to really think about how your character needs to move!
- Create pose libraries: Sketch out extreme poses your character will need to hit
- Consider the personality: A nimble thief moves differently from a hulking warrior.
- Think about camera angles: Will players only see the character from behind, or in closeups too?
2- Create a Clean, Consistent Naming System
This might sound super boring, but it’s a lifesaver when your project gets complex! When you have 80+ bones in a character, good naming becomes your best friend. Plus, well-named rigs are so much easier to animate with!
- Develop a naming convention: Like “L_arm_01_jnt” for left arm joint #1
- Be consistent across all characters: So you can easily reuse scripts and tools
- Document your system: Create a simple guide so teammates understand your setup
3- Use Proxy Geometry During Rigging
Using simpler versions of your character while you’re designing is a great idea! This technique speeds up the whole process since it removes the need for your computer to calculate deformations on complex drawings while you’re still working things out.
- Create low-poly versions: Make simple shapes that represent the character’s overall form
- Rig with these proxies: Build and test your skeleton using these simplified models
- Transfer to the final model: Once everything works perfectly, apply it to your detailed character
4- Set Up Custom Attributes for Animators
The absolute kindest thing you can do for animators is give them simple controls for complex movements!
- Create “one-click” solutions: Make attributes like “foot roll” that control multiple bones with one slider..
- Add limits and constraints: Prevent movements that would break the model or look unrealistic..
- Built-in “auto” features: Add things like automatic shoulder movement when arms are raised..
5- Test Skinning with Animation Cycles
Don’t just test your skinning in static poses because that’s setting yourself up for surprises later!
- Create test animations – Simple walks, runs, jumps, and other common movements
- Look for problem areas – Watch for stretching, pinching, or strange bulges
- Fix issues progressively – Address major problems first, then refine the details
6- Optimize for Your Target Platform
Different platforms have totally different requirements, and planning for them early makes everything smoother!
- Consider poly count limits: Mobile games need much lighter rigs than films..
- Set bone influence limits: Many game engines limit how many bones can affect each vertex..
- Plan LOD (Level of Detail) variations: Create simplified versions for distant views
What Are The Challenges in the Rigging and Skinning?
Artists face tons of tricky challenges that can make or break how natural a character looks when moving. Even professional riggers with years of experience run into stubborn problems that can take days to solve perfectly.
- Realistic deformation at joints: Getting those elbows, knees, and shoulders to bend naturally without that weird “candy wrapper” twisting or awkward pinching.
- Maintaining volume during movement: Keeping character parts from shrinking or stretching unnaturally when they bend or twist.
- Performance optimization: Balancing between amazing-looking deformations and making sure the rig doesn’t slow down games or crash systems.
- Weight painting precision: Getting perfect smooth transitions between bone influences, especially in tricky areas like armpits, shoulders, and hips.
- Character proportions and style compatibility: Making rigs that work properly for wildly different character types (realistic humans vs. cartoon characters vs. fantasy creatures)
Last Words
Rigging and skinning characters is the beautiful dance that goes on behind the scenes. Your beloved characters may run wild, jump with joy, flash that perfect smile, or break your heart with a single tear, thanks to this wonderful process that makes all those unseen holes and pulleys.
Along the way, riggers have to do some really hard things, like getting arms to bend just right, making sure that figures don’t look hollow when they move, and making sure that everything works perfectly without crashing your computer or game. Despite all of these problems, the most amazing thing happens when rigging and skinning are done well: you don’t even notice them!