3D modeling is one of the core foundations of modern digital art production used in video games, animation, films, architecture, product visualization, virtual reality, and advertising. From realistic game characters and cinematic creatures to vehicles, environments, and industrial products, nearly every modern CG project relies on 3D modeling workflows.
Professional 3D modeling combines both artistic creativity and technical problem-solving. Artists must create models that not only look visually impressive but also function correctly inside game engines, animation pipelines, and rendering systems.
In this guide, we’ll explore what 3D modeling is, the complete 3D modeling process, the software used by professional artists, and the workflows used in modern game art and animation pipelines.
Need Game Art Services?
Visit our Game Art Service page to see how we can help bring your ideas to life!
What Is 3D Modeling?
3D modeling is the process of creating digital three-dimensional objects using specialized software. These objects are built using geometry made of vertices, edges, and polygons that define the shape and structure of the model.
3D models are used across many industries, including games, animation, VFX, architecture, engineering, and product design. Depending on the project, a model may be designed for real-time rendering in a game engine or for highly detailed cinematic rendering in film production.
Modern 3D workflows often combine modeling, sculpting, texturing, lighting, rendering, and optimization pipelines to create production-ready assets.
The Complete 3D Modeling Process
Professional 3D modeling services follow a structured workflow that helps artists create visually polished and technically optimized assets. While pipelines vary depending on the project, most productions follow similar stages from concept development to final rendering or engine integration.
Concept Art & Planning
Concept art services establish the visual direction of the asset before modeling begins. Depending on the project, concept artists may create sketches, orthographic views, silhouette explorations, or detailed turnaround sheets.
This phase helps define the shape language, proportions, materials, and overall artistic style of the model. Strong planning reduces production mistakes later in the pipeline and allows the entire team to work toward a consistent visual target.

Blockout & Base Mesh Creation
The blockout stage focuses on building the overall proportions and silhouette of the model using simple geometry. Artists use primitive shapes like cubes, cylinders, and spheres to establish scale and structure before adding details.
At this stage, the goal is not realism or surface detail. Instead, 3D modelers focus on silhouette readability, proportions, and overall balance. A strong blockout helps avoid major revisions later in the workflow.
In game art production, blockouts are also useful for testing scale and gameplay readability inside the engine.
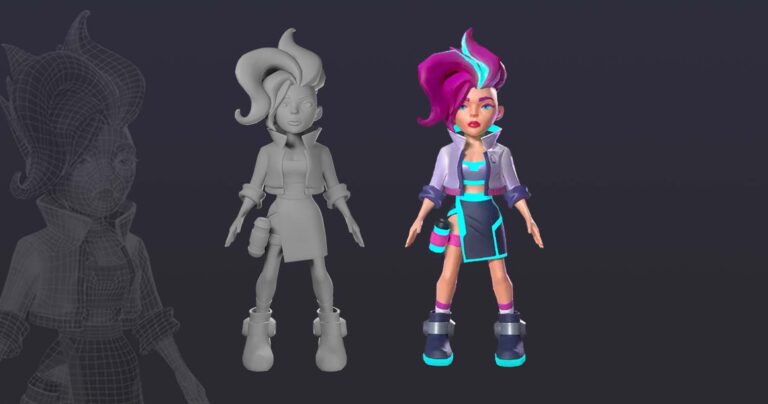
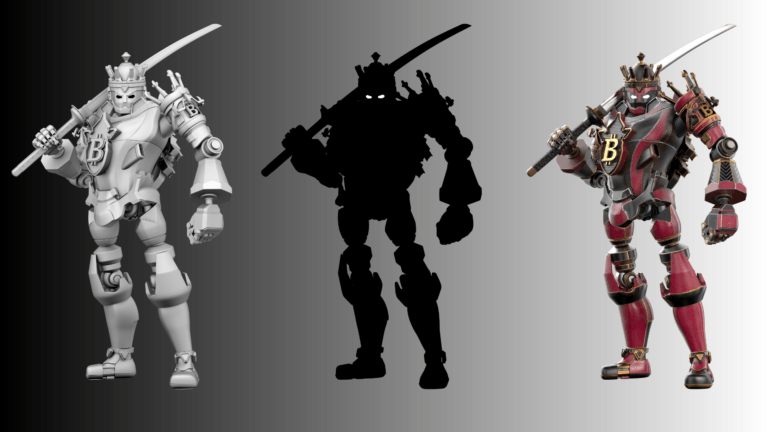
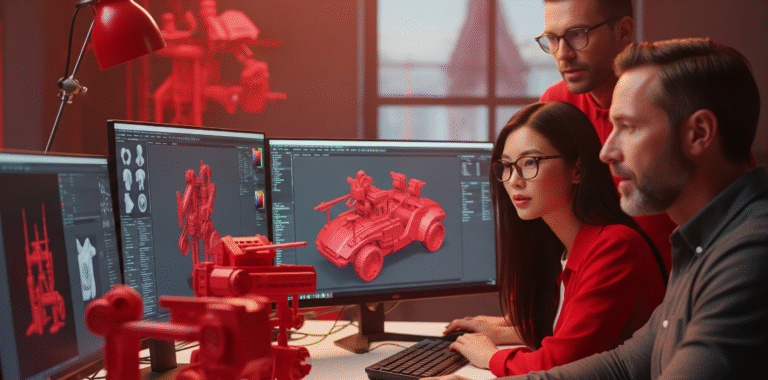
High-Poly Modeling & Sculpting
Once the base mesh is approved, artists begin refining the model with high-poly modeling and sculpting. This stage adds surface detail, anatomy refinement, fabric folds, hard-surface details, damage, and small design elements.
Organic models such as characters and creatures are often sculpted using programs like ZBrush, while hard-surface assets like vehicles or weapons may rely more heavily on polygon modeling workflows.
High-poly models contain far more detail than what would normally be used in a game engine, but they serve as the foundation for later baking and texturing stages.
You can also learn more about the differences between modeling and sculpting.

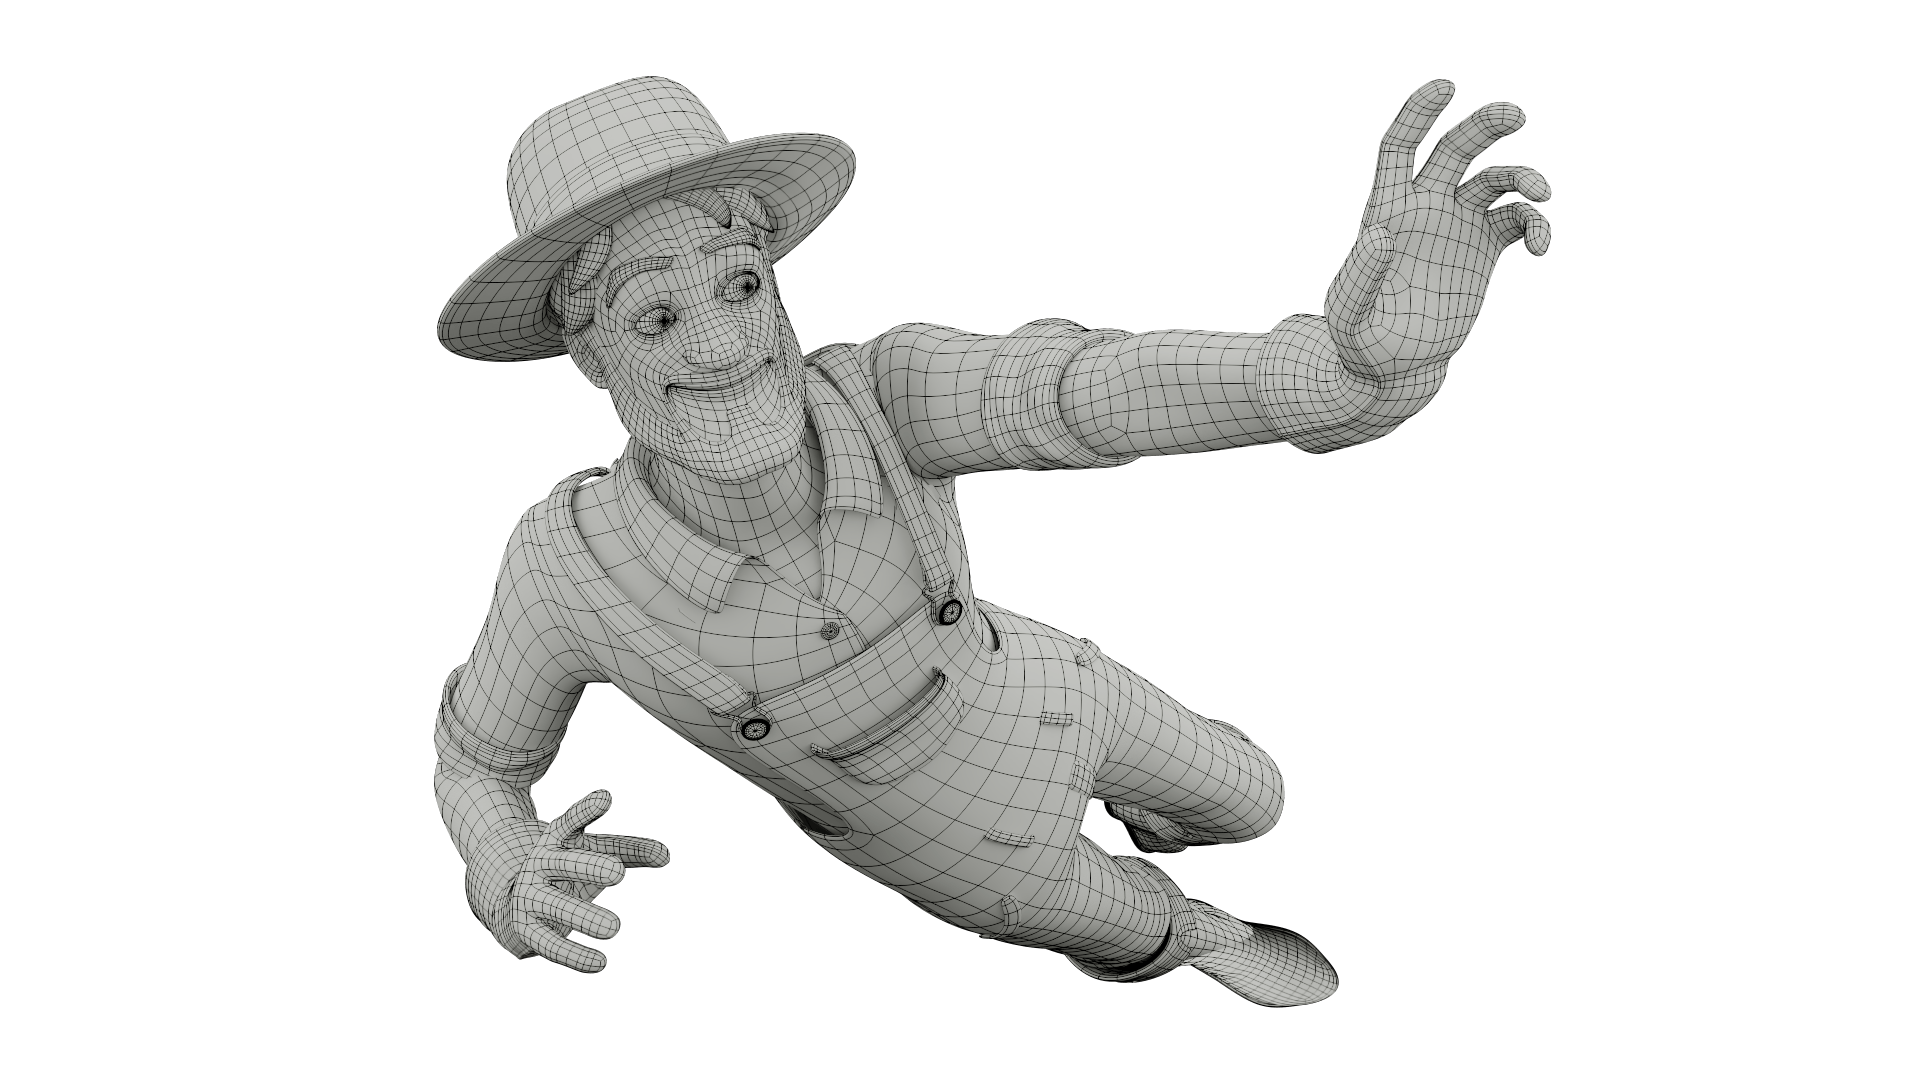
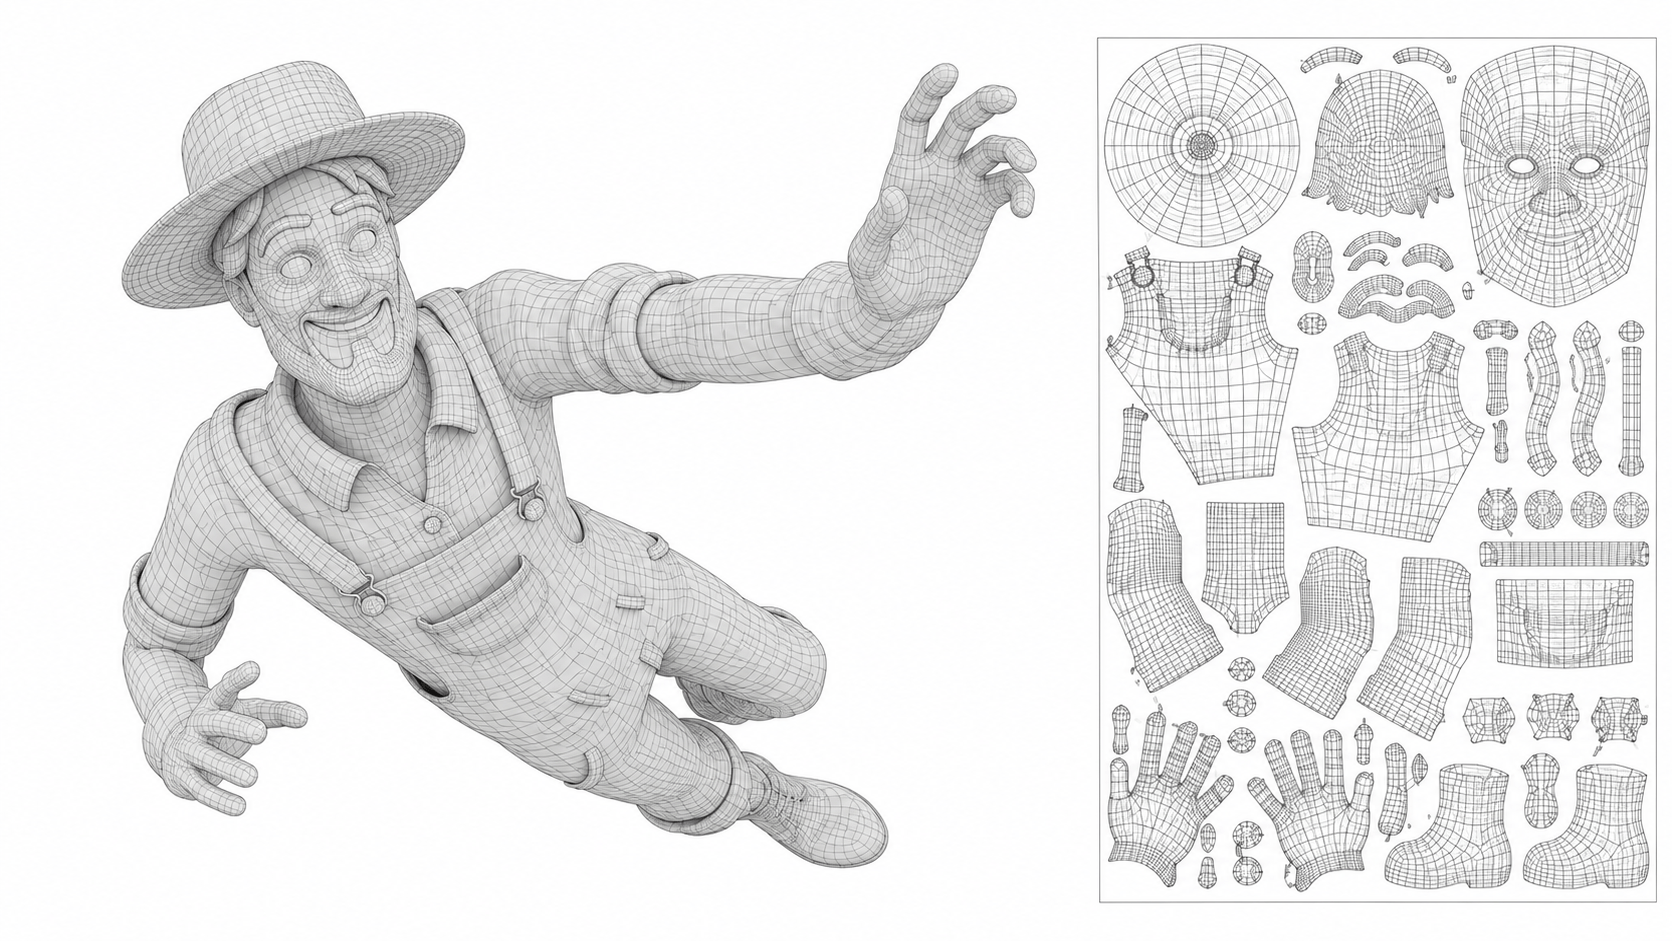
Retopology
High-poly models are usually too dense for animation or real-time rendering, so artists create optimized geometry through 3D retopology services.
Retopology rebuilds the model using cleaner polygon flow while preserving the original shape and detail. Proper edge flow is especially important for character animation because bad topology can create poor deformations during movement.
In games, optimized topology also improves performance and reduces rendering costs.
UV Mapping
UV mapping prepares the model for texturing by flattening its 3D surface into 2D texture space. Texture artists organize UV islands carefully to maximize texture quality while minimizing stretching and distortion.
Good UV layouts improve texel density, material consistency, and overall rendering quality. Poor UV mapping can create visible texture artifacts and reduce visual polish.
This stage is essential for both realistic cinematic assets and optimized game-ready assets.
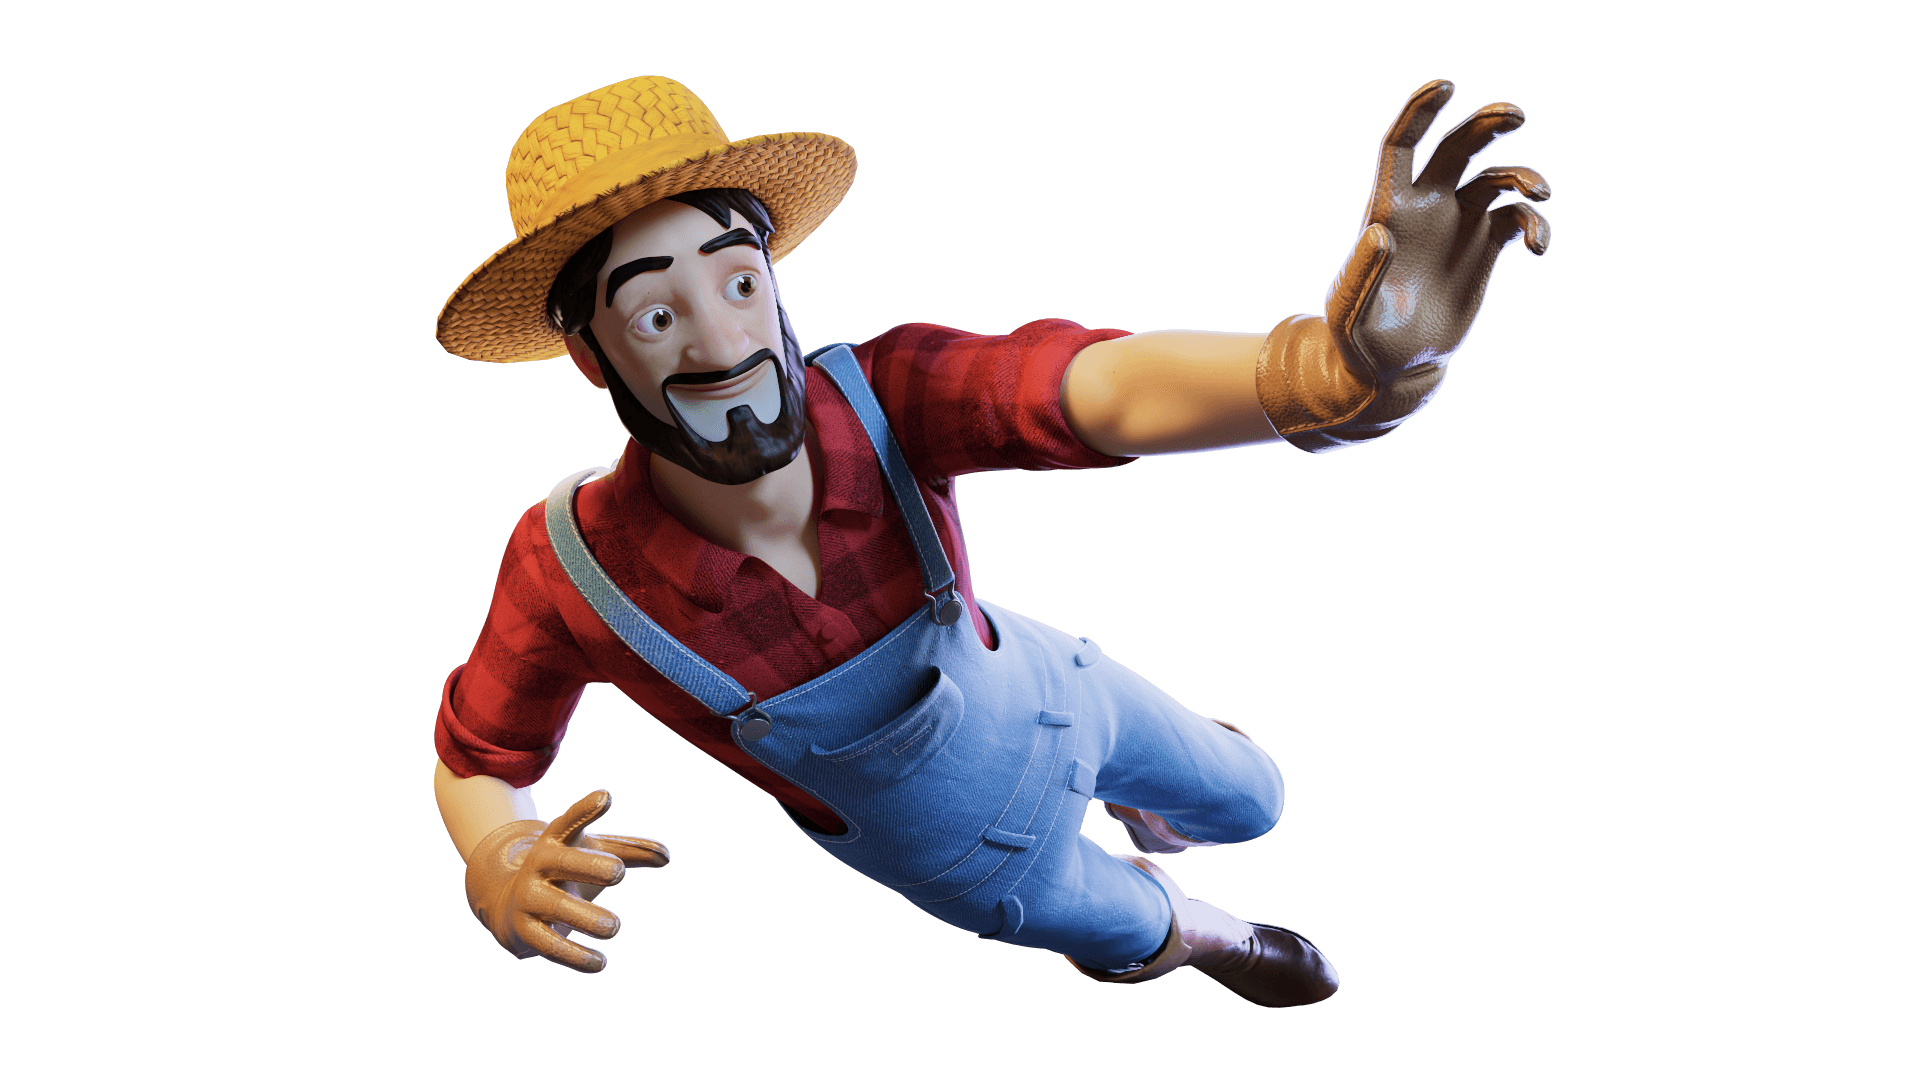
Texturing & Materials
Texturing gives the model its surface appearance by adding color, roughness, metallic properties, wear, dirt, scratches, and material definition.
Modern texturing pipelines usually rely on PBR (Physically Based Rendering) workflows, which allow materials to react more realistically to lighting conditions. Texture artists commonly use programs like Substance Painter and Substance Designer to create detailed textures and materials.
Well-crafted texturing services play a major role in realism, visual storytelling, and quality.
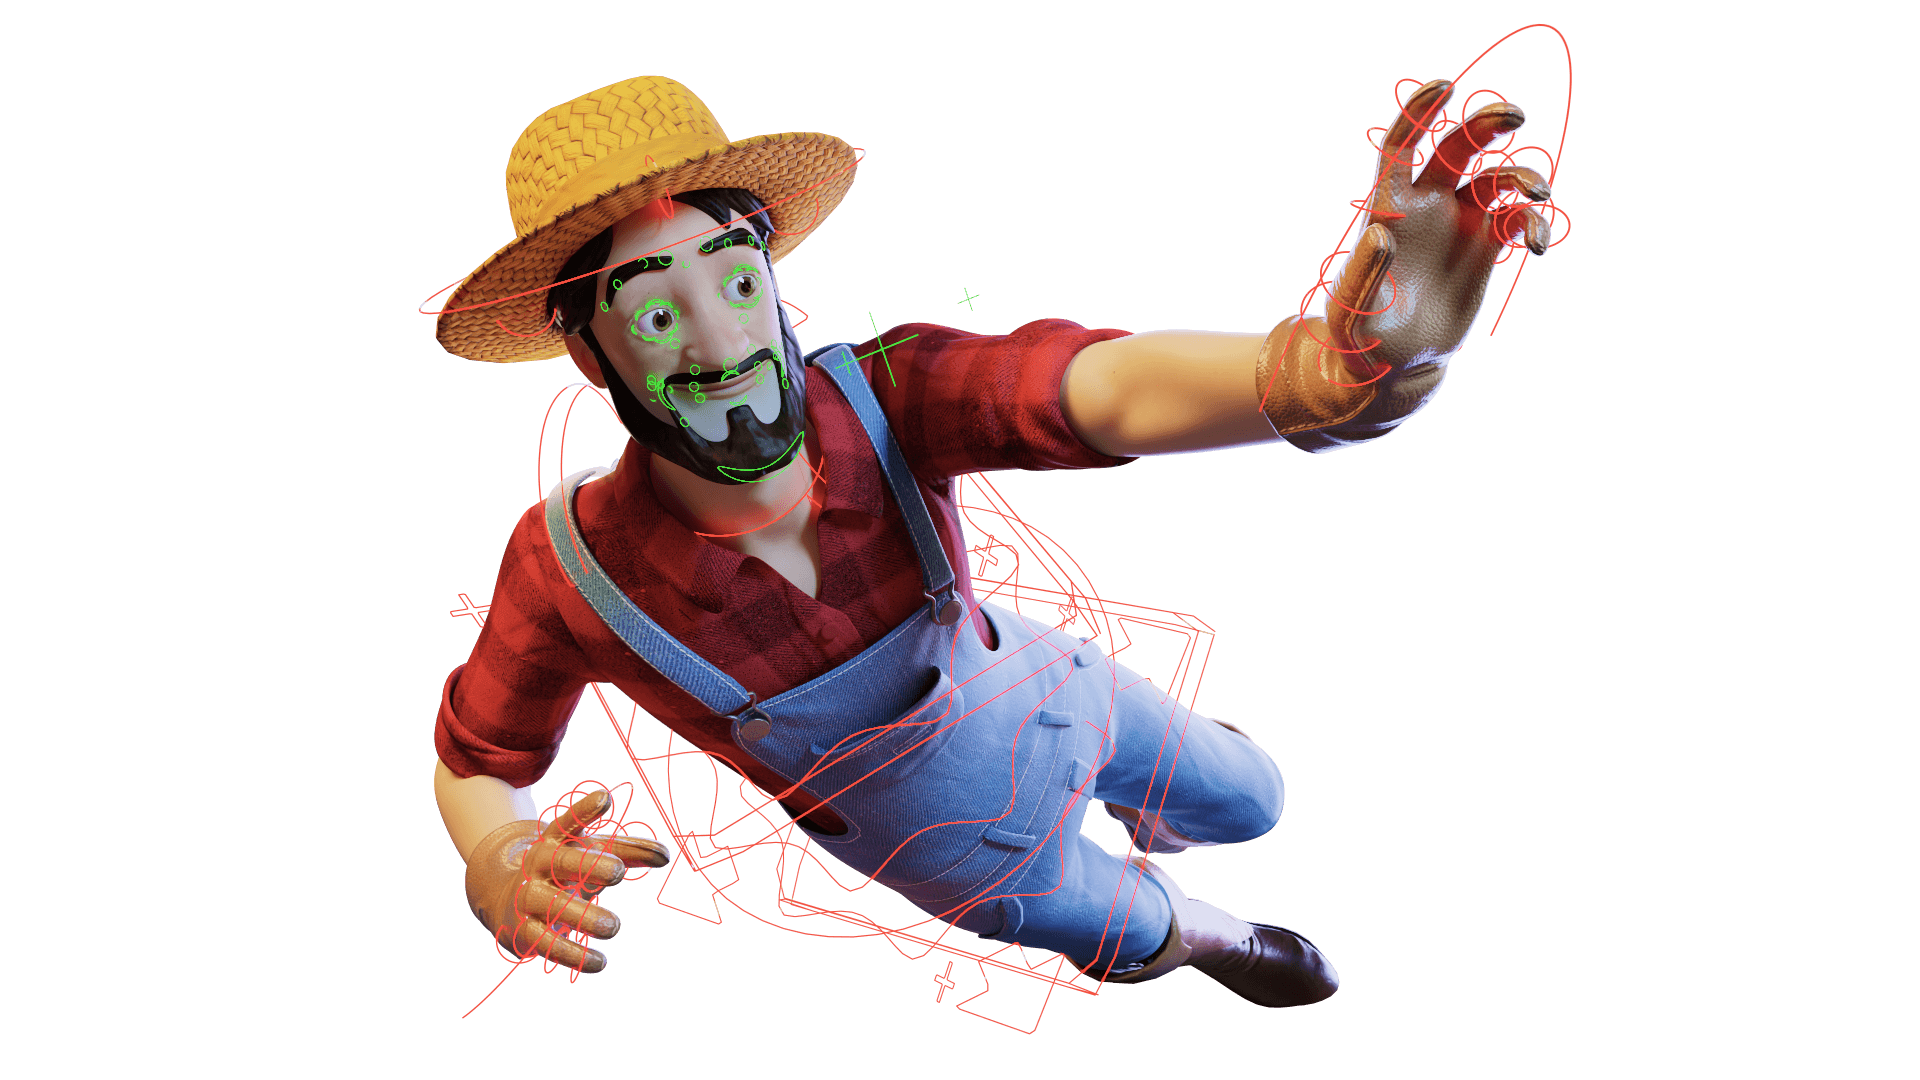
Rigging & Animation Preparation
If the model is intended for animation, artists create skeletons and control systems through rigging. In character modeling services, rigging allows the character or object to move correctly during animation.
A good rig must balance flexibility, stability, and clean deformation. Complex rigs may include facial animation controls, muscle systems, cloth simulation, and physics-driven secondary motion.
Rigging is one of the most technical stages of the 3D production pipeline because it directly affects animation quality and production efficiency.
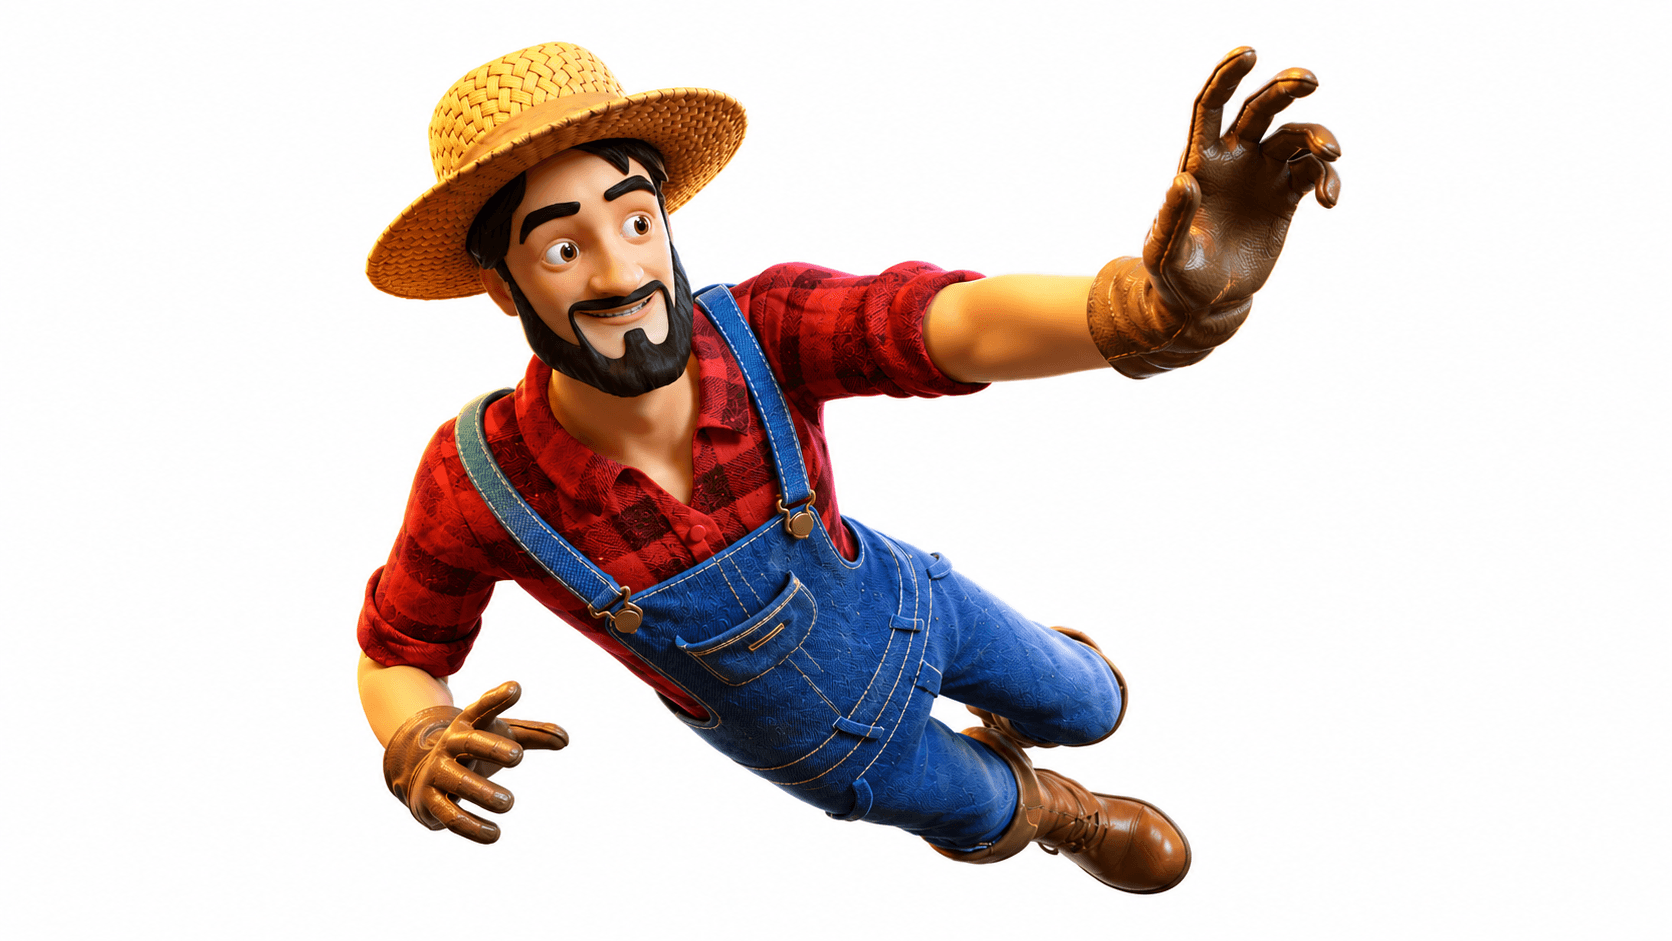
Lighting & Rendering
Lighting and rendering transform the completed model into its final visual presentation. Lighting artists and render artists use lighting to improve mood, realism, composition, and storytelling.
Different rendering techniques may prioritize realism, stylization, or real-time performance depending on the project. Popular render software include Arnold, Cycles, V-Ray, Redshift, and Unreal Engine.
Strong lighting can dramatically improve the visual quality of even simple models, while poor lighting can weaken highly detailed assets.
Optimization & Export
For games and real-time applications, models must be optimized before engine integration. Technical artists reduce polygon density, create LODs (Level of Detail), optimize textures, and prepare assets for real-time rendering.
Optimization ensures the asset performs efficiently while maintaining visual quality. This stage is especially important in large open-world games and mobile productions where performance limitations are more strict.
The final asset is then exported into the game engine or rendering pipeline for integration.
Types of 3D Modeling
Different industries use different 3D modeling techniques depending on production needs.
Each modeling method offers different advantages depending on the project’s technical and artistic requirements.
1. Polygon Modeling
The most common and used modeling workflow in game art studios and animation studios.
2. Digital Sculpting
Used for highly detailed organic models like characters and creatures.
3. CAD Modeling
Used across industries, like engineering, industrial design, and manufacturing.
4. Procedural Modeling
Uses node-based systems and procedural generation workflows.
5. NURBS Modeling
Common in product design and automotive industries.
Read More: High-Poly vs. Low-Poly Modeling
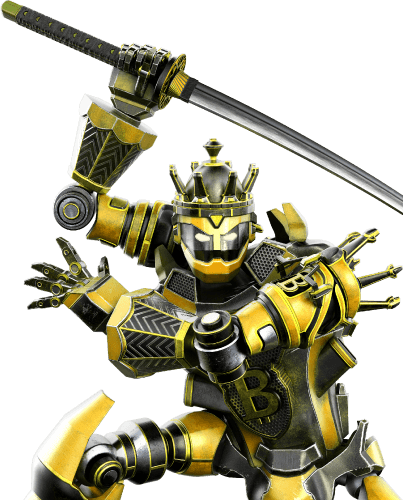
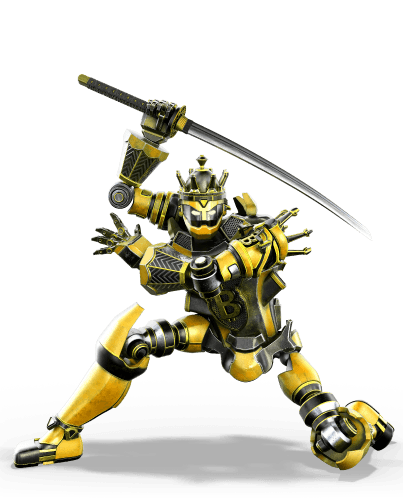
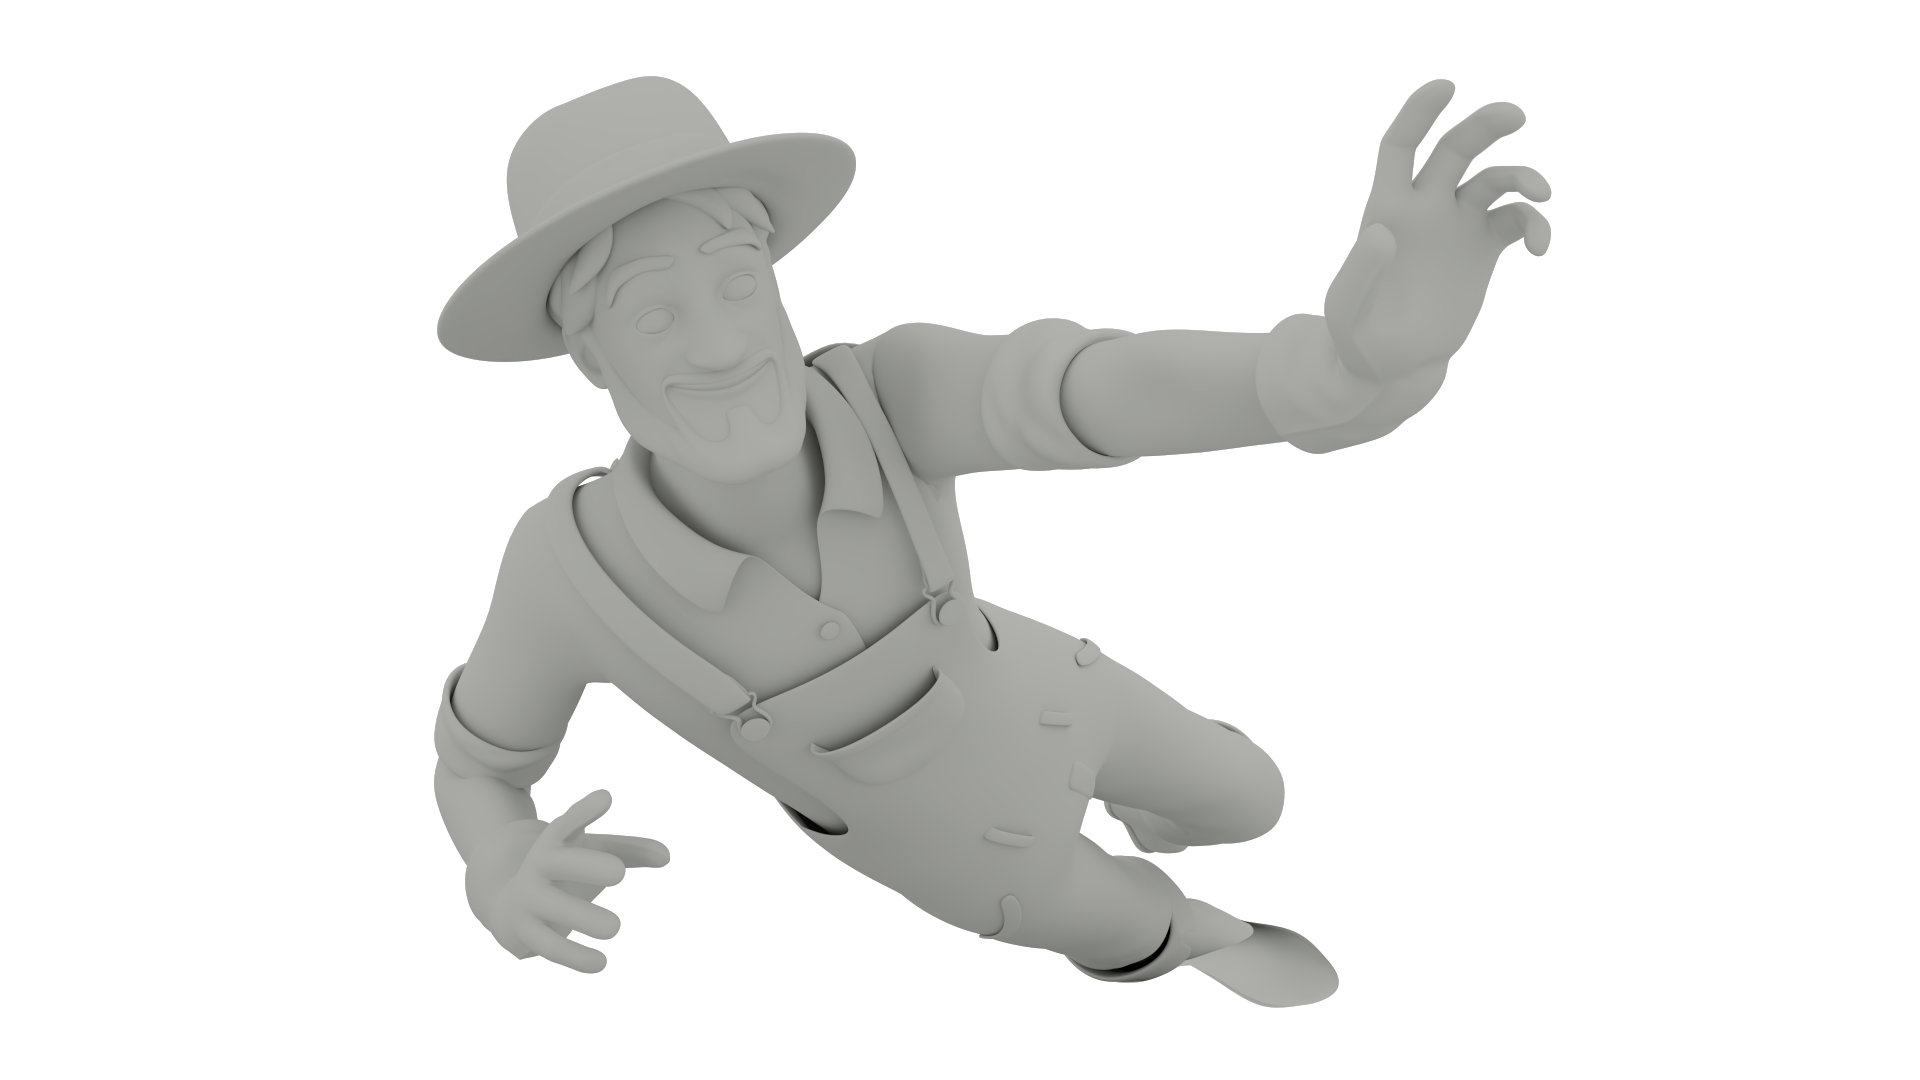
Hard Surface vs. Organic Modeling
3D modeling is generally divided into two major categories: hard-surface modeling and organic modeling.
Hard-surface modeling services focus on mechanical objects such as vehicles, architecture, robots, and weapons. These workflows prioritize precision, clean edges, and controlled geometry.
Organic modeling focuses on natural forms like characters, animals, creatures, anatomy, and vegetation. Organic workflows rely more heavily on sculpting techniques and anatomical understanding.
Most modern productions combine both approaches depending on the project.
Hard Surface Modeling is Used for:
- Vehicles
- Weapons
- Architecture
- Robots
- Machinery
Organic Modeling is Used for:
- Characters
- Creatures
- Animals
- Anatomy
- Natural forms
Best Software for 3D Modeling
Modern artists use different modeling software depending on the workflow, production requirements, and 3D modeling production budget.
Blender has become one of the most popular all-in-one 3D programs thanks to its accessibility and large community. Maya remains an industry standard in animation and film pipelines, while ZBrush dominates high-detail sculpting workflows.
Programs like Houdini, Cinema 4D, and 3ds Max are also widely used in specialized pipelines for VFX, simulation, motion graphics, and architectural visualization.
Popular 3D Modeling Software:
- Blender
- Maya
- ZBrush
- 3ds Max
- Cinema 4D
- Houdini
Read More: Maya vs. Blender
Common 3D Modeling Mistakes
Beginner artists often encounter technical and artistic issues during production. Learning proper workflow habits early can significantly improve production quality.
Common Mistakes:
- Poor topology
- Stretched UVs
- Inconsistent scale
- Overly dense geometry
- Weak silhouette design
- Bad edge flow
- Poor optimization
Beginner Tips for Learning 3D Modeling
Learning 3D modeling takes time, patience, and consistent practice. Strong fundamentals are more important than highly detailed asset creation too early.
Helpful Beginner Tips:
- Start with simple objects
- Learn topology fundamentals
- Study real-world references
- Practice silhouette design
- Focus on clean geometry
- Learn lighting basics early
- Avoid over-detailing beginner projects
How AI Is Changing 3D Modeling
AI-assisted workflows are beginning to influence modern 3D production pipelines. AI animation tools can help accelerate concept generation, procedural workflows, retopology, texture creation, and asset organization.
However, professional production still depends heavily on human artists for design decisions, artistic direction, storytelling, and technical problem-solving.
Rather than replacing artists entirely, AI is helpful and currently functioning more as a supportive production tool inside larger creative workflows.
Conclusion
3D modeling is one of the most important foundations of modern digital production across games, animation, films, architecture, and product visualization. From early concept planning to final rendering and optimization, every stage of the workflow contributes to creating visually compelling and technically functional assets.
As technology continues evolving, modern 3D workflows are becoming faster, more cinematic, and increasingly connected with real-time rendering, procedural systems, and AI-assisted production. However, strong artistic fundamentals, clean workflows, and technical understanding remain essential for creating professional-quality 3D models.