
Every animated film, show, or video game you have ever watched started as a series of simple sketches. Before the expensive computers are turned on and the final animation frames are drawn, the creative team needs a plan. That plan is the storyboard.
An animation storyboard is a visual map of a project, drawn frame by frame. It looks a lot like a comic strip, showing key moments in the story. In professional studios, this step is never skipped. It helps the director see the pacing, keeps the crew on the same page, and stops the team from wasting time and money on scenes that do not work.
This guide covers the history of storyboarding, how it differs from animation layouts, what actually goes into a storyboard panel, and a simple workflow you can use for your own projects.
How Storyboarding Started
Planning films with drawings has been around since the early days of cinema. Some of the very first filmmakers, like Georges Méliès, used pre-production sketches to organize their fantasy projects. But the modern storyboard system we use today came from the Walt Disney studio in the early 1930s.
It began with “story sketches” in the 1920s, which animators used to show ideas for cartoon shorts. Then, a Disney animator named Webb Smith had a simple but brilliant idea. He started drawing scenes on separate pieces of paper and pinning them up in a row on a bulletin board. This allowed the directors and writers to look at the whole story in sequence, shift scenes around easily, and see how the plot flowed before committing to the final drawings.
The first complete storyboard was created for the 1933 Disney cartoon short, “Three Little Pigs.” The system worked so well that by 1938, every American animation studio was doing it.
Soon after, live-action filmmakers realized how useful this tool was. “Gone with the Wind,” released in 1939, was one of the first live-action films to be completely storyboarded. By the 1940s, storyboards were a standard part of filmmaking, helping directors plan complicated camera moves and visual effects before going on set.
Storyboard vs. Layout: Clearing Up the Confusion
People new to animation often mix up storyboarding services and layouts, or think they are the same thing. In a real studio 3D animation pipeline, they are separate steps with different goals.
1. Storyboards are about composition and story. The main job of a storyboard is to regulate where objects and characters sit in the frame to tell the story clearly. It is a sequential tool that shows how shots connect, how the plot moves forward, and what the viewer sees and hears in each scene.
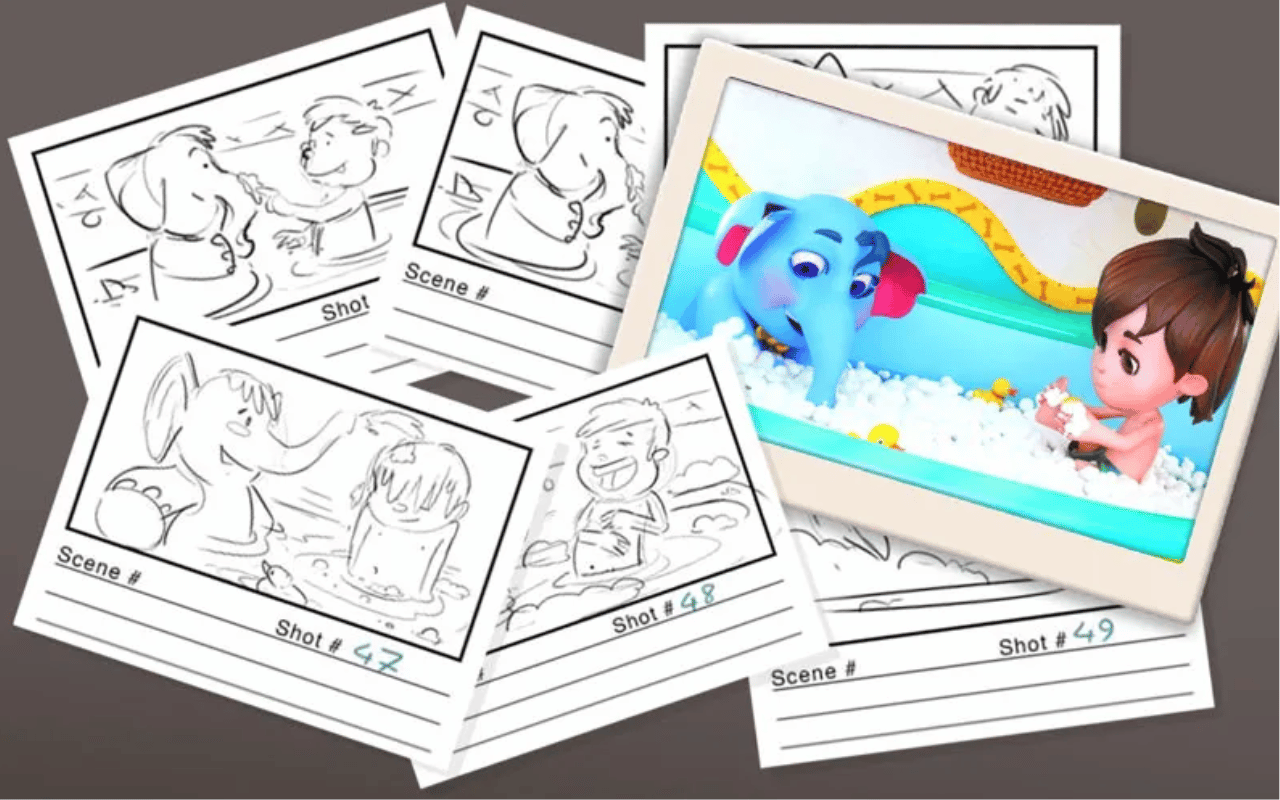
2. Layouts are about movement and depth. A layout is much more technical and is designed specifically for the animator. While a storyboard panel shows a general scene, a layout sheet represents a single shot or a single movement. It shows the animator exactly how characters, props, and backgrounds will move through the physical space.
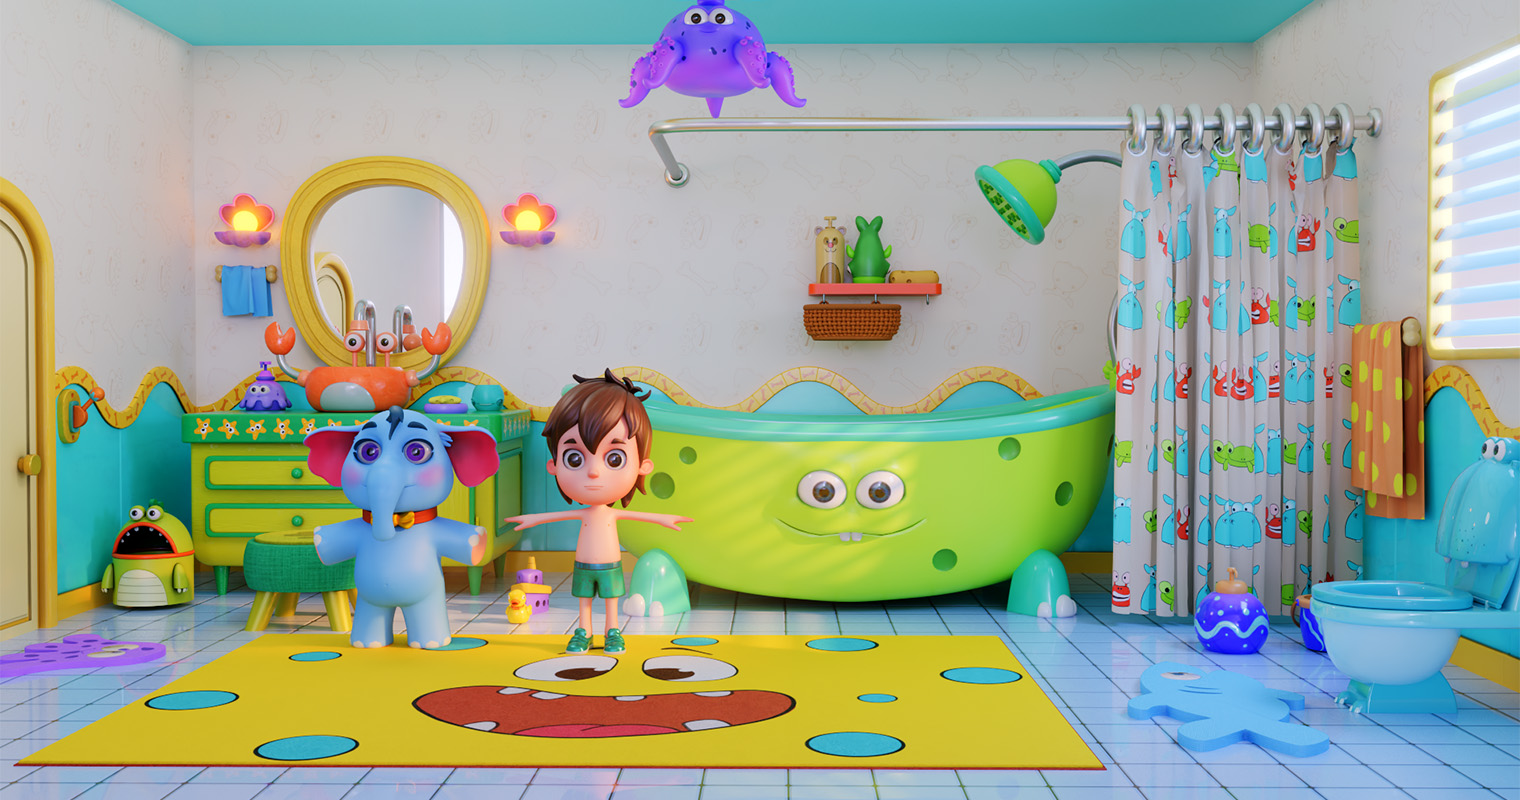
To see the difference in action, think about two famous animation directors:
First, consider a scene from “Only Yesterday,” directed by Isao Takahata. The storyboarding here is incredible because the transition from reality to fantasy is simple and easy to understand. But the layouts themselves are basic. The characters are drawn from the profile, which is the easiest angle to animate, and there is almost no background movement. The focus is purely on the storytelling.
Now look at a shot by Hayao Miyazaki, who was an exceptional layout artist in the 1970s. For one of his shots, the storyboard might have been a simple sketch with a few arrows. But the layout sheet he drew was highly complex. It had three layers of depth. A car moved in the foreground, characters ran from the back of the screen to the front, and elements went in and out of the camera’s view. Everything moved in different directions. That detailed planning of physical movement is what layout is all about.
A good layout needs to balance complexity with readability. If a scene is too complex, the viewer gets lost and cannot follow the action. Keeping things clear and readable is the most important part of animation.
Why You Can’t Skip the Storyboard Stage
Some small teams or solo artists might think they can save time by skipping the storyboard and animating straight from a script. In almost every case, this leads to confusion, wasted work, and high costs. Here is why the storyboard is helpful and essential:
- It aligns the team. A written script can be interpreted in dozens of different ways. Until you draw it, the visual style only exists in the creator’s head. A storyboard gives everyone on the crew, including animators, set designers, lighting artists, and directors, a single visual reference.
- It catches problems early. It is incredibly easy to change a pencil sketch, but changing a finished 2D drawing or a 3D render is slow and expensive. A storyboard acts as a diagnostic tool, showing you pacing issues, plot holes, and technical visual effects challenges before you start production.
- It acts as a checklist. A solid storyboard tells the production crew exactly what assets, backgrounds, props, and camera setups are needed for each scene, acting as a clear progress tracker.
- It gets projects green-lit. If you need to secure funding or get approval from clients or studio heads, a text script is rarely enough. A storyboard lets investors see the film before it is made, helping them understand the value of the project.
What Actually Goes Into a Storyboard Panel?
Every studio has its own templates, but many professional teams use a standard sheet with six panels, arranged three on top of three. Regardless of the layout, each individual panel needs to contain a few key pieces of information to be useful for the crew:
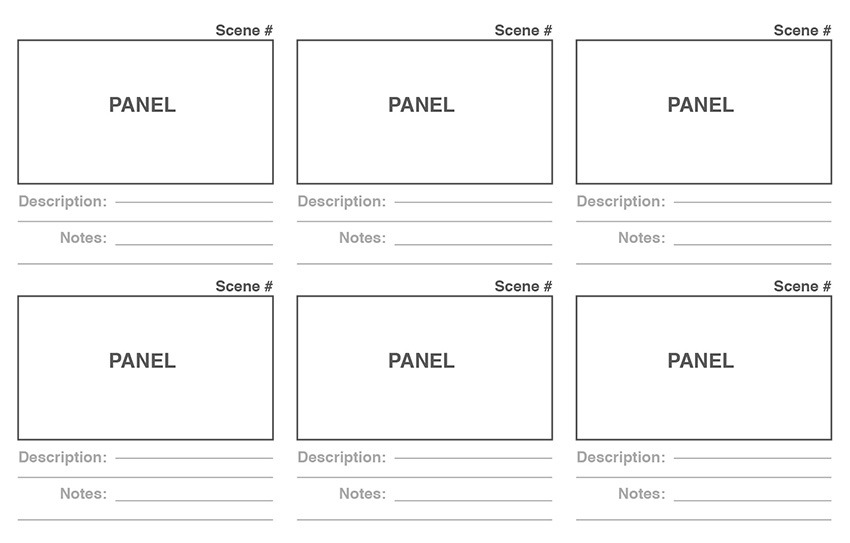
- The Drawing: A simple sketch showing the characters, their poses, and where they are in the frame. You do not need highly detailed art, but the framing must be clear.
- Scene and Shot Labels: Every panel needs a unique ID, like “Scene 11, Shot 1A.” This keeps the project files organized and helps the editors and animators track assets.
- Dialogue and Audio Notes: A dedicated space below the drawing for script lines, voiceover cues, important sound effects, or music notes.
- Action Notes: Simple descriptions explaining how characters or props are moving within the scene.
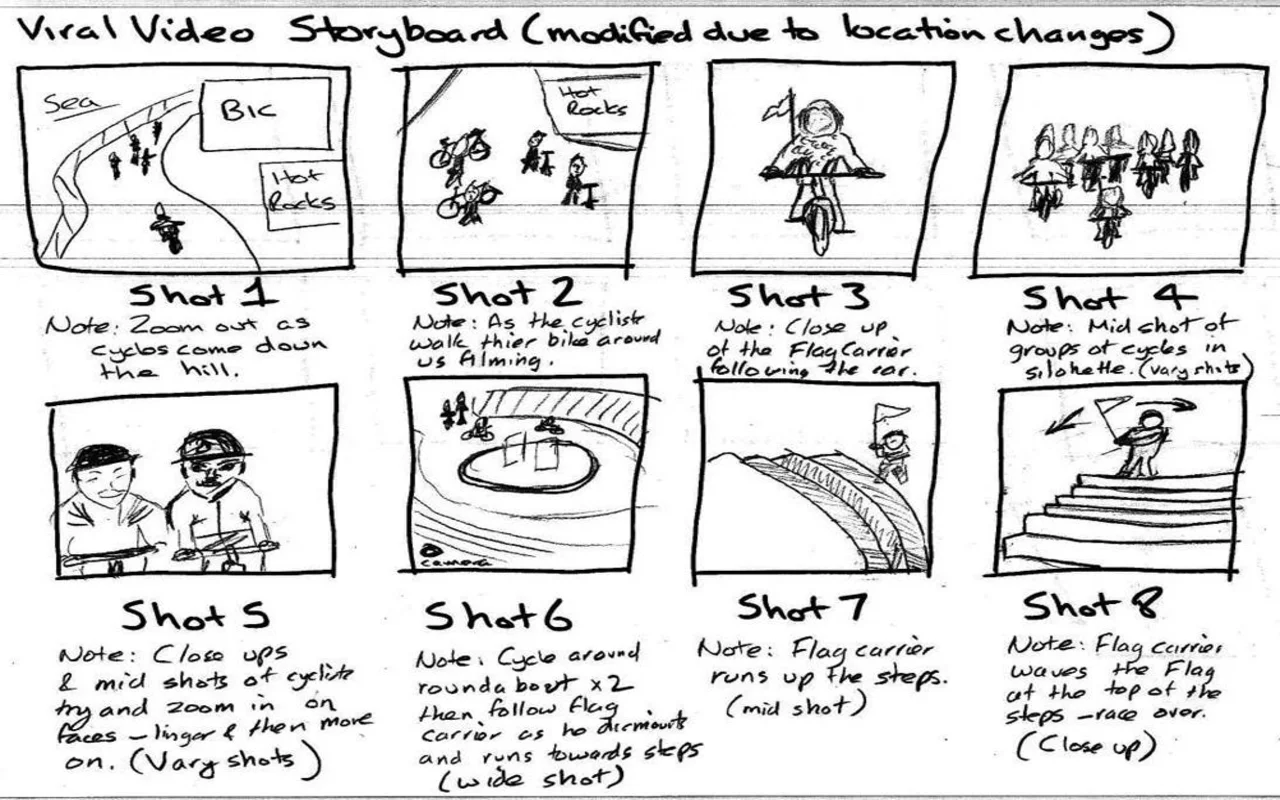
- Camera Notes: Clear directions on camera angles, perspectives, and movement. Storyboard artists use simple directional arrows inside the drawing to show camera moves like pans, tilts, or zooms.
A Realistic 7-Step Storyboarding Workflow
If you want to create a great storyboard, here is a practical, step-by-step storyboarding workflow used by professional animation studios:
Step 1: Break Down the Script
Never start drawing until your script is finished and as close to final as possible. Read through the script and highlight the most important narrative moments, character actions, and emotional beats. You need to decide which shots are critical to show the flow of the story.
Step 2: Draw Quick Thumbnails
Start with tiny, rough sketches called thumbnails. Do not worry about clean lines or small details here. Draw four to six frames per page to brainstorm compositions, character placements, and staging. This stage is all about testing your ideas quickly without wasting time on drawings you might throw away.
Step 3: Establish the Visual Flow
Once you have your thumbnails, look at how the shots connect. This is where you think about visual pacing. Plan when to cut from a wide establishing shot to an emotional close-up. Use simple composition methods, like the rule of thirds or framing with foreground objects, to guide the viewer’s eye to the most important parts of the screen.
Step 4: Focus on Clear Silhouettes and Arcs
As you flesh out your sketches, make sure your character’s actions are clear. A major rule of thumb is silhouette clarity, meaning a viewer should understand exactly what a character is doing just by looking at their dark outline. Also, make sure that physical movements, like a swinging arm, follow natural, smooth arcs.
Step 5: Add Dialogue, Notes, and Arrows
Write down the corresponding script lines and action notes under each frame. Use bold arrows to show which way characters are moving or how the camera is panning. This ensures that the animation crew knows exactly what is supposed to happen on screen.
Step 6: Revise and Track Versions
A storyboard is a living document that will change based on feedback from directors, writers, and animators. When you make changes, keep things organized. If the edits are small, update the current draft. For major changes, save a new version, like version two. Always keep your old drafts so you can compare different ideas and see what worked best.
Step 7: Build the Animatic
Once your still panels are complete, scan them or import them into your computer. Put the frames in chronological order on a video timeline and match them to your script’s timing. Add temporary voiceovers, sound effects, and music. This rough video is called an animatic, or a Leica reel. It is the final test of your project’s pacing and rhythm before the actual animation begins.
Read More: Animatic vs Animation
How Famous Films Used Storyboards to Solve Problems
Studying how classic movies were storyboarded shows how simple drawings solve massive, complex production challenges:
- Jurassic Park (The Raptor Kitchen Scene): Steven Spielberg’s tense kitchen scene with the velociraptors was planned frame by frame on paper by storyboard artist David Lowery. Spielberg used multiple panels for single camera moves, tracking the dinosaurs’ paths in relation to the kids. This detailed planning allowed the crew to coordinate physical child actors with mechanical dinosaur models perfectly, building suspense without wasting expensive shoot time.
- Inception (The Rotating Hallway Fight): Storyboard artist Gabriel Hardman had to figure out how to keep a fight scene clear when the room was spinning and gravity was shifting. He solved this by drawing a ceiling fan as a permanent visual anchor in almost every frame. This kept the audience from getting confused about which way was up and allowed the stunt and camera crews to build the rotating sets safely.
- Star Wars (The Classic Space Battles): George Lucas used detailed storyboards to design a style of space cinematography that had never been seen before. Meticulous drawings of space fighters, laser fire, and dramatic camera angles established the exact pacing and scale of the battles, showing the crew how to film complex models and special effects.
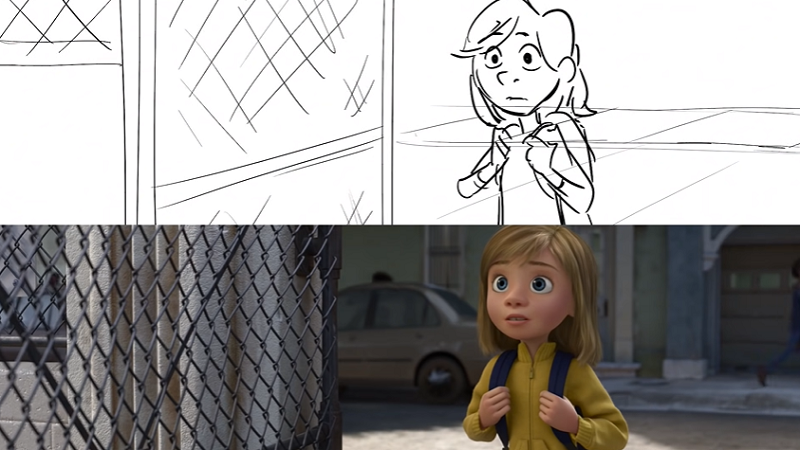
- Up (The Married Life Montage): Pixar’s emotional opening montage showing Carl and Ellie’s life is a perfect example of visual timing. If you look at the storyboard side by side with the finished movie, you will see they are nearly identical. The pacing, composition, and emotional beats were already worked out on paper, showing how static sketches can tell a powerful, wordless story.
Choosing the Right Tools for Your Workflow
You do not need fancy animation software to start storyboarding. A pen, paper, and a solid idea are always the best starting points. Once you are comfortable with the basics, you can move on to digital tools to speed up your process and make sharing with a team easier.
- Storyboarder: This is a free, open-source tool that is incredibly fast and has a simple interface. You can import scripts, sketch frames quickly, and export your work directly to animation software like Adobe After Effects. It is a favorite for many indie creators.
- Procreate: If you like drawing on a tablet, Procreate is a simple and fast choice. It is easy to learn and avoids the technical hurdles of heavy studio software.
- Storyboard That: This tool has a user-friendly interface with a huge library of pre-made characters, backgrounds, and objects. It is perfect for rapid mockups, especially if you are not confident in your drawing skills.
- Boords: A cloud-based platform made specifically for team collaboration. It is excellent for remote teams because it allows members to leave feedback, track changes, and manage project tasks in real time.
- Toon Boom Storyboard Pro: This is the professional studio standard. It has powerful drawing tools, camera controls, and a built-in timeline that lets you sync your drawings with audio to build complete animatics in one place.
- CeltX: A great tool for writers and directors because it links your storyboards directly to your scripts, screenplays, and project plans.
- Meshy: For a 3D animation studio, AI tools like Meshy can speed up pre-visualization by quickly turning 2D sketches or text descriptions into simple 3D models. This lets you experiment with camera angles and scene staging much faster than building assets from scratch.
Three Principles of a Strong Storyboard
No matter what tools you use, all successful types of storyboards rely on three simple rules:
- Accuracy: Your sketches must clearly show the physical layout of the scene and where characters are in relation to objects. The framing and angles must accurately set the mood and match the narrative goals.
- Consistency: Keep character details, props, backgrounds, shape language, and light directions consistent across all your panels. Be sure to follow spatial rules like the 180-degree rule, which means keeping your camera on one side of an imaginary line between two characters so you do not confuse the audience.
- Proficiency: A strong storyboard goes beyond static figures. It should show natural interactions between characters, dialogue, and camera movement. By focusing on how characters react and how the camera tracks action, you turn simple sketches into a dynamic visual guide.
Conclusion
Storyboarding is the ultimate tool for visual planning. It is the place where written words are tested, camera angles are planned, and creative visions are built into practical blueprints. By focusing on panel structure, keeping your scenes consistent, and choosing the right tools, you can build a storyboard that guides your project smoothly from the page to the screen.



![1405,02,10 SnpLE[Cover HD] 1](https://pixune.com/wp-content/uploads/2026/08/14050210-SnpLECover-HD-1-768x431.jpg)