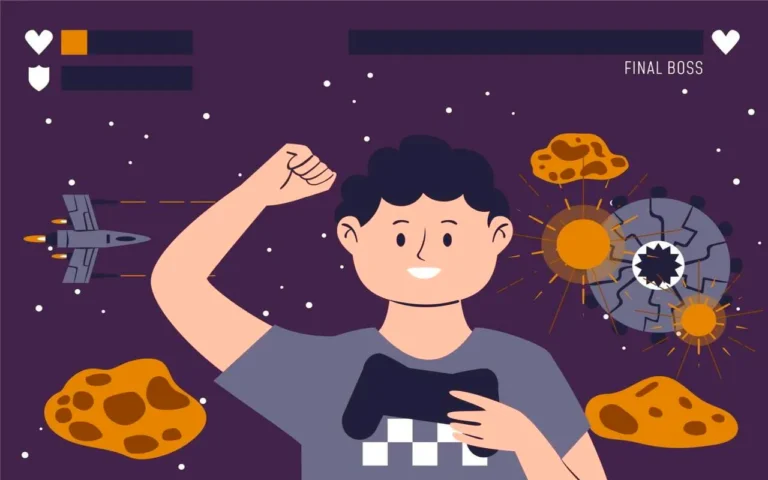
The heroes we play in video games begin as cool ideas in someone’s head. No need for fancy tools; just write a story, draw a character, and build them up one step at a time! The pros use some great tools (don’t worry, a lot of them are free), but the most important thing is to give your character a personality that people will care about. Dream up your character’s tale, draw how they appear, work out how they move, and then use modern technology or character design services to bring your character to life. And you know what? Even well-known personas like Lara Croft began as little before rising to be legendary.
How to Design a Game Character?
Let’s start from the first spark of creativity to the last technical aspects that make your character sparkle in-game!
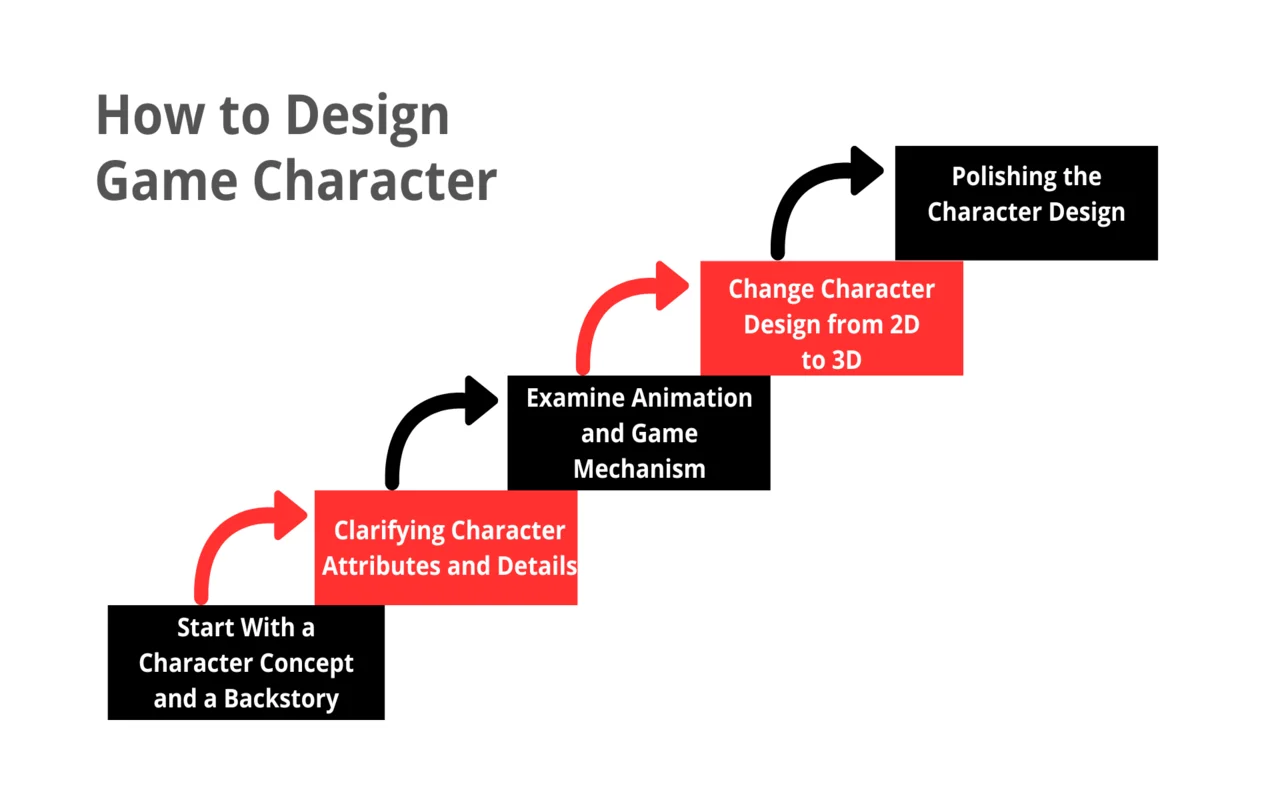
1- Start With a Character Concept and a Backstory
The coolest aspect of game character design begins right in your mind! You know those times when you find yourself thinking about a really great character? We start precisely in that area. Every great character began in someone’s imagination as a concept.
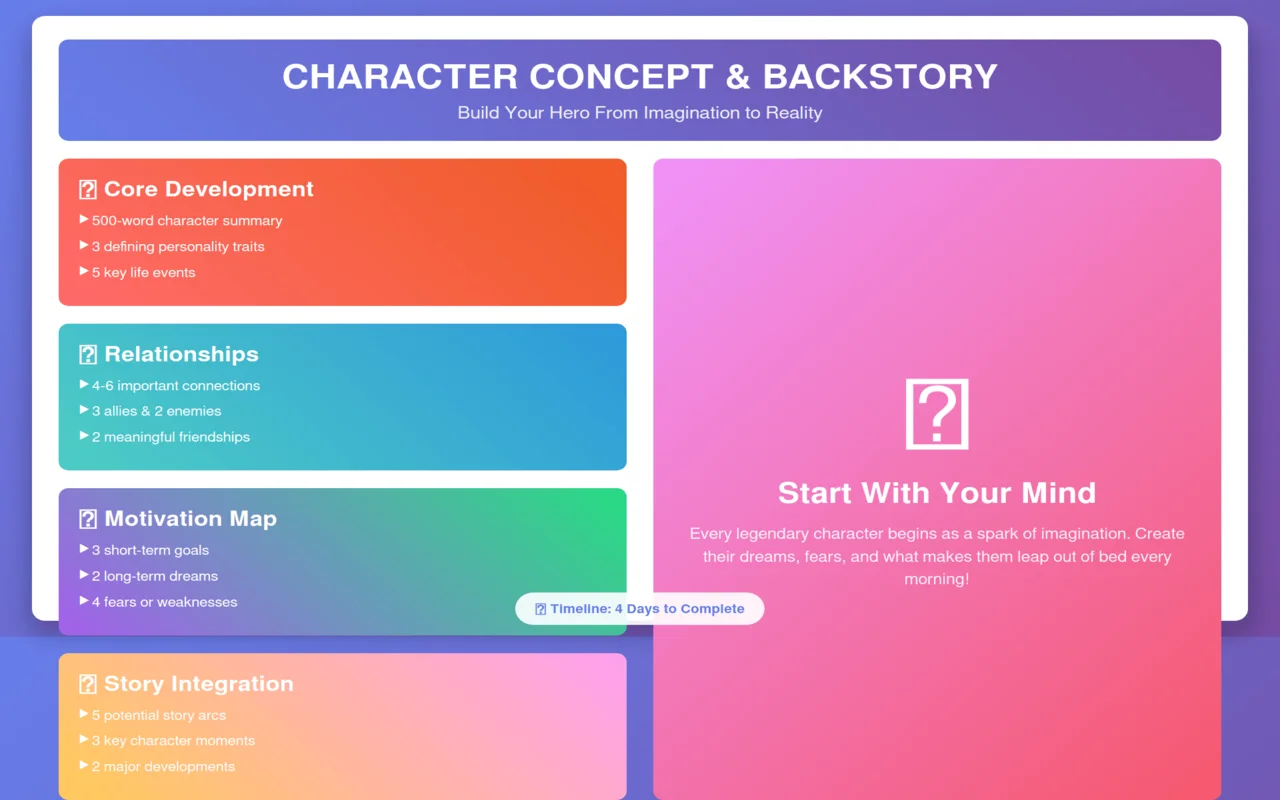
While working on characters, begin by jotting down whatever you can think of about who they are: their dreams, worries, and what makes them leap out of bed in the morning! It’s a joyous character development process, like crafting a story that’s waiting to be told.
Core Character Development (Day 1-2):
- Write a 500-word character summary
- Create 3 defining personality traits
- List 5 key life events that shaped them
- Example: A warrior who lost their family → became protective of others
Relationship Building (Day 2-3):
- Create 4-6 important relationships
- Define 3 allies and 2 enemies
- Write 2 meaningful friendships
- Example: Best friend who betrayed them, a mentor who saved their life
Motivation Mapping (Day 3):
- List 3 short-term goals
- Define 2 long-term dreams
- Write down 4 fears or weaknesses
- Example: Short-term: Find lost sword, Long-term: Rebuild hometown
Story Integration (Day 4):
- Create 5 potential story arcs
- Write 3 key character moments
- Plan 2 major character developments
- Example: From scared rookie to confident hero in 3 stages
2- Clarifying Character Attributes and Details
Now it’s time for the really interesting part: transforming your character into a fantastic sight! Character anatomy goes beyond just cool design. Every component we provide informs gamers about this character! This section always makes me happy, as we are practically bringing our character to life. Every single detail counts while working on game characters, from their posture to the slightest armour scratch. That’s why understanding human anatomy for artists is crucial. It helps make every pose and movement feel intentional and real.
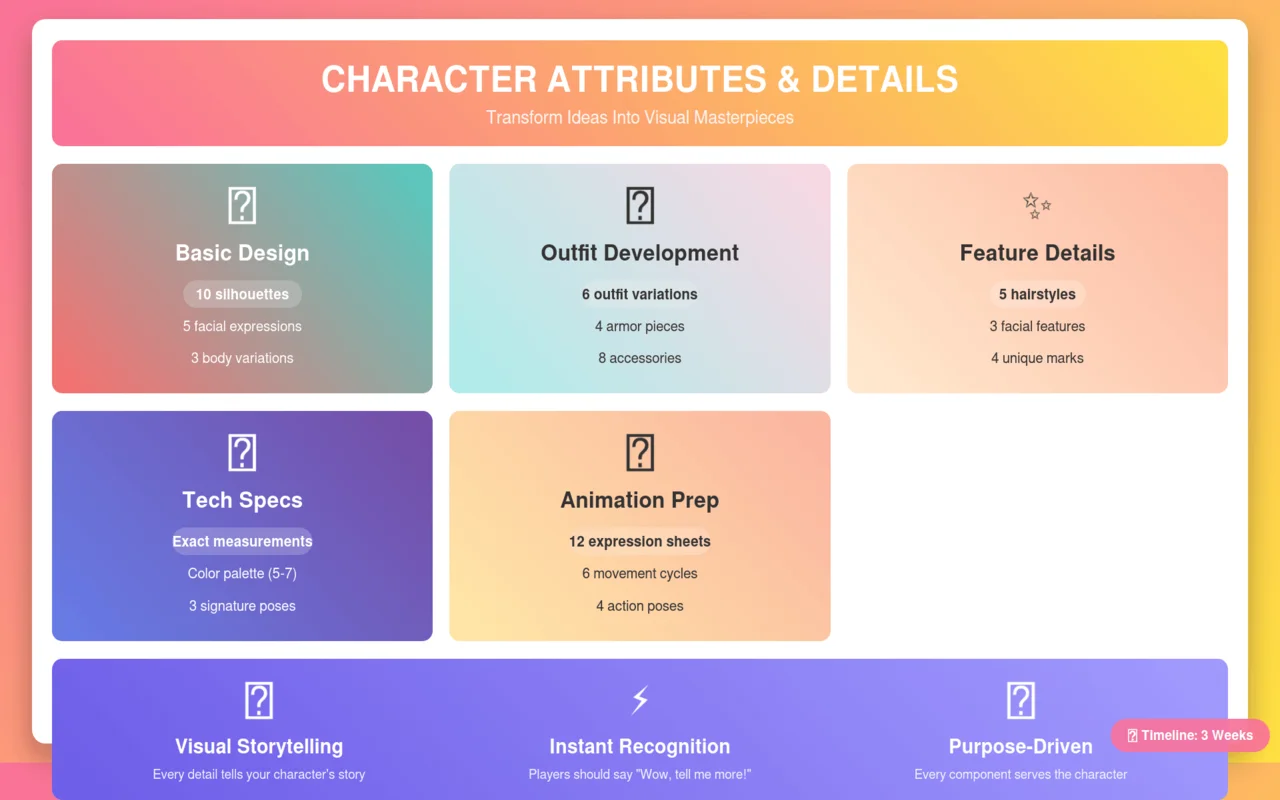
Players should be able to see your character and instantly wonder, “Wow, I wish I knew more about them!” Keep in mind that every detail counts!
Basic Design Elements (Week 1):
- Create 10 different silhouettes
- Design 5 facial expressions
- Draw 3 body type variations
- Example: Tall/muscular, medium/athletic, small/agile
Outfit Development (Week 1-2):
- Design 6 outfit variations
- Create 4 armour pieces
- Add 8 personal accessories
- Example: A necklace with 3 meaningful charms
Feature Details (Week 2):
- Design 5 hairstyle options
- Create 3 facial feature variations
- Add 4 unique identifying marks
- Example: A scar shaped as an arrow pointing north
Technical Specifications (Week 2-3):
- Set exact height (e.g., 6’2″)
- Define weight (e.g., 185 lbs)
- Create a color palette using color theory (5-7 colors)
- Design 3 signature poses
- Example: Height chart comparing a character to common objects
Animation Preparation (Week 3):
- Create 12 expression sheets
- Design 6 movement cycles
- Draw four action poses
- Example: Running, jumping, fighting stances with specific angles
3- Examine Animation and Game Mechanism
When your character jumps over hurdles or lands the perfect attack, that’s an awesome moment. Every move they make should feel natural and fun. Make sure that every action, from simple idle motions to huge battle moves, flows easily and feels just right.
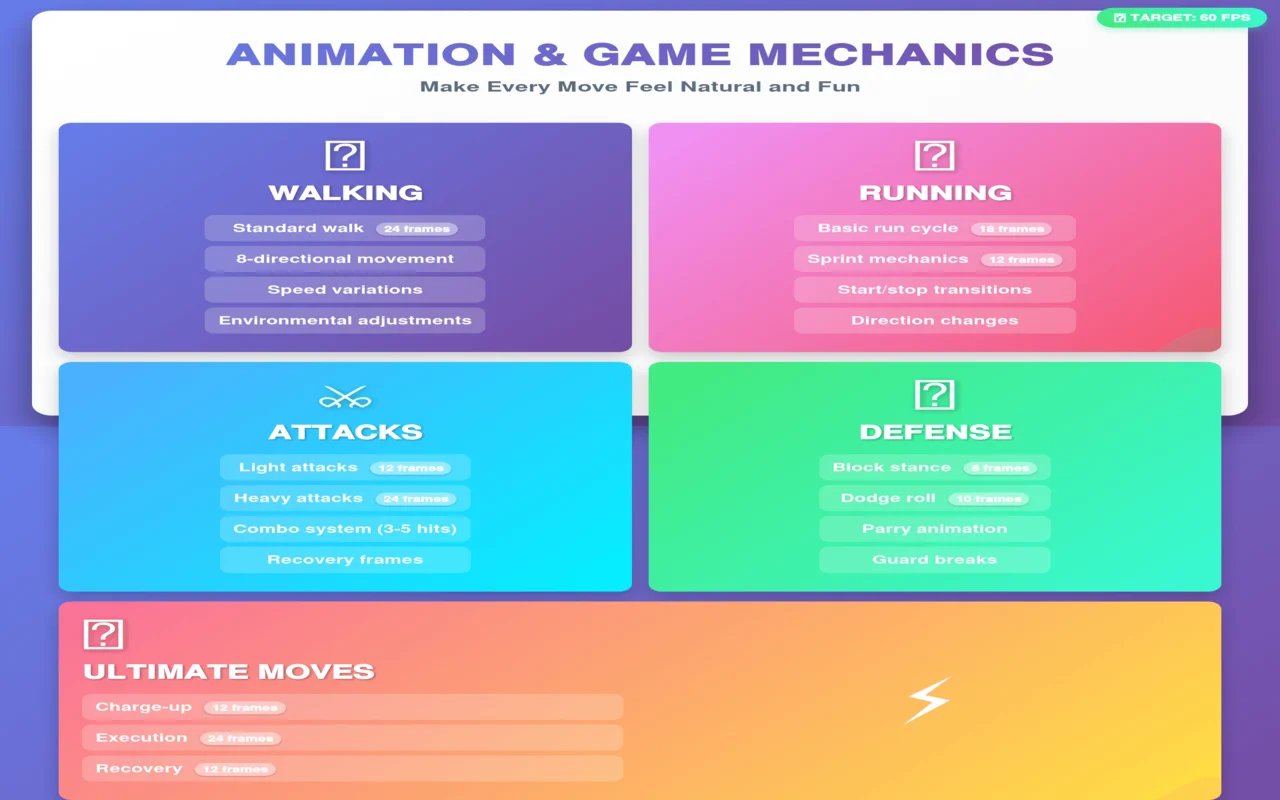
The interesting aspect of game creation is that every single button push should cause gamers to smile! Every move your character makes should show what kind of person they are, like a fast ninja or a strong fighter. You can use the following settings to make a good character:
Walking System:
- Standard walk animation (24 frames)
- 8-directional movement patterns
- Speed variations (slow/normal/fast)
- Environmental adjustments (slopes/stairs)
Running System:
- Basic run cycle (18 frames)
- Sprint mechanics (12 frames)
- Start/stop transitions (8 frames each)
- Direction changes (6 frames)
Basic Attacks:
- Light attacks (12 frames)
- Heavy attacks (24 frames)
- Combo system (3-5 hits)
- Recovery frames (6-8 frames)
Defence Mechanics:
- Block stance (8 frames)
- Dodge roll (10 frames)
- Parry animation (6 frames)
- Guard breaks (12 frames)
Ultimate Moves:
- Charge-up (12 frames)
- Execution (24 frames)
- Recovery (12 frames)
4- Change Character Design from 2D to 3D
The options are endless when you switch from 2D to 3D models. Although at first the jump seems frightening, breaking it down into smaller increments makes it very controllable. While creating this change, begin by concentrating on one element at a time: first, the fundamental form, then details, and next, textures.
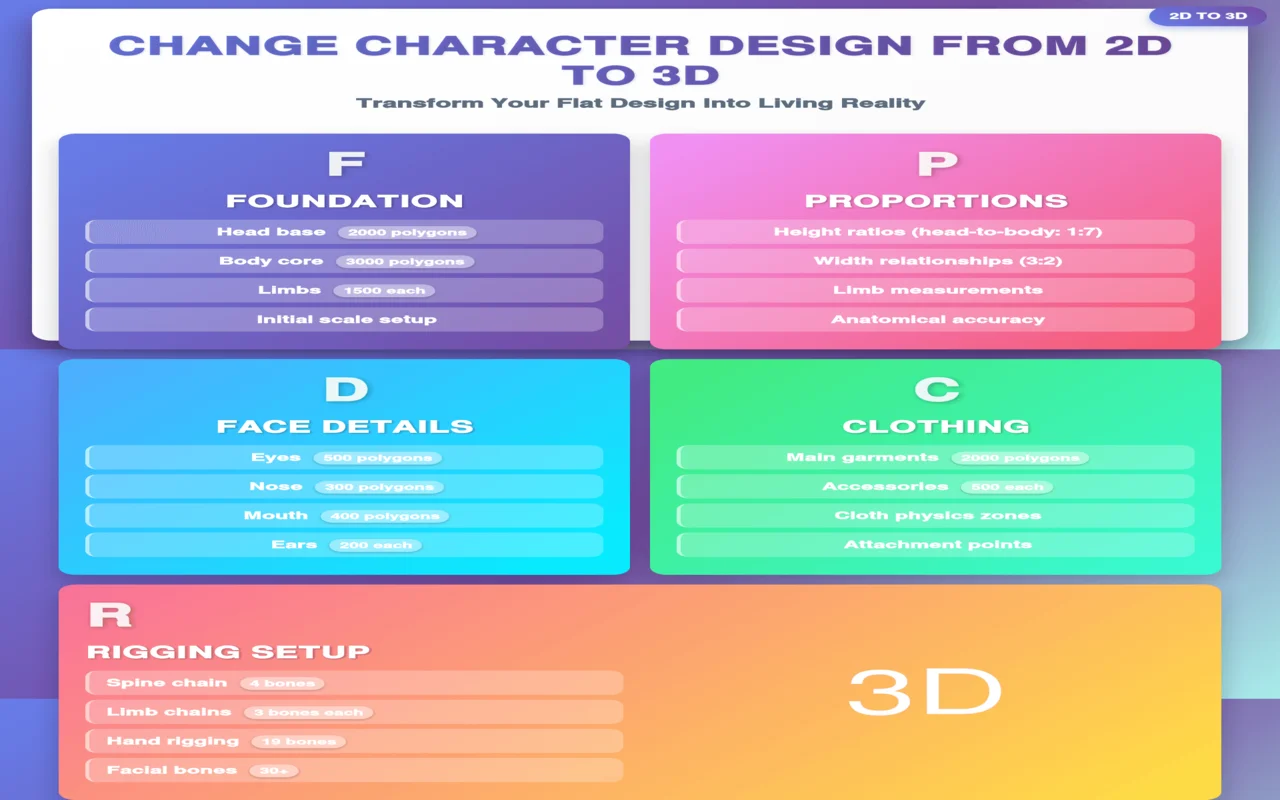
Foundation Setup:
- Basic Geometry
- Head base (2000 polygons)
- Body core (3000 polygons)
- Limbs (1500 each)
- Initial scale setup
Proportion System:
- Height ratios (head-to-body: 1:7)
- Width relationships (shoulder:waist: 3:2)
- Limb measurements (arm length = 3 heads)
High-Resolution Elements:
- Face Details
- Eyes (500 polygons)
- Nose (300 polygons)
- Mouth (400 polygons)
- Ears (200 polygons each)
Clothing System:
- Main garments (2000 polygons)
- Accessories (500 each)
- Cloth physics zones
- Attachment points
Rigging Setup:
- Skeleton Structure
- Spine chain (4 bones)
- Limb chains (3 bones each)
- Hand rigging (19 bones)
- Facial bones (30+)
Read More: Rigging and Skinning Pipeline for Characters
5- Polishing the Character Design
The process for getting the ideal textures is similar to giving your digital companion a flawless facelift. We are discussing a crystal-clear 2 K- 4 K resolution, three layers of detail mapping to achieve the perfect skin texture, and approximately 5-8 distinct material adjustments to enhance the overall appearance. Most artists spend three to five days in this stage; the professional polish is very worth it.
The last phase is ensuring your character performs like a star. It’s easy for them to move at 60 frames per second because they only have 15K to 20K pixels. To save room, reduce the size of the images by 50–75% and fine-tune the motions to work at 30–60 frames per second. You can be sure that your character will look great and move smoothly on all devices, from high-end PCs to phones.
Visual Polish Phase:
- Base texture resolution: 4096×4096
- Normal maps: 2048×2048
- Roughness/Metallic maps: 1024×1024
- 5 material blend layers minimum
- 3 wear pattern overlays
- Example: “Metal armour needs 0.8 roughness value at edges”
Detail Enhancement:
- Micro detail normal intensity: 0.3-0.5
- Ambient Occlusion strength: 0.6-0.8
- Edge wear mask: 2-3 layers
- Surface noise: 10-15% intensity
- Example: “Add 0.4 strength edge wear on metal surfaces”
Technical Optimization:
- Maximum draw calls: 3-4 per character
- Texture memory budget: 100-150MB
- Material instance count: 3-5 maximum
- Example: “Reduce main texture set from 4K to 2K = 75% memory save”
LOD System:
- LOD0: 15,000-20,000 polygons
- LOD1: 8,000-10,000 polygons
- LOD2: 3,000-5,000 polygons
- Transition distances: 10/20/30 meters
- Example: “LOD0 to LOD1 transition at 10 meters from camera”
Character Animation Polish:
- Animation framerate: 30 FPS
- Blend times: 0.15-0.3 seconds
- Root motion accuracy: 1cm tolerance
- Physics update rate: 60 Hz
- Example: “Walk-to-run blend takes 0.2 seconds”
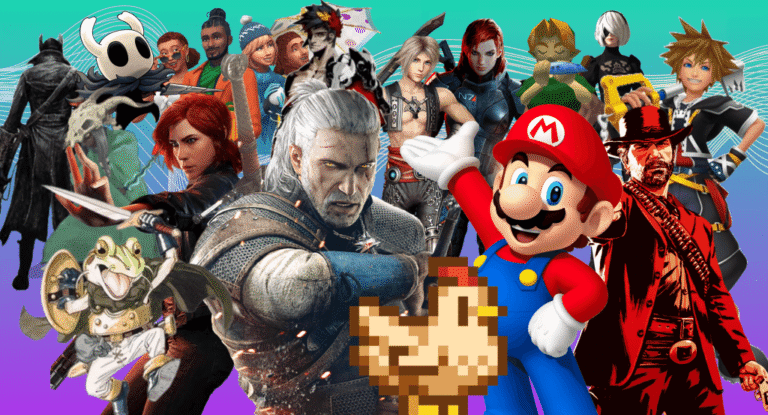
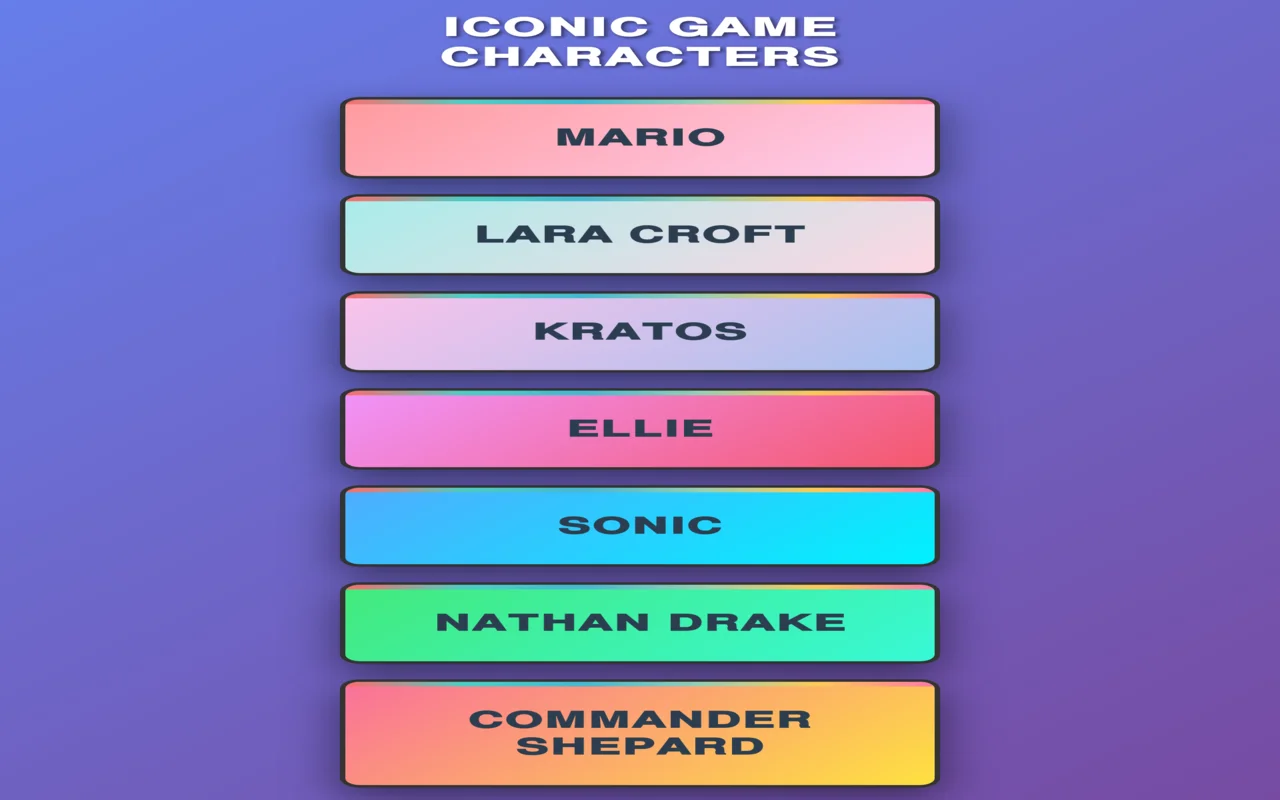
Examples of Iconic Game Character Designs
3D character history reveals amazing development! Famous characters, like Mario’s simple but effective design or Aloy from Horizon: Zero Dawn, show how technological limitations can lead to creative solutions. These characters show that great design goes beyond mere technological limitations and that a skilled 3D character artist can turn constraints into iconic creations.
Mario: The Classic Timeless for Endings
Mario’s simple but perfect style makes everyone happy. Nintendo perfected it with those brilliant red and blue colours, even when it was only little pixels. Really nice is what you have here. His fundamental rounded form became gaming history!
His best features, like his famous red hat, beard, and classic overalls, have been kept the same over the years, from the old NES to the new Switch. Mario, from today, needs 24 separate animations to execute all his beautiful motions in both 2D and 3D games.
Read More: 15 Fascinating Facts About Nintendo
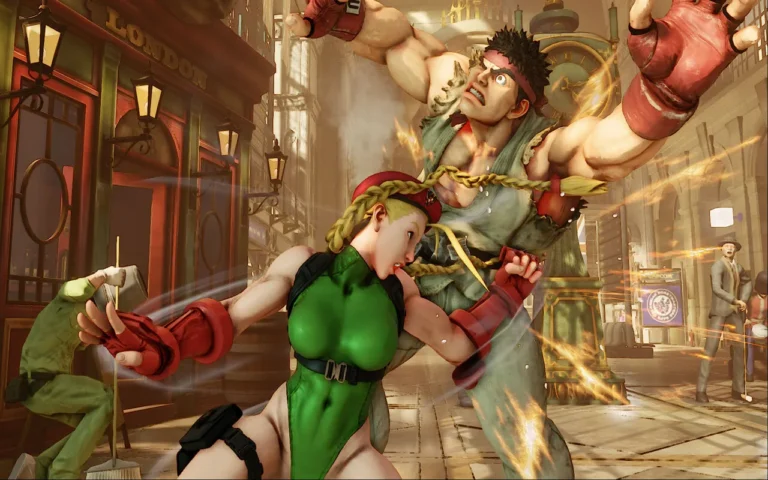
Lara Croft – The Adventure Queen
Lara Croft changed completely over time! She began with just 540 polygons back in ’96, and now she’s wearing over 100,000! Her most recent appearance has incredible details: 30,000 strands of flowing hair and very lifelike clothes that become dirty and damp.
Also, her new gear is serious: tough tank tops, legit cargo pants with pockets, and real climbing boots, all with super-clear 4K graphics.
Kratos: The Mighty Warrior
His most recent form has 15 groups of muscles that move naturally, and his beard is made up of 20,000 separate strands! Kratos moves his face in 32 various ways for emotions, and the red tattoo looks just great with three distinct texture layers. Plus, he has over 120 distinct techniques, each displaying his heavenly power!
Ellie: The Master of Survival
Ellie’s skin shows ageing and scars in five layers. She uses 90 distinct facial expressions, each requiring 50 muscle moves! She has eight methods to sneak about, moves differently on six kinds of terrain, and has fifteen combat positions. They even included twenty distinct ways she could get filthy, bloody, or sweaty!
Sonic: The Speed Demon
Sonic demonstrates how 2D characters may rock in 3D! He has preserved everything that makes him fast: 7 primary spikes that move on their own, a streamlined form, and his trademark blue colour that pops at any speed. Modern Sonic runs through 12 positions, many more than his initial six. Also, there are 36 parts to his character setup that are needed just for basic moving, plus 15 more for his special moves.
Nathan Drake – The Parkour Project
Thirty different muscle groups work together to make his body move very naturally. His face exhibits incredible detail; every emotion seems natural thanks to 120 distinct bones! His clothing responds to everything he does; see how his shirt moves as he climbs or how it becomes wet in various ways. He is really mixing 3-4 motions from a vast range of over 250 distinct movements as he is sprinting and hopping around!
Commander Shepard – The Customizable Hero
The settings for more than 50 features can be changed, and each one has between 15 and 20 choices. The facial features are quite finely detailed; there are 100 unique ways to sculpt them, allowing for highly expressive facial animation! It has 15 pieces, and you can change how each one looks in 4 different ways. Their movement varies depending on your class; six distinct walking techniques for various personalities and eight combat techniques are dependent on your level of expertise. Plus, they get every word of the more than 20,000 lines of speech right!
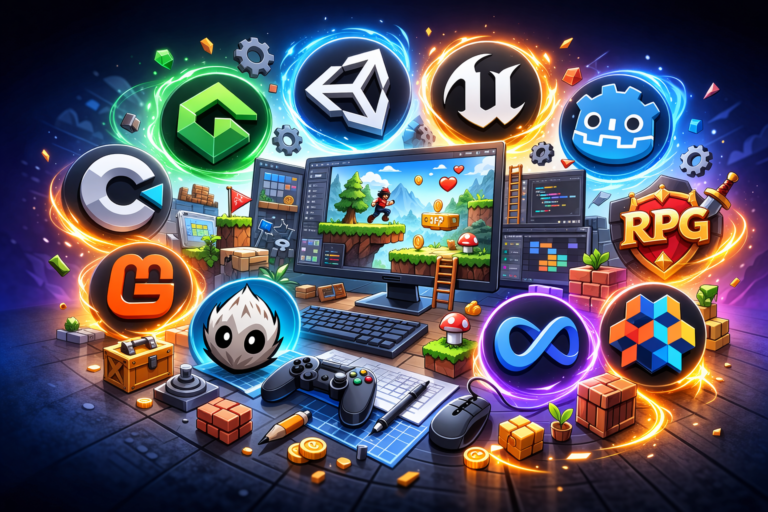
What Are The Best Tools and Software for Game Character Design?
It’s never been easier to handle every part of character creation with modern tools, from the first sketches to the finished animation. Every tool category— 3D modelling, texturing, animation, and engines—serves a distinct function in the pipeline and collectively helps to bring characters to life.
Modelling and Sculpting Tools
Your major tools for creating 3D characters are these 3D modeling software! The experts make use of these tools:
- Maya: Perfect for delicate work ($1,785/year); very exact
- Blender: Does everything and is absolutely free!
- ZBrush: The ruler of digital sculpting ($39.95/month)
- Mudbox – Great for beginners ($10/month)
- 3D-Coat: ($99/year) Solid all-rounder
Texturising and Materials Tools
These tools give your figures life, texture, and colour:
- Substance Painter: The best modelling program in the business ($19.90/month).
- Mari: ($2,119/year) Pro-level painting tool
- Substance Designer: Costs $19.90 a month and lets you make your own materials.
- Quixel Mixer: Free with Unreal Engine 5!
- Photoshop: The old version ($20.99/month)
Animation Phase Tools
Use these incredible tools to get your character moving:
- Motion Builder: A Pro drawing program that costs $1,620 a year.
- iClone: Simplifies animation ($150,000 per year)
- Mixamo: Free character animation with Adobe Cinema 4D ($94/month)
- Maya Animation: Comes with Maya
Game Engines Tools
Using these game-making tools will help you activate your character:
- Unreal Engine 5: Free and rather powerful!
- Unity: Popular and starting point friendly (Free*)
- Godot: completely free and open-source
- CryEngine: Free images that are very good
- Amazon Lumberyard: AAA engine for free
Project Management Tools
This set of tools will help your project go smoothly:
- Trello: Record your free tasks.
- Notion: Record everything (Free tier)
- Adobe Creative Cloud: All Adobe tools ($52.99/month)
- Miro: Fantastic for free tier planning
- GitHub: Save and share your work (Free)
What Are The Must-Know Tips for Aspiring Game Character Designers?
Start by creating your visual library: spend daily time examining several faces, physiques, and clothes types. Save references for any item that grabs your attention. Then concentrate on making every element tell a story – that amazing scar on your warrior’s cheek or those worn-out boots should indicate something about the path of the character!
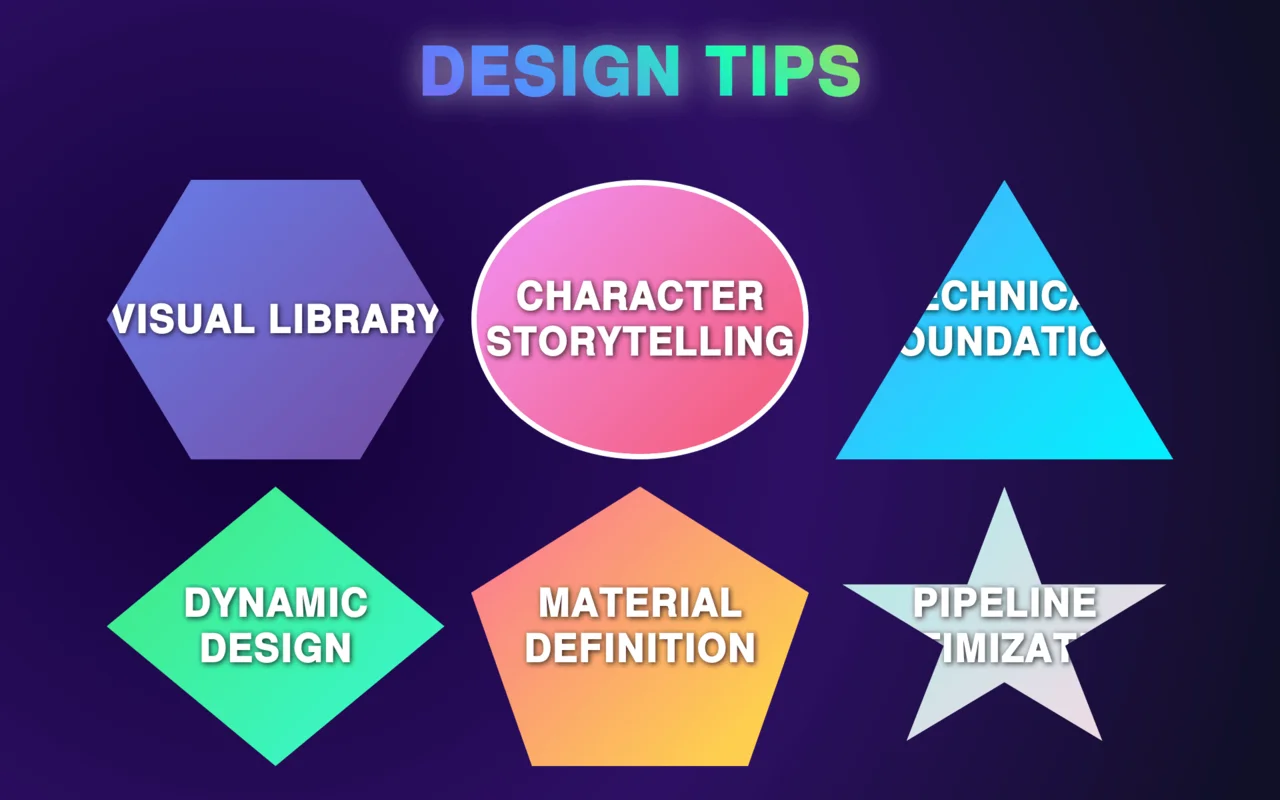
Mastery of Your Visual Library
In-game character design, creating a solid mental library of references, changes your job! This exercise enables every character to have special combinations. As you actively create this knowledge base, you will see your concept artwork become more varied and real.
- Every week, look at 20 different face types.
- Draw 10 kinds of bodies every day.
- Make mood boards for every kind of character type.
- Record clever outfit combinations.
- Show unusual materials and textures in pictures.
Focus on Character Storytelling
The best characters are those that use pictures to tell a story. Every scar, item of clothing, or accessory should have significance. Psychology in character creation plays a big role. Always make sure that every part of a character’s creation adds to their story. This makes them more recognisable and easier to relate to.
- Create a backstory for every visual component.
- Set up wear patterns consistent with the character’s history.
- Design 3 to 5 personal objects for every character.
- Use visible cues to figure out how characters are related.
Technical Foundation First
Good technical preparation is the basis of strong character modeling! Clearly define your technical rules before starting thorough work. This guarantees flawless application in the game engine and helps to avoid expensive changes.
- Create character-type polygon budgets.
- Specify LOD or Level of Detail.
- Record criteria for texture resolution in documents
- Clearly specify early on the animation needs.
- Plan memory use to restrict.
Apply Dynamic Design
Always consider how every component of the character will move and interact during play. Design with movement in mind helps to improve character animation!
- Organise movement studies.
- Design tests in many positions.
- Create sections for cloth simulation.
- Design with great mobility in mind.
- Think about action shapes.
Focus on Material Definition
Effective character texturing depends on well-defined material planning!
- Create material reference sheets.
- Test several shader combinations.
- Record PBR values for often-used materials.
- Create a bespoke library of materials.
- Use methods of material mixing.
Pipeline Optimization
I’ve learned that getting your process organised saves a lot of time and makes the end result better.
- Develop character creation models.
- Create recyclable asset libraries.
- Record shared solutions.
- Develop naming rules.
- Design modular components for character work.
Read More: How Much Does a Character Design Cost?
Conclusion
When you break it down, the field of game character creation is really very simple. It all starts with a cool idea. Then, you draw it out, give it some personality, and use the right tools to live. Tech stuff is important to learn, but don’t be scared of it—everyone started out as a beginner! Make sure your figures tell a story and make people laugh, whether you’re just starting to learn 3D modelling or you’re already working on your first character.