The animation pipeline is like whipping up a gourmet meal, but you’re cooking cartoon magic instead of food. It’s a three-course feast: pre-production (planning the menu), production (cooking up a storm), and post-production (adding those fancy garnishes).
Pre-production is where the brainstorming bonanza happens. Production is where the rubber meets the road. Post-production is the cherry on top.
From the first “what if” to the final frame, creating an animated masterpiece is a wild ride that takes a boatload of creativity, tech smarts, and a dash of pixie dust. It’s a long haul from a lightbulb moment to the cartoon gold we binge-watch, but boy, is it worth it!
Need Animation Services?
Visit our Animation Service page to see how we can help bring your ideas to life!
What is the Animation Pipeline?
The animation pipeline is the formula for creating those amazing cartoons and animated films you like. Think of it as a fascinating assembly line where many creative people transform a basic concept into amazing animation magic.
It all begins with brainstorming and drawing and continues through phases like storyboarding (think comic book version of the program), character design (giving those characters snappy looks), and animation (when things start to move and flow).
What Are the 3 Main Stages in the Animation Pipeline?
The animation pipeline consists of three main stages that transform ideas into captivating visual stories: pre-production, production, and post-production.
- Pre-Production: This is the planning and creativity stage where the creative foundation is laid. It involves brainstorming story ideas, writing scripts, creating character designs, and mapping the visual narrative through storyboards.
- Production: This stage brings the plans to life through animation. Animators create the movement of characters and objects, while artists craft backgrounds and add colors, transforming static designs into dynamic, moving scenes.
- Post-Production: This final stage polishes and refines the animated content. It includes editing, adding sound effects and music, color correction, and incorporating final visual effects to make the finished product ready for viewing.
10 Steps in the Pre-Production Stage
Pre-production is the beginning of the cartoon-making process. It involves planning and coming up with ideas.
1- Concept Development
All the fun begins here! This is a creative brainstorming session during which big ideas start to blossom. The story should make people laugh, cry, or yell, “Wow!” The team will choose the overall narrative atmosphere, develop the main plot, and name the characters.
Steps in Concept Development:
- Brainstorm ideas
- Choose the best concept
- Develop main characters
- Outline the basic plot
- Define the story’s world and rules
Example: The story for “Toy Story” could have begun with the question, “What if toys had secret lives?” Then, they would settle on the laws of the toy world (such as freezing when humans are near), introduce Buzz as the new hotshot, and discuss Woody as Andy’s preferred toy.
2- Script Writing
It’s time now to flesh out that fantastic concept by penning (or fingertips to keyboard). Writing a script is like laying your story’s skeleton. Writers compose every word of conversation, portray the action, and ensure the story runs naturally from beginning to end. Their job is to make sure that every joke works, every sad moment is real, and every plot twist keeps you on the edge of your seat.
Steps in Script Writing:
- Write a rough outline
- Develop detailed character backstories
- Draft the script scene by scene
- Write dialogue and action descriptions
- Revise and refine multiple times
Example: In “Frozen,” the writers would craft Elsa’s iconic “Let It Go” scene, detailing her actions, emotions, and, of course, every word of that catchy song. They’d also describe how Anna and Kristoff’s banter develops their relationship throughout their journey.
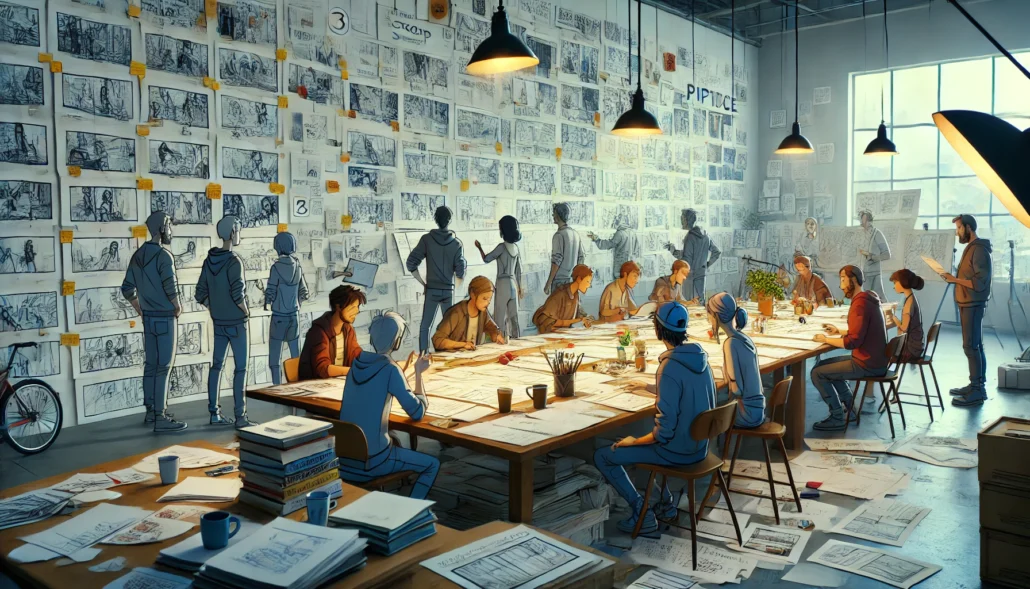
3- Storyboarding
Storyboarding is similar to creating a comic book version of your show or movie. The artists carefully lay out every key scene from the story, showing the characters’ locations, actions, and the “camera” perspective. The storyboard serves as a rough visual draft that clarifies the style and feel of the finished animation for everyone.
Steps in Storyboarding:
- Break down the script into key scenes
- Sketch rough drawings for each important moment
- Add notes about camera angles, movement, and timing
- Create panels showing the flow from one shot to the next
- Review and revise with the team
Example: The designers of “The Lion King” storyboards would draw Simba, Timon, and Pumbaa lying on their backs and staring at the night sky. They would draw several panels showing how Simba’s face changes when he thinks about his dad, with notes about how the camera would slowly zoom in on his face.
4- Animatic
Animatics are initial drafts of movies. They’re similar to seeing your storyboards animated but without the fancy effects. The cast gathers those storyboard designs into a film, adding simple movement, camera views, and timing. They also provide sound effects and temp voices. Though not beautiful, they help everyone understand how the finished work will flow.
Steps in Animatic:
- Scan or import storyboard panels
- Add basic movements and transitions
- Time out each scene
- Add temporary dialogue and sound effects
- Review and revise for story and pacing
Example: The animatic for a chase sequence in “How to Train Your Dragon” may include crude doodles of Hiccup and Toothless soaring between sea stacks using simple motions and camera angles. It lets them know whether the situation calls for extra punch or is thrilling enough.
5- Voice Recording
At this point, the characters begin to talk! When it’s time to record, voice performers don their voices and give the screenplay soul. These skilled people must read lines and show how their characters feel and act through their sounds. Usually, the recording starts early because artists need the speech to fit how the figures’ mouths move later on.
Steps in Voice Recording:
- Cast voice actors
- Hold recording sessions
- Perform multiple takes of each line
- Edit and select the best takes
- Create a dialogue track for animators to use
Example: To portray Elsa’s emotional spectrum in “Frozen,” Idina Menzel would record “Let It Go” in the studio and perform it many times. The finest takes would be selected to direct the animators in producing Elsa’s motions and emotions.
6- Color Scripts
Color scripts serve as the mood board for your animation. Based on the color theory in art, artists create a collection of small, vibrant paintings illustrating how the colors will change as the story unfolds. The goal is to capture the overall vibe of each scene rather than focusing on the little details. These color guides are great for maintaining a visually consistent movie and using color to enhance the story’s emotions.
Steps in Color Scripts:
- Analyze the story’s emotional journey
- Create color palettes for different scenes or locations
- Paint small, simplified versions of key moments
- Arrange paintings in story order
- Review and adjust for color flow and emotional impact
Example: The color screenplay for “Inside Out” would contrast Riley’s joyful memories in warm, golden colors with the chilly blues and greys she experiences while adjusting to a new city.
6 Steps in the Production Stage
Cartoon magic truly occurs in production. It is similar to giving life to a flip book but much more amazing. Animators use fancy screens to move figures in various ways, from simple blinks to crazy dance acts.
1- Character and Environment Design
The fun of giving people and settings life starts here! Artists put on creative hats and begin to draw furiously. In the character design process, they determine each character’s appearance, including their movement and footwear choices.
Not only should their looks be impressive, but they should also convey a message. Perhaps it’s a strange planet, a busy metropolis, or a haunted forest. Everything, no matter how fantastical, should have an authentic, lived-in quality.
Steps in Character and Environment Design:
- Sketch initial character concepts
- Refine character designs and create model sheets
- Design props and objects characters will interact with
- Sketch environment concepts
- Finalize environment designs and create background art
Example: For “Zootopia,” artists would design Judy Hopps to look determined and energetic, while Nick Wilde might have a sly, laid-back appearance. They’d also create the diverse districts of Zootopia, from the icy Tundratown to the miniature Little Rodentia.
2- Background Art
Background artists are like the set designers of the animation world. They paint or draw all the places where your characters hang out, from cozy living rooms to epic alien planets.
Steps:
- Sketch rough background designs
- Refine designs based on layout
- Choose color palette
- Paint detailed backgrounds
- Add finishing touches like lighting effects
Example: For “SpongeBob SquarePants,” artists would create the colorful, whimsical underwater world of Bikini Bottom, painting everything from SpongeBob’s pineapple house to the Krusty Krab restaurant in a style that’s both cartoony and weirdly realistic.
3- Layout
Think of layout as setting up the stage for your cartoon. It’s where artists decide how each scene will look, like a director choosing camera angles for a movie.
Steps:
- Review storyboards
- Sketch rough scene layouts
- Determine camera angles and movements
- Position characters and objects
- Get approval from the director
Example: Layout artists in “The Lion King” would use a wide view to highlight Simba’s small size relative to his dad and frame Mufasa and Simba atop Pride Rock.
4- 3D Modeling
To put it simply, 3D modeling is like playing with digital clay! Artists use unique software to create and shape characters, objects, and environments in three dimensions. It’s similar to creating a digital action figure you can check out from every angle. They begin with simple shapes and slowly incorporate more detail, creating everything from a character’s nose to the buttons on their shirt.
Steps in 3D Modeling:
- Create basic shapes (like spheres or cubes) as a starting point
- Sculpt and refine the model’s form
- Add details like facial features or clothing folds
- Optimize the model for animation (this is called topology)
- Set up the model’s skeleton (known as rigging) for movement
For example, 3D artists would start with simple forms to create Forky for Toy Story 4. In addition to adding features like his messy eyes and pipe cleaner arms and legs, they would polish his spork body and ensure the structure allows animators to move and animate him effortlessly.
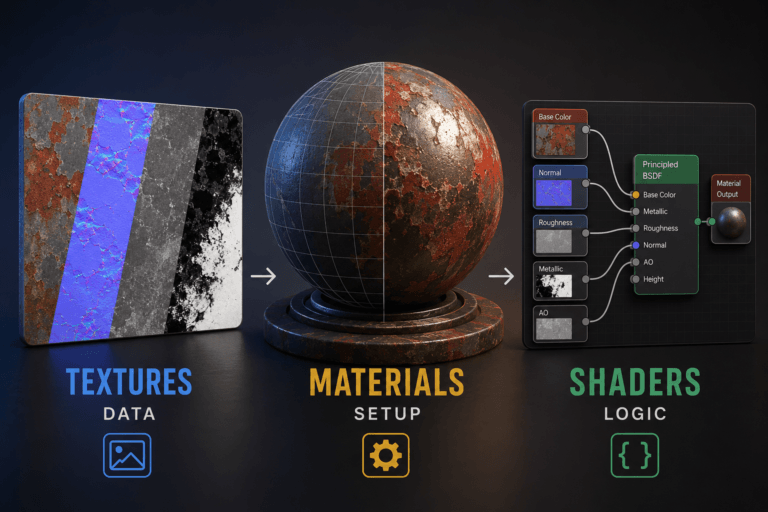
5- Texturing
Once you have your 3D models, it’s time to add some texture! 3D texturing is similar to painting your 3D models but is more than just applying color. Designers make 3D models look realistic or artistic by adding detailed pictures to their surfaces.
This covers details such as the fabric pattern on a character’s shirt, a tree’s rough bark, or a car’s shiny surface. They are considering more than simply color; they also consider how light behaves on various surfaces. Is it shiny? Challenging? Clear? All of this is incorporated into the textures to create a 3D world that feels vibrant and authentic.
Steps in Texturing:
- Create or gather reference images for textures
- Unwrap the 3D model (imagine peeling the skin off an orange and laying it flat)
- Paint or apply color and texture maps
- Add details like bump maps for surface texture
- Adjust how the surface reacts to light (shininess, transparency, etc.)
Example: For a character like Elsa from Frozen, texture artists would establish her skin tone, incorporate subtle details such as freckles or skin pores, design the intricate patterns on her ice dress, and ensure that her hair has the appropriate sheen and flow. They would also make her ice powers appear enchanting by giving the ice a translucent, shimmery quality.
6- Animation
This is the heart and soul of animation – bringing drawings to life! Animators start by drawing key poses (called keyframes) for each action in 2D animations, rigging and animation in 3D animations.
Steps:
- Plan out the action
- Draw key poses (keyframes)
- Create in-between frames
- Check timing and flow
- Review and revise the animation
Example: Animators would initially sketch Aladdin in crucial stances, stepping onto the magic carpet for a sequence in “Aladdin.” To ensure his movement seemed natural and fluid, they would then add in-between shots to depict how he jumps, lands, and recovers his balance.
Read More: What is Keyframe Animation?
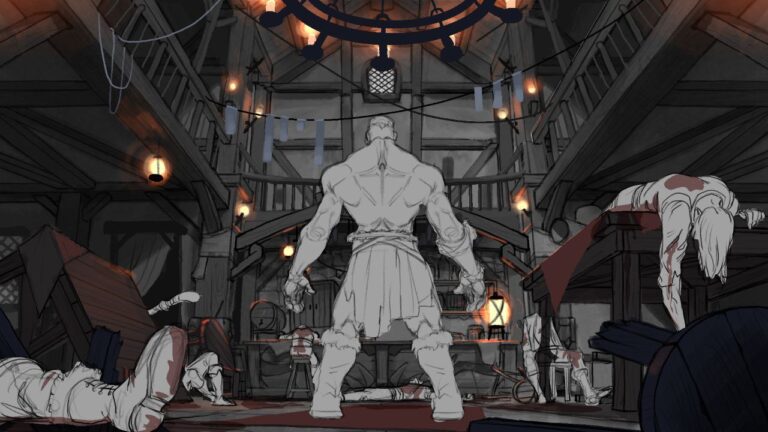
7- Clean-up
Consider clean-up artists as the detail detectives of animation. They take the rough sketches from animators and turn them into crisp, clear lines ready for the final cartoon.
Steps:
- Receive rough animation drawings
- Trace over rough lines with clean, precise lines
- Ensure character details are consistent
- Add fine details like facial expressions
- Check for any errors or inconsistencies
For example, in Beauty and the Beast, the clean-up artists ensured that Belle’s eyes, hair, and dress details remained the same in every frame, even when she moved or showed emotion.
8- Inking and Painting
This is where your cartoon gets its pop of color! In the old days, this meant tracing drawings onto clear sheets (cels) and painting the back. It’s all done digitally, but the idea’s the same.
Steps:
- Import clean-up drawings into digital software
- Trace final line work (inking)
- Create color palettes for characters and objects
- Fill in colors digitally
- Add shading and special color effects
Example: Digital painters would color Homer’s famous yellow skin, blue jeans, and white shirt for “The Simpsons,” ensuring that the colors match exactly in every scene—whether he’s at work, Moe’s Tavern, or wreaking havoc at home.
9- VFX (Visual Effects)
Visual effects artists are the animators’ magicians. These people add all the great things that would be impossible—or very dangerous—to capture in real life for movies. You name it: explosions, dazzling glitter, tornados! VFX in animation usually consists of particle effects (like snow or fire), simulations (like water or fabric), and other components requiring specific care.
Steps for VFX:
- Analyze the scene requirements
- Design the effect concept
- Create the base effect (like a fire simulation)
- Refine and adjust the effect properties
- Render the effect for integration
7 Steps In The Post-production Phase
Everything comes together during post-production in an animation studio. First, all the bits are combined to fit the characters in their environment. Then, cool special effects, like sparks and blasts, are added. After changing the colors to make everything stand out, fun sound effects are added to make the action real.
1- Editing in Animation Pipeline
The editor’s task is to gather and arrange all the sequences so that the narrative is told precisely as intended. They choose which sequences go where and how long each should be and ensure the entire thing goes at the appropriate speed. Everything revolves around ensuring the narrative makes sense and hooks viewers from beginning to end.
Steps:
- Review all animated scenes
- Arrange scenes in story order
- Adjust timing and pacing
- Cut or extend scenes as needed
- Add transitions between scenes
2- Color Correction
The animation gets its glow-up right here! It’s like adding an Instagram effect to your whole animation, but it’s much more complicated. Artists adjust the colors throughout the animations to guarantee everything appears correct. In color correction, they correct scenes that need more pop or that seem too blue. In addition to creating the appropriate atmosphere and ensuring that the colors remain constant from scene to scene, they also ensure that everything looks stunning.
Steps:
- Review overall color consistency
- Adjust brightness, contrast, and saturation
- Fine-tune individual colors
- Ensure color continuity between scenes
- Apply overall color grade for mood and style
3- Sound Design
When an animated environment comes to life, it’s because of the work of sound designers. There is sound design in every step, every whoosh of movement, and every crash and bang. They mix taped sounds, computer-made noises, and sometimes even weird things (like squashing a watermelon to make monster sounds) to create a full soundscape that makes you feel like you’re in the cartoon world.
Steps:
- Analyze animation for needed sounds
- Create or source sound effects
- Record foley sounds (everyday sound effects)
- Layer and mix different sounds
- Sync sounds with animation
4- Music Step in Animation Pipeline
Music composers are like emotional puppeteers; they can move you to tears or rush you with only the right melody or rhythm. They make the music that sets the tone for every scene, whether it’s a romantic moment or an exciting rush. Unaware of it, the correct music might cause you to laugh, weep, or sit on the brink of your seat.
Steps:
- Watch the animated sequences
- Compose themes for characters or settings
- Create music for specific scenes
- Record with musicians or use digital instruments
- Mix music with sound effects and dialogue
5- Voice Syncing
Voice-syncing artists ensure that the characters’ mouth movements match the speech correctly. They adjust the animation so that every “oh” and “ah” appears perfect. They must pay close attention to every detail; if they do it wrong, the figures will look like they came from a bad kung-fu movie.
Steps:
- Analyze recorded dialogue
- Adjust character mouth movements frame by frame
- Sync facial expressions with dialogue emotion
- Fine-tune timing of gestures and body language
- Review and revise for natural-looking speech
6- Compositing
Composing is comparable to having the greatest digital sandwich maker available worldwide. These animators smoosh all the many layers of the animation—the character animation, backgrounds, VFX, and any other element—together into one seamless, stunning picture. They add last touches like motion blur or glow effects, change colors and lighting so all the elements match, and guarantee everything perfectly fits.
Steps for Compositing:
Gather all rendered layers and elements
Arrange layers in the correct order
Adjust color and lighting to match all elements
Add final effects (like depth of field or motion blur)
Render the final composited image
7- Final Render
Models, texturing, lighting, effects—all the components—are poured into the computer oven for the final render. It’s like taking a picture of everything the artists have made, but it can take hours or even days for more complicated scenes. Your hard work pays off with the beautiful pictures you see on the screen. It’s very important for 3D animation because this is where all the complicated formulas for light, shadow, and material come together.
Steps:
- Set up render settings (quality, resolution, etc.)
- Start rendering process for all scenes
- Monitor for any errors or glitches
- Render any necessary separate passes (like reflection or shadow passes)
- Compile rendered images into video sequences
8- Quality Control
Quality control employees are like eagle-eyed detectives who look for any little anomaly. They notice things like when a character’s hat goes missing for a frame or the lighting changes quickly. Before the animation reaches your screen, they make sure it appears flawless by watching it several times.
Steps:
- Review the entire animation multiple times
- Check for visual errors or inconsistencies
- Verify audio sync and quality
- Ensure color and lighting consistency across scenes
- Compile a list of needed fixes for the team
Conclusion
The animation pipeline is a thrilling experience that transforms a concept into jaw-dropping animations that audiences can’t get enough of. Pre-production—where the creative juices flow—production—where the magic happens—and post-production—where everything gets its last polish—are the three acts of a drama.
Many different people work together to make this happen. There are planning sessions where crazy ideas are born, artists who use digital wands to bring characters to life, and sound wizards who ensure that every “boop” and “whoosh” sounds great.