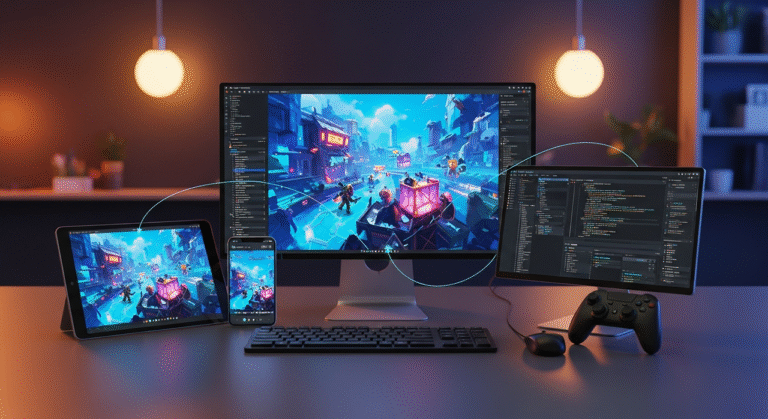
The best tools and optimization techniques for an awesome game art design are both easy to use and have numerous powerful features. This way, you can be creative without having to fight the software.
You can cut months off of your development time with the right tools, like Blender’s amazing free modeling environment or Substance Painter’s mind-blowing painting processes. Don’t forget about the hidden stars, like xNormal and compression tools, that make your game playable on real hardware.
But at the end of the day, the best tool is not the most expensive one or the one used by the best game art studios, but the one that feels like an extension of your smart mind.
What Is Polygon Count Management in 3D Models?
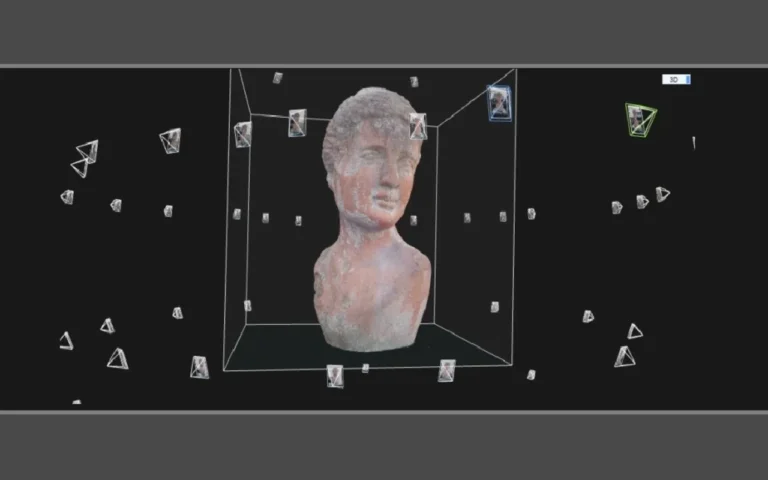
Polygon count is just how many squares your 3D image has. More polygons mean more detail, which makes models look better, but they also make them run slower. A skilled 3D modeler has to find the right balance during the 3D modeling process to keep visuals sharp without hurting performance.

In real numbers:
- Low-poly models: 500-1,000 polygons (perfect for background stuff)
- Mid-poly models: 1,000-5,000 polygons (good for most objects)
- High-poly models: 5,000- 10,000+ polygons (use sparingly for hero characters)
Read More: High vs Low Poly Modeling: Complete Guide To 14 Differences
5 Optimization Techniques To Make the Model Run Better
Let’s cut to the chase! Here are the five best tricks to make your game run smoother:
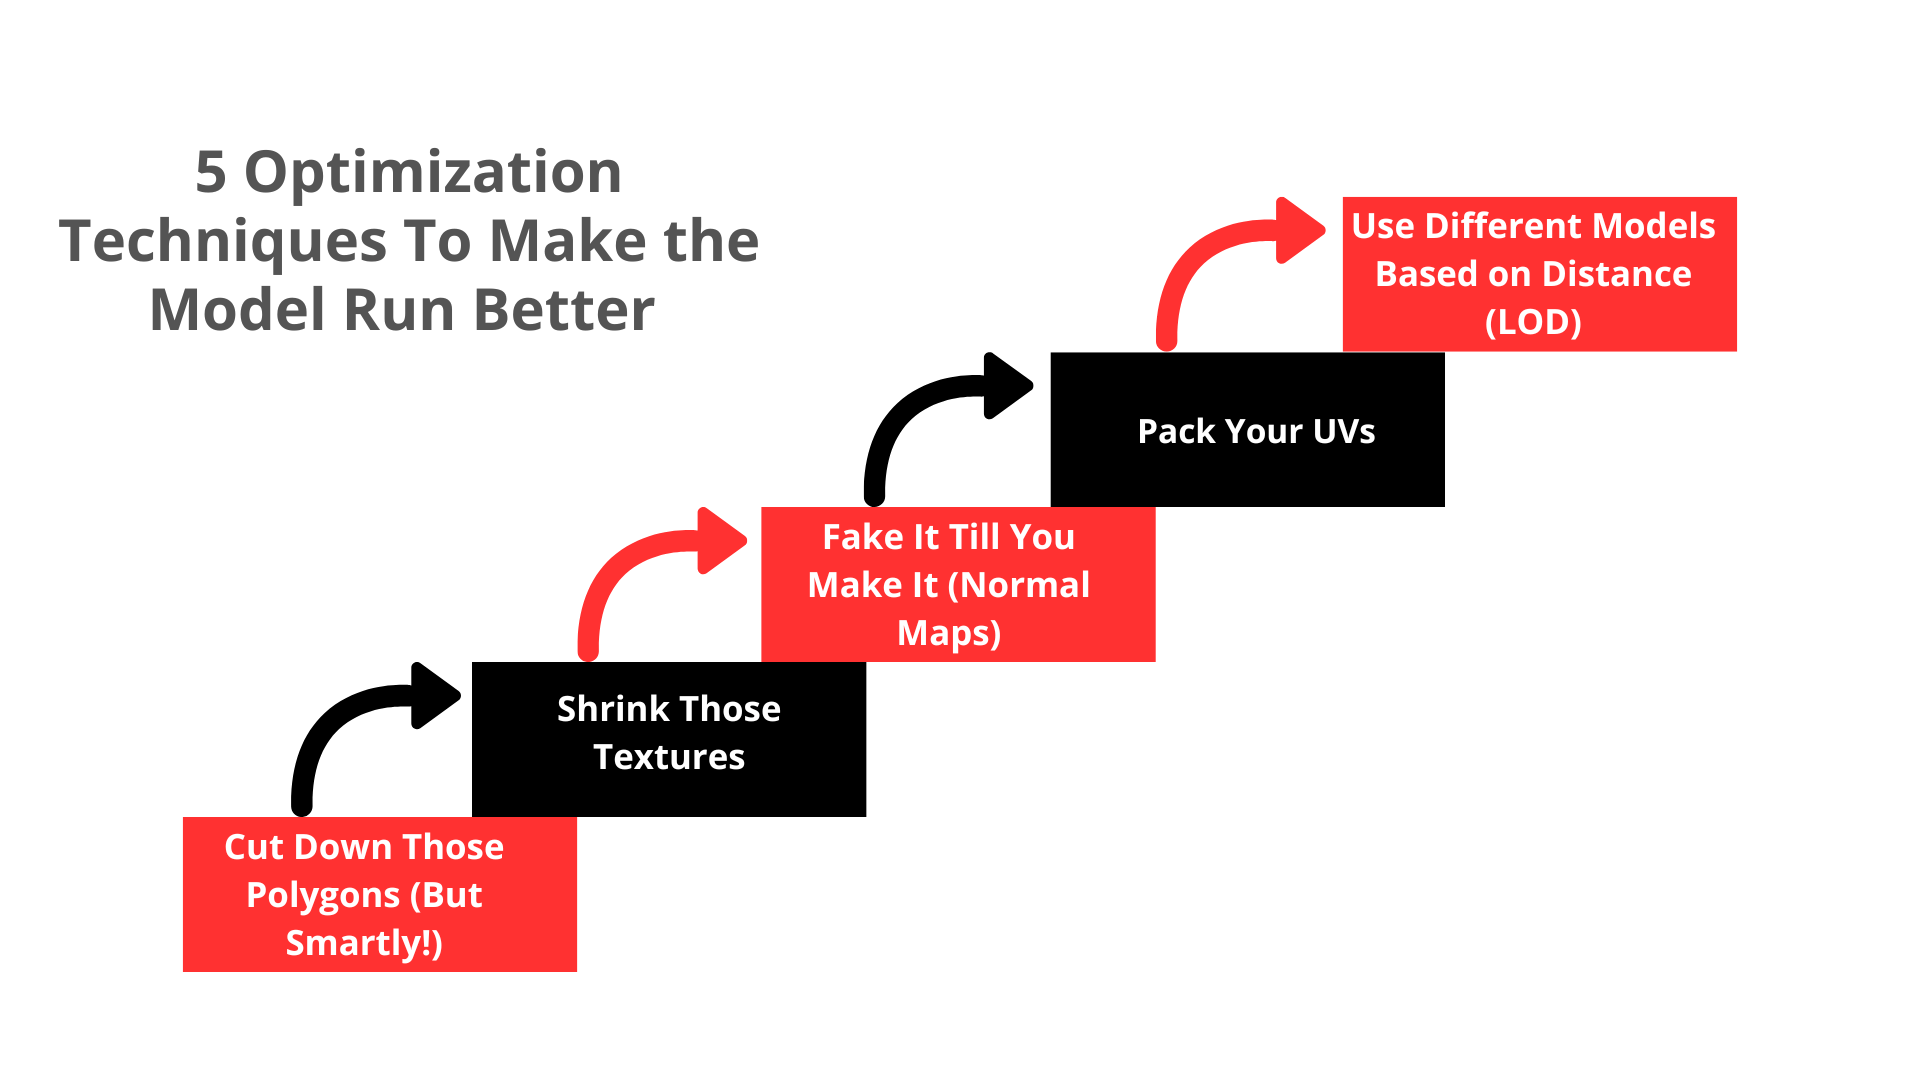
1. Cut Down Polygons (But Smartly!)
Look, not every object needs to be super detailed. That rock in the background? Probably doesn’t need 10,000 polygons!
Here’s what works:
Decimation (the quick & dirty approach):
- Take your detailed model
- Use a tool like Blender’s Decimate Modifier
- Reduce it by 50-70% for background objects
Manual Retopology (for important stuff):
It takes longer, but the effects are better for close-ups or key figures. Basically, you build a smaller model from scratch. Think of it this way: would you rather have one super detailed character that makes your game run like molasses, or a decently detailed character in a world that actually responds when you press buttons?
2. Shrink Those Textures
Big textures, including 3D textures, eat memory for breakfast!
| Object Type | Recommended Size | Example |
| Background stuff | 256×256 | Distant buildings, rocks |
| Regular objects | 512×512 or 1024×1024 | Weapons, furniture |
| Main characters | Up to 2048×2048 | Your hero (but be careful!) |
Do This:
- Combine textures: Instead of 5 small textures, make one bigger one (called a texture atlas).
- Compress everything: A 4K texture might look marginally better than a compressed 2K texture, but most players won’t notice the difference since they WILL notice if your game runs at 15 FPS, though!
3. Fake It Till You Make It (Normal Maps)
Normal maps let you “paint” in the details instead of modeling every bump or groove by hand. This technique makes your model look impressively lifelike to achieve a realistic art style in games, all without slowing things down.
Here’s how:
- Make your super detailed model (20,000+ polygons, go nuts!)
- Make a simple version (like 2,000 polygons)
- “Bake” the details from the detailed version onto a normal map
- Apply that normal map to your simple model
Boom! You now have something that looks like it has 20,000 polygons but actually only has 2,000. Your game engine will thank you!
4. Pack Your UVs Like You’re Trying to Fit Too Much in a Suitcase
UV mapping is just how textures get wrapped around your model. Most beginners waste TONS of texture space with sloppy UV mapping.
Simple tips:
- Pack everything tightly: Don’t leave empty spaces in your UV map
- Give more space to important parts: A character’s face needs more detail than their elbow!
- Reuse where possible: Left arm probably looks like right arm, right? Use the same texture space!
5. Use Different Models Based on Distance (LOD)
When something’s far away, you don’t need all the details!
LOD (Level of Detail) is simple:
- Close up (LOD0): Use your detailed model (like 7,000 polygons)
- Medium distance (LOD1): Switch to a simpler version (maybe 3,000 polygons)
- Far away (LOD2): Use a super simple version (like 500 polygons)
Most game engines do this automatically once you set it up.
Quick Optimization Techniques for Different Types of Games
For Mobile Games:
- Keep EVERYTHING super light! Phones have way less power than PCs:
- Go for under 2,000 polygons per character
- Texture size: 512×512 max for most things
- Combine small objects into single meshes to reduce draw calls
For Open World Games:
- Use aggressive LOD (things get simplified quickly with distance)
- Don’t render what players can’t see (it’s called “occlusion culling” and it’s a lifesaver!)
- For super distant mountains and stuff, sometimes a flat image (impostor) works better than a 3D model made by the best 3D modeling software
For VR Games:
VR is extra demanding because it has to render everything TWICE (once for each eye):
- Keep polygon counts 30-40% lower than you would for regular games
- Focus on steady frame rates (90+ FPS), or players might get sick
- Simplify your shaders (the programs that calculate how things look)
Best 3 Texture Optimization Techniques for Game Art
Textures use up most of your game’s resources. Seriously! They use up more memory on your graphics card than anything else. Your GPU’s VRAM has to hold all of your game’s textures. If you run out, your game will slow, crash, and players will be so mad that they’ll throw their controllers across the room.
A standard 1024×1024 image takes up about 3MB of VRAM, and the VRAM on the average graphics card is only 4–8 GB. This means that the textures add up quickly. Also, what if your game has a lot of detailed rooms? If you don’t improve, you’ll be in trouble.
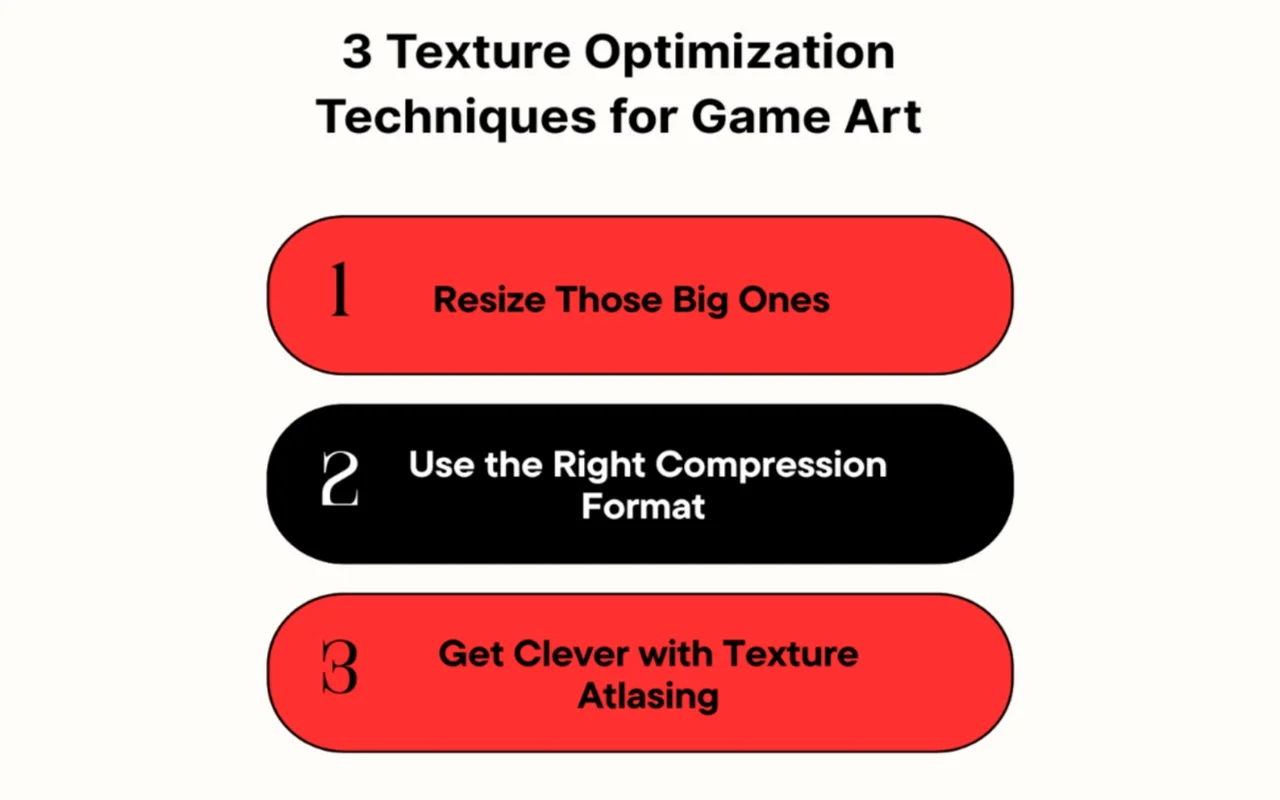
1. Resize Those Big Ones
A 2048×2048 texture uses 12MB of VRAM, but cut it in half to 1024×1024 and you’re down to just 3 MB. Plus, cut it in half again to 512×512, and you’re looking at only 768 KB.
The million-dollar question is, how small can you go? Well, think about it this way: how many actual screen pixels will that texture take up?
That milk carton on a table that players will never get closer than 5 feet to? It’s probably only going to be about 300-500 pixels tall on their screen. So why are you using a 2048×2048 texture for it? That’s just wasteful!
2. Use the Right Compression Format
Forget JPG and PNG for your game textures. Seriously. Your graphics card has to convert everything to DDS format anyway, so you’re just making extra work happen at runtime.
A typical PBR material might have 6 texture maps per object. If you’re using uncompressed 2048×2048 textures, that’s 72MB of VRAM for just one object! Switch to properly compressed DDS formats, and you could get that down to around 16 MB.
| Texture Type | Best DDS Format | Why It Works |
| Color textures (diffuse) | BC1 (DXT1) | Uses 1/6 the memory of uncompressed! |
| Grayscale maps (roughness, metallic) | BC4 | Perfect for single-channel data |
| Normal maps | BC5 | Great for normal map data |
| Textures with transparency | BC3 (DXT5) | Supports alpha channel properly |
3. Get Clever with Texture Atlasing
Throw all of your similar items onto one bigger background instead of giving them their own separate ones. It’s called “texture atlasing,” and it’s very useful.
For example, you could have one 1024×1024 map with all of the textures instead of 10 different 512×512 images for 10 different props, which would take up 5MB more space. That means your GPU will have to handle 40% fewer image swaps, which saves 40% of its memory.
Think of a level in a game that has a lot of office supplies like phones, computers, staplers, and pens. There would be too much VRAM use if each had its own image set. But an atlas that brings together all of these small things can cut memory use in half and boost speed by cutting down on the number of times your GPU has to switch between images.
Bonus Tip: Mipmaps Matter!
Take mipmaps into account! These smaller versions of your textures have already been generated, and your GPU uses them instantly for things that are far away. They not only speed things up, but they also make patterns look less “shimmery” from far away. Remember to turn these on, though, since most engines make them automatically. They are well worth it.
4 Techniques for Better UV Mapping & Normal Maps
The thing is, these two techniques are absolute game-changers when it comes to making your 3D models look detailed and gorgeous using the best 3D modeling techniques without tanking performance.
Good UV mapping lets you efficiently use texture space, which means better-looking games that run smoother. And Normal maps let you fake tons of surface detail without adding extra polygons.
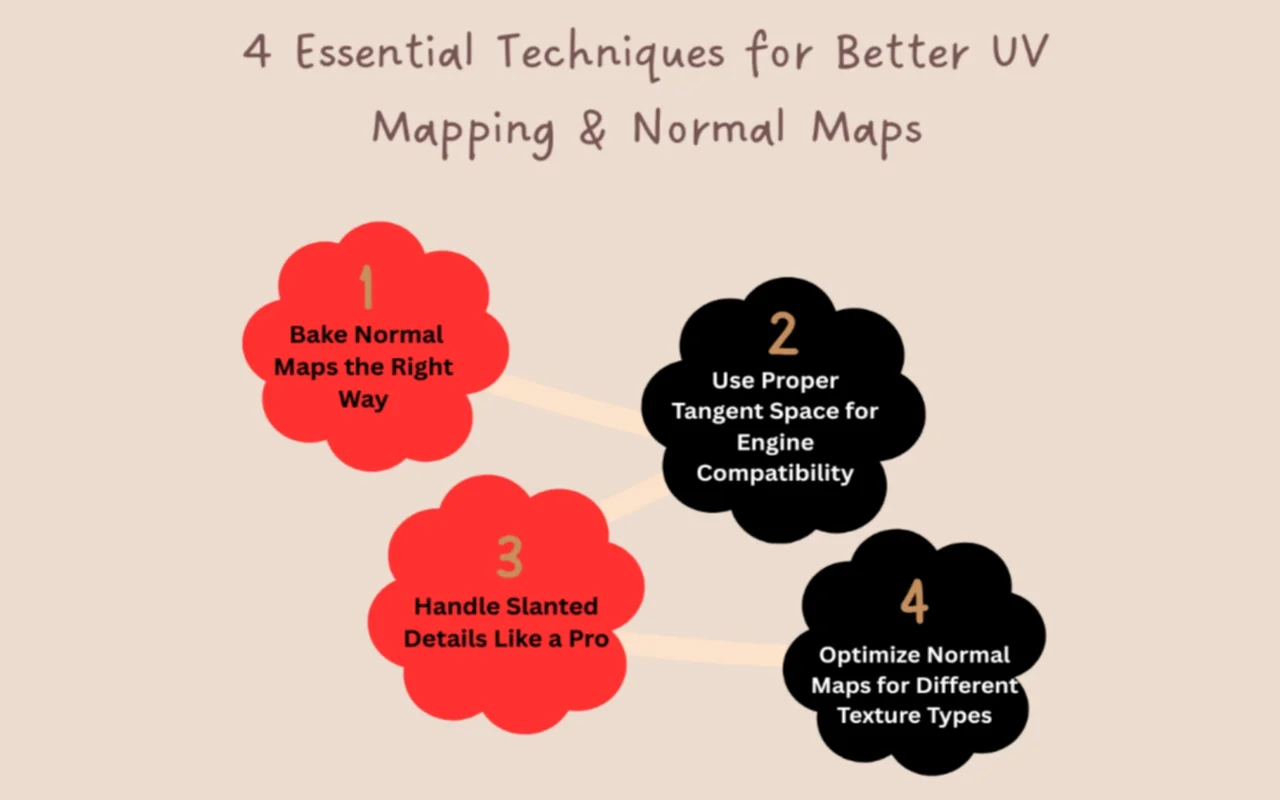
1. Bake Normal Maps the Right Way (Avoid Those Dreaded Artifacts!)
Normal maps can look absolutely incredible. They can be a complete disaster with weird shadows and messed-up lighting. The difference often comes down to how you bake them.
Keys to perfect normal maps:
- Make sure your low-poly model has the right smoothing before baking (hard edges where needed)
- Set an appropriate ray distance (too large = bleeding, too small = missing details)
- Always use antialiasing when baking (4x minimum, 8x for production)
- Use edge padding (at least 16 pixels) to prevent seams at UV borders
2. Use Proper Tangent Space for Engine Compatibility
Different programs calculate normal maps slightly differently. If you bake in one program and view in another, sometimes the lighting looks wrong.
What you need to know:
- Most modern engines use “MikkTSpace” for normal map calculations
- When baking, check if your baker (like xNormal) supports MikkTSpace
- When in doubt, test your normal maps in your actual game engine
- For Unreal Engine 4 (since version 4.7), use MikkTSpace and make sure “Compute Binormal in Pixel Shader” is unchecked
3. Handle Slanted Details Like a Pro
Details that aren’t flat on the surface, like metal plates or panels that are tilted, can look off or not show up at all in normal images.
Three ways to fix this:
- Adjust the cage: Push your cage out in the direction of the slanted detail
- Adjust the low-poly: Add extra edges to your low-poly to support the slanted shapes
- Use skewed meshes: For really tricky cases, actually skew your low-poly to match the high-poly angles
Read More: How to Create Stunning Low-Poly Game Art?
4. Optimize Normal Maps for Different Texture Types
Not all parts of your model need the same normal map treatment. You can optimize your workflow based on what kind of surface you’re creating.
Smart strategies:
- For organic surfaces (characters, creatures): smoother gradients in normal maps work well
- For hard-surface models (weapons, vehicles): sharper normal map details with defined edges
- For distant objects, simplify normal details since they won’t be visible anyway
- For tiling textures, make sure your normal details wrap seamlessly across UV borders
Numbers that matter: A 2048×2048 normal map takes up about 5.3MB of VRAM when compressed with BC5 format. If you drop down to 1024×1024 for background objects in game background design, that’s around 1.3MB; a 75% savings that most players will never notice on objects that are far away.
5 Lighting and Shader Optimization Techniques
Dynamic lighting and complicated effects are known to use a lot of resources, which can make your beautiful game look like a movie. Depending on the game genres you’re working with, these visual elements might be more or less demanding. When you use too many real-time lighting formulas and fancy visual effects, even a high-end game PC will slow down.
Here’s another way to look at it. Each light in your scene needs more calculations for each pixel it touches. And complicated shaders are like giving your graphics card a math test 60 times a second for every little dot on the screen!
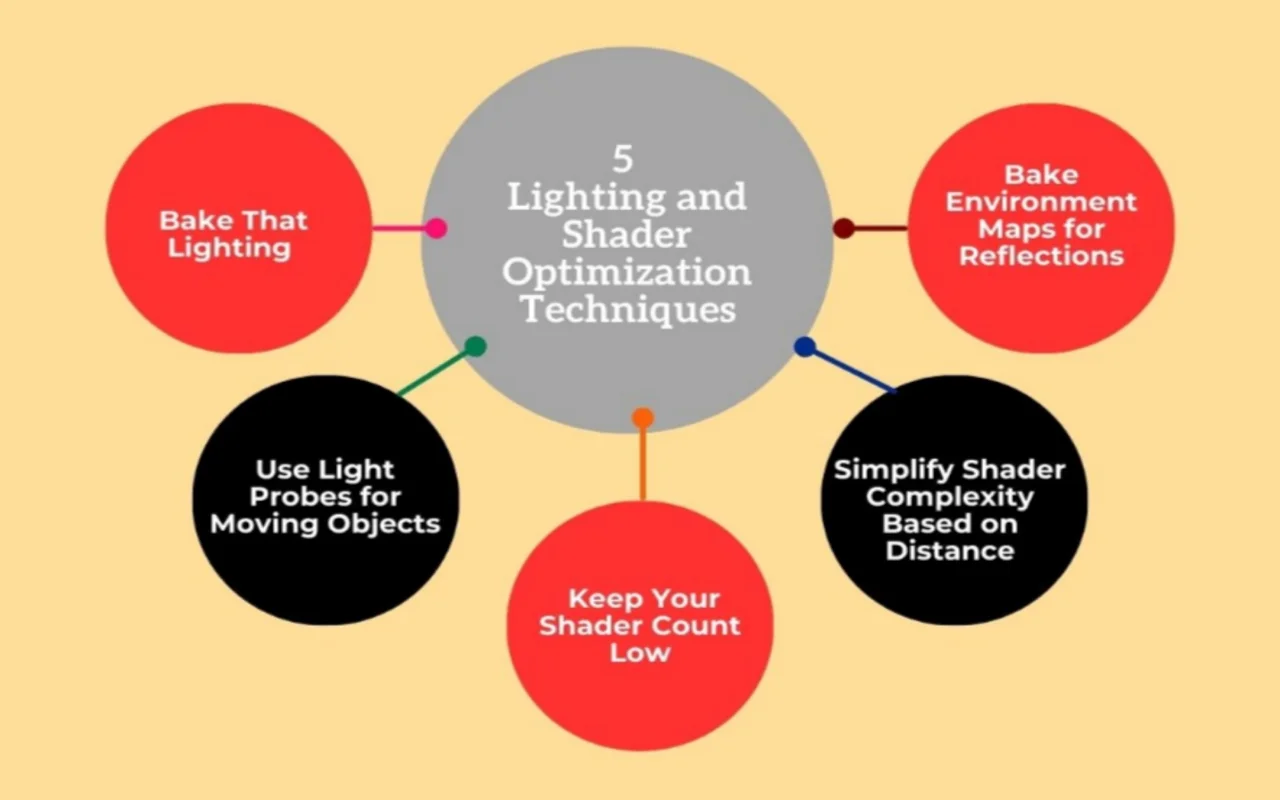
1. Bake That Lighting (For Stuff That Doesn’t Move)
Real-time lighting is great, but it costs a lot to use. It’s not necessary to set the lighting of things in real time if they don’t move, like buildings, landscapes, or static props. Bake it instead!
How it works:
- You pre-calculate all lighting for static objects
- The results get saved into “lightmaps” (special textures that store lighting information)
- Your game just displays these lightmaps instead of calculating lighting every frame
- Your frame rate skyrockets because your GPU isn’t sweating bullets anymore!
2. Use Light Probes for Moving Objects
So you’ve baked lighting for your static objects, but what about characters, vehicles, and other moving things? They still need to look like they belong in the scene!
Enter light probes:
- Place these invisible spheres throughout your environment
- They capture and store lighting information at specific points
- Moving objects sample the nearest probes to figure out how they should be lit
- This gives you the illusion of dynamic lighting at a fraction of the cost!
Mind-blowing fact: Light probes typically reduce the lighting calculation cost for dynamic objects by 80-90% compared to fully dynamic lighting. As a result, in a scene with 20 characters, this could mean the difference between smooth gameplay and watching a slideshow.
3. Keep Your Shader Count Low (Batching Is Your Friend)
One of the worst things for game speed is switching between different graphics. Every switch is known as a “draw call,” and if you have too many of them, your game will end.
How to fix it:
- Group objects that use the same shader together (called “batching”)
- Create versatile shaders that can be reused for multiple purposes
- Use texture atlases so multiple objects can share one material
- Consider shader variants instead of completely different shaders
4. Simplify Shader Complexity Based on Distance
Shader effects don’t have to be fancy for everything, especially things that are far away from the player. The secret tool you need here is distance-based color reduction.
Smart simplification:
- For close-up objects: Full PBR (Physically Based Rendering) with all the bells and whistles
- For medium distance: Simplified PBR with fewer texture samples
- For far-away objects: Super simple shaders with maybe just diffuse and normal maps
- For distant skyline objects: Literally just a color and basic lighting
Numbers that matter: A full PBR shader might use 20+ texture samples and dozens of calculations per pixel. On the other hand, a simplified distant shader might use just 2-3 texture samples.
5. Bake Environment Maps for Reflections
Real-time reflections are incredibly expensive, but you can fake them convincingly with baked environment maps!
The reflection trick:
- Create cube maps that capture what the world looks like from different positions
- Use these for reflections instead of calculating them in real-time
- For moving objects, blend between nearby cube maps
- For extra realism, add screen space reflections just for close-up surfaces
5 Optimization Techniques to Reduce Draw Calls
Whatever your game needs to draw on the screen—a tree, a character, or a cool particle effect- it has to “call” the GPU and say, “Hey, draw this!” The CPU and GPU are talking to each other through a draw call, which takes valuable working time. Your game starts to wheeze like it just finished a run when thousands of these happen every frame.

1. Use Instanced Static Meshes (Your Forest’s Best Friend!)
Let’s say you’ve planted 10,000 trees and made a beautiful forest. If every tree is its own draw call, your frame rate will be reduced. Thankfully, instancing saves the day here.
How it works:
- Instead of saying “draw this tree, now draw this tree, now draw this other tree” 10,000 times…
- Your game says, “Here’s a tree, now draw it 10,000 times in these locations” ONCE!
How to do it in Unreal:
- Create an Instanced Static Mesh Component
- Set your mesh
- For each tree, call “AddInstance” with a transform
- Sit back and watch your FPS counter skyrocket!
2. Merge Static Meshes That Don’t Need to Move
Not everything in your scene needs to be its own separate entity. Those rocks scattered around? That pile of crates in the corner? Those decorative fence posts? If they’re never going to move or be interacted with individually, they’re perfect candidates for merging!
The magic of merging:
- Combine 20 different rocks into ONE mesh = 19 fewer draw calls
- Merge all your background buildings in the distance = dozens fewer draw calls
- Combine that decorative clutter into logical groups = happy GPU!
Quick tip: In Unreal, just select multiple static meshes, right-click, and select “Merge Actors.” It’s almost too easy!
3. Materials, Materials, Materials – Batch That Stuff!
Each unique piece of material could lead to a different draw call! So those 50 slightly different types of wood you made for different props? Yes, they are killers on stage.
Material batching secrets:
- Create master materials with parameters instead of unique materials
- Use material instances that share the same shader but vary in color/texture
- For environment assets, aim for 1-3 materials PER OBJECT, maximum
4. Implement Occlusion Culling (Don’t Draw What Players Can’t See!)
Why waste time and money creating things that are hidden by other things? Claiming occlusion is like telling your game, “Hey, don’t draw what’s behind that mountain,” and your GPU will appreciate it.
How occlusion culling saves your bacon:
- Objects hidden behind walls/mountains/buildings aren’t rendered at all
- Entire sections of your level can be skipped by the renderer, especially when a 3D render artist optimizes scenes to reduce processing load without sacrificing visual quality.
- Especially powerful in indoor environments with separate rooms
Implementation tips:
- In Unity: Use the built-in occlusion culling system (Window > Rendering > Occlusion Culling)
- In Unreal: Enable “Generate Mesh Distance Fields” and set up proper bounds for your actors
- For both: Place occluder objects strategically to block visibility between areas
5. Level of Detail (LOD) Systems – Distance Is Your Friend
It’s not necessary to show a 10,000-polygon tree if it’s practically invisible. That’s the idea behind LOD systems, which are necessary for any game with open areas.
How LOD works:
- Create multiple versions of each model at different detail levels
- As objects get farther away, switch to the simpler versions
- Not only reduces polygon count, but it can also merge draw calls for distant objects
For example, a figure model could have 30,000 polygons up close (LOD0), 10,000 at middle distance (LOD1), and only 2,000 at far away (LOD2). That means you have up to 93% fewer objects to show! When you set up LOD correctly, your project goes from 32 FPS to 75 FPS in a fight scene with 50 characters. Players couldn’t tell that the characters far away were much easier models because they still looked great.
5 Compression Techniques for Game Art Assets
Do you know what’s really awful? When people can’t play your beautiful game because the art files are too big for their devices, or take too long to download.
Basically, compression is your savior for getting those huge art files down to an acceptable size without making everything look like it was made on a computer from 1995. Good compression can cut the size of your game’s download by 50–80% while keeping up with the best game art trends.
1. DDS Format with the Right BC Compression (Your Textures’ Best Friend!)
Every 2048×2048 image that isn’t packed might take up about 16 MB. When you change that to DDS with BC1 compression, it drops down to just 2.7MB! That’s 83% less of a layer, but it still looks great most of the time.
What makes DDS so special?
- Your GPU actually prefers this format! (It converts everything to DDS internally anyway)
- It offers different compression types (BC1 through BC7) for different texture needs
- You can get MASSIVE file size reductions with surprisingly little quality loss
Which compression to use for what:
| Format | Ratio | Best Used For | Alpha | Quality |
| BC1/DXT1 | 6:1 | Color textures (diffuse/albedo) | Limited | Good |
| BC3/DXT5 | 4:1 | Textures needing transparency | Full | Good |
| BC4 | 4:1 | Single-channel maps (roughness, metallic, height) | N/A | High |
| BC5 | 4:1 | Normal maps | N/A | High |
| BC7 | 3:1 | Critical high-quality textures | Yes | Excellent |
2. Texture Atlasing (Combine All the Things!)
Instead of having dozens of small textures crafted by a texture artist, you combine related textures into one bigger image. Not only does this save space, but it actually improves performance too!
Why atlasing works wonders:
- Compression works more efficiently on larger textures than multiple small ones
- Fewer files mean less overhead in your game
- Your GPU doesn’t have to keep switching between different textures
How to do it right:
- Group similar elements together (all UI elements, all foliage textures, etc.)
- Leave a few pixels between elements to prevent texture bleeding
- Update your UV mapping to point to the correct parts of the atlas
3. Mipmapping with a Purpose (Don’t Waste Space on Details No One Will See!)
Mipmaps are basically smaller versions of your textures that are used when objects are far away. They’re essential for performance and visual quality, but they add about 33% to your texture size.
Smart mipmapping strategies:
- Use them for all your main game textures (they prevent ugly shimmering effects)
- Skip them for UI elements that never change size
- Consider “throwing away” the smallest mip levels on huge background textures
4. Vector Displacement Maps (Compress Actual 3D Detail!)
You can put all of those small geometric features into a displacement map instead of saving them as real shape data, an approach especially useful when working with vector art in video games.
The displacement maps:
- A high-poly model with 1 million polygons might be 20-50MB
- The same model, simplified to 50,000 polygons, might be only 1-2MB
- Add a 2-3MB displacement map to restore details = 95% file size reduction!
When to use this:
- For background elements that don’t need physical collision
- For detailed environment assets like rocks, ruins, or vegetation
- For character details like clothing wrinkles, skin pores, or armor dents
Technical note: Some engines handle this differently. For example, Unity uses Tessellation Shaders, Unreal has Displacement materials, and some custom engines implement their own solutions. But the concept is the same; store 3D detail as 2D data!
What Are The Tools and Software For Optimizing Game Art?
The right tools will not only make your work faster, but they can also make the difference between a game that works well on players’ devices and one that crashes or takes up all of their room.
| Tool Type | Popular Options | Best For |
| 3D Modeling | Blender, Maya, 3ds Max | Creating and optimizing 3D assets |
| Texture Creation | Substance Painter, Photoshop, GIMP | Creating detailed textures, normal maps |
| Game Engines | Unity, Unreal Engine, Godot | Building your actual game |
| Compression Tools | Nvidia Texture Tools, DirectX Texture Tool | Optimizing and compressing textures |
| Asset Management | Perforce, Git LFS, PlasticSCM | Tracking and managing all your game files |
Last Words
When you optimize your game, it goes from being beautiful but slow to something that people actually enjoy! Texture compression is a smart way to cut file sizes by 80% without affecting the quality of the image. Occlusion culling stops your GPU from wasting time drawing things that no one can see.
And by combining models and instancing similar items, you can cut down on the number of draw calls that slow down your program by thousands. Also, don’t forget the magic of well-built LOD systems that make it easy to reduce faraway items while keeping your frame rates smooth as glass!